
Tools#
On the tablet version, you’ll find the Tools menu on the Tablet Menu Bar. On the mobile version, it’s located inside Configuration.
User Waypoints#
In Tools > User waypoints, you’ll find the list of all your created or imported user waypoints. You can User Waypoints from here or the Moving Map. To edit them simply tap on the user waypoint you want to edit. You can delete individual user waypoints by swipping them from right to left or via the Options menu while editing one. You can also search by identifier, name or coordinates and filter them by type or tag.
Additionally, you can backup, restore and share your user waypoints or create tags for them.
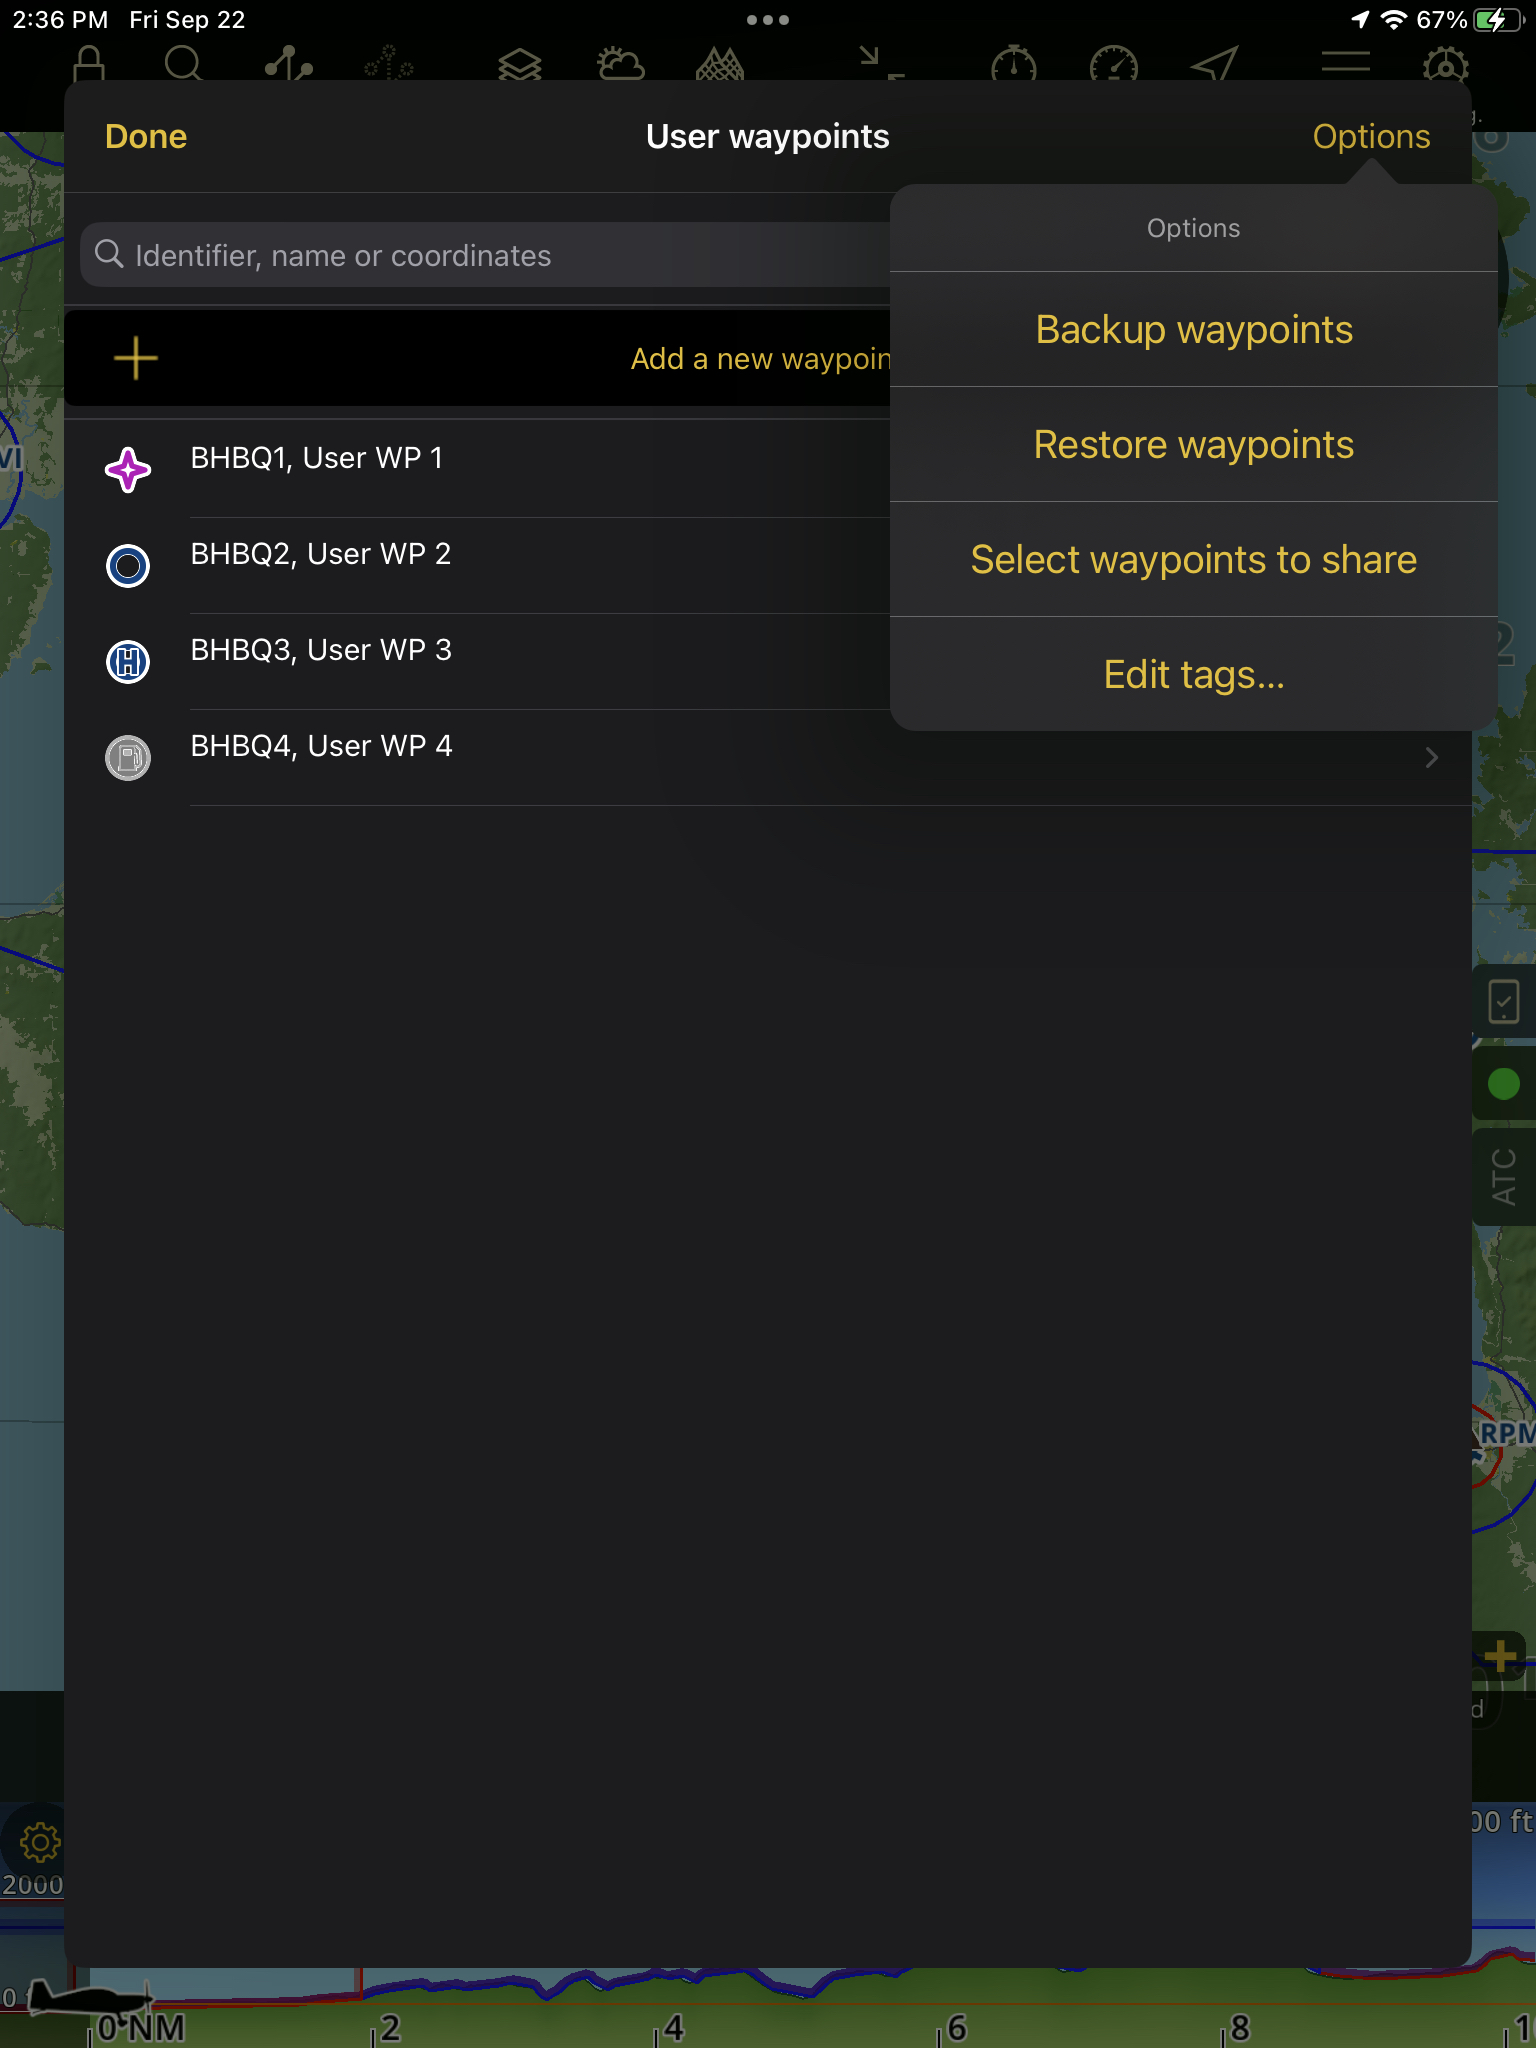
Backup waypoints#
In case you want to temporarily remove your user waypoints and use it later, you can backup all your user waypoints by following the steps below:
Navigate to Tools > User waypoints
Tap Options
Tap Backup waypoints
Note
You can copy and save the backup file with WebDAV Server.
Restore waypoints#
All your backed-up waypoints can be restored back into the app.
Prepare your backup file and make sure to copy it in WebDAV Server
In Air Navigation Pro, go to Tools > User waypoints
Tap Options
Tap Restore waypoints
Ruler#
Tap here to activate a grey transparent ruler, which will appear static on the Moving Map for you to move freely. Tap on any point on the map to make it disappear. Alternatively, by making a long press with two fingers on the map, the ruler will automatically appear between the two fingers. The ruler will show:
The distance between the waypoints
The bearing value of the waypoints
Example: The distance (12NM) and bearing of LSGG (31°) - LSGP (212°)
It is possible to change the display unit from the Configuration > Settings menu.
ScratchPad#
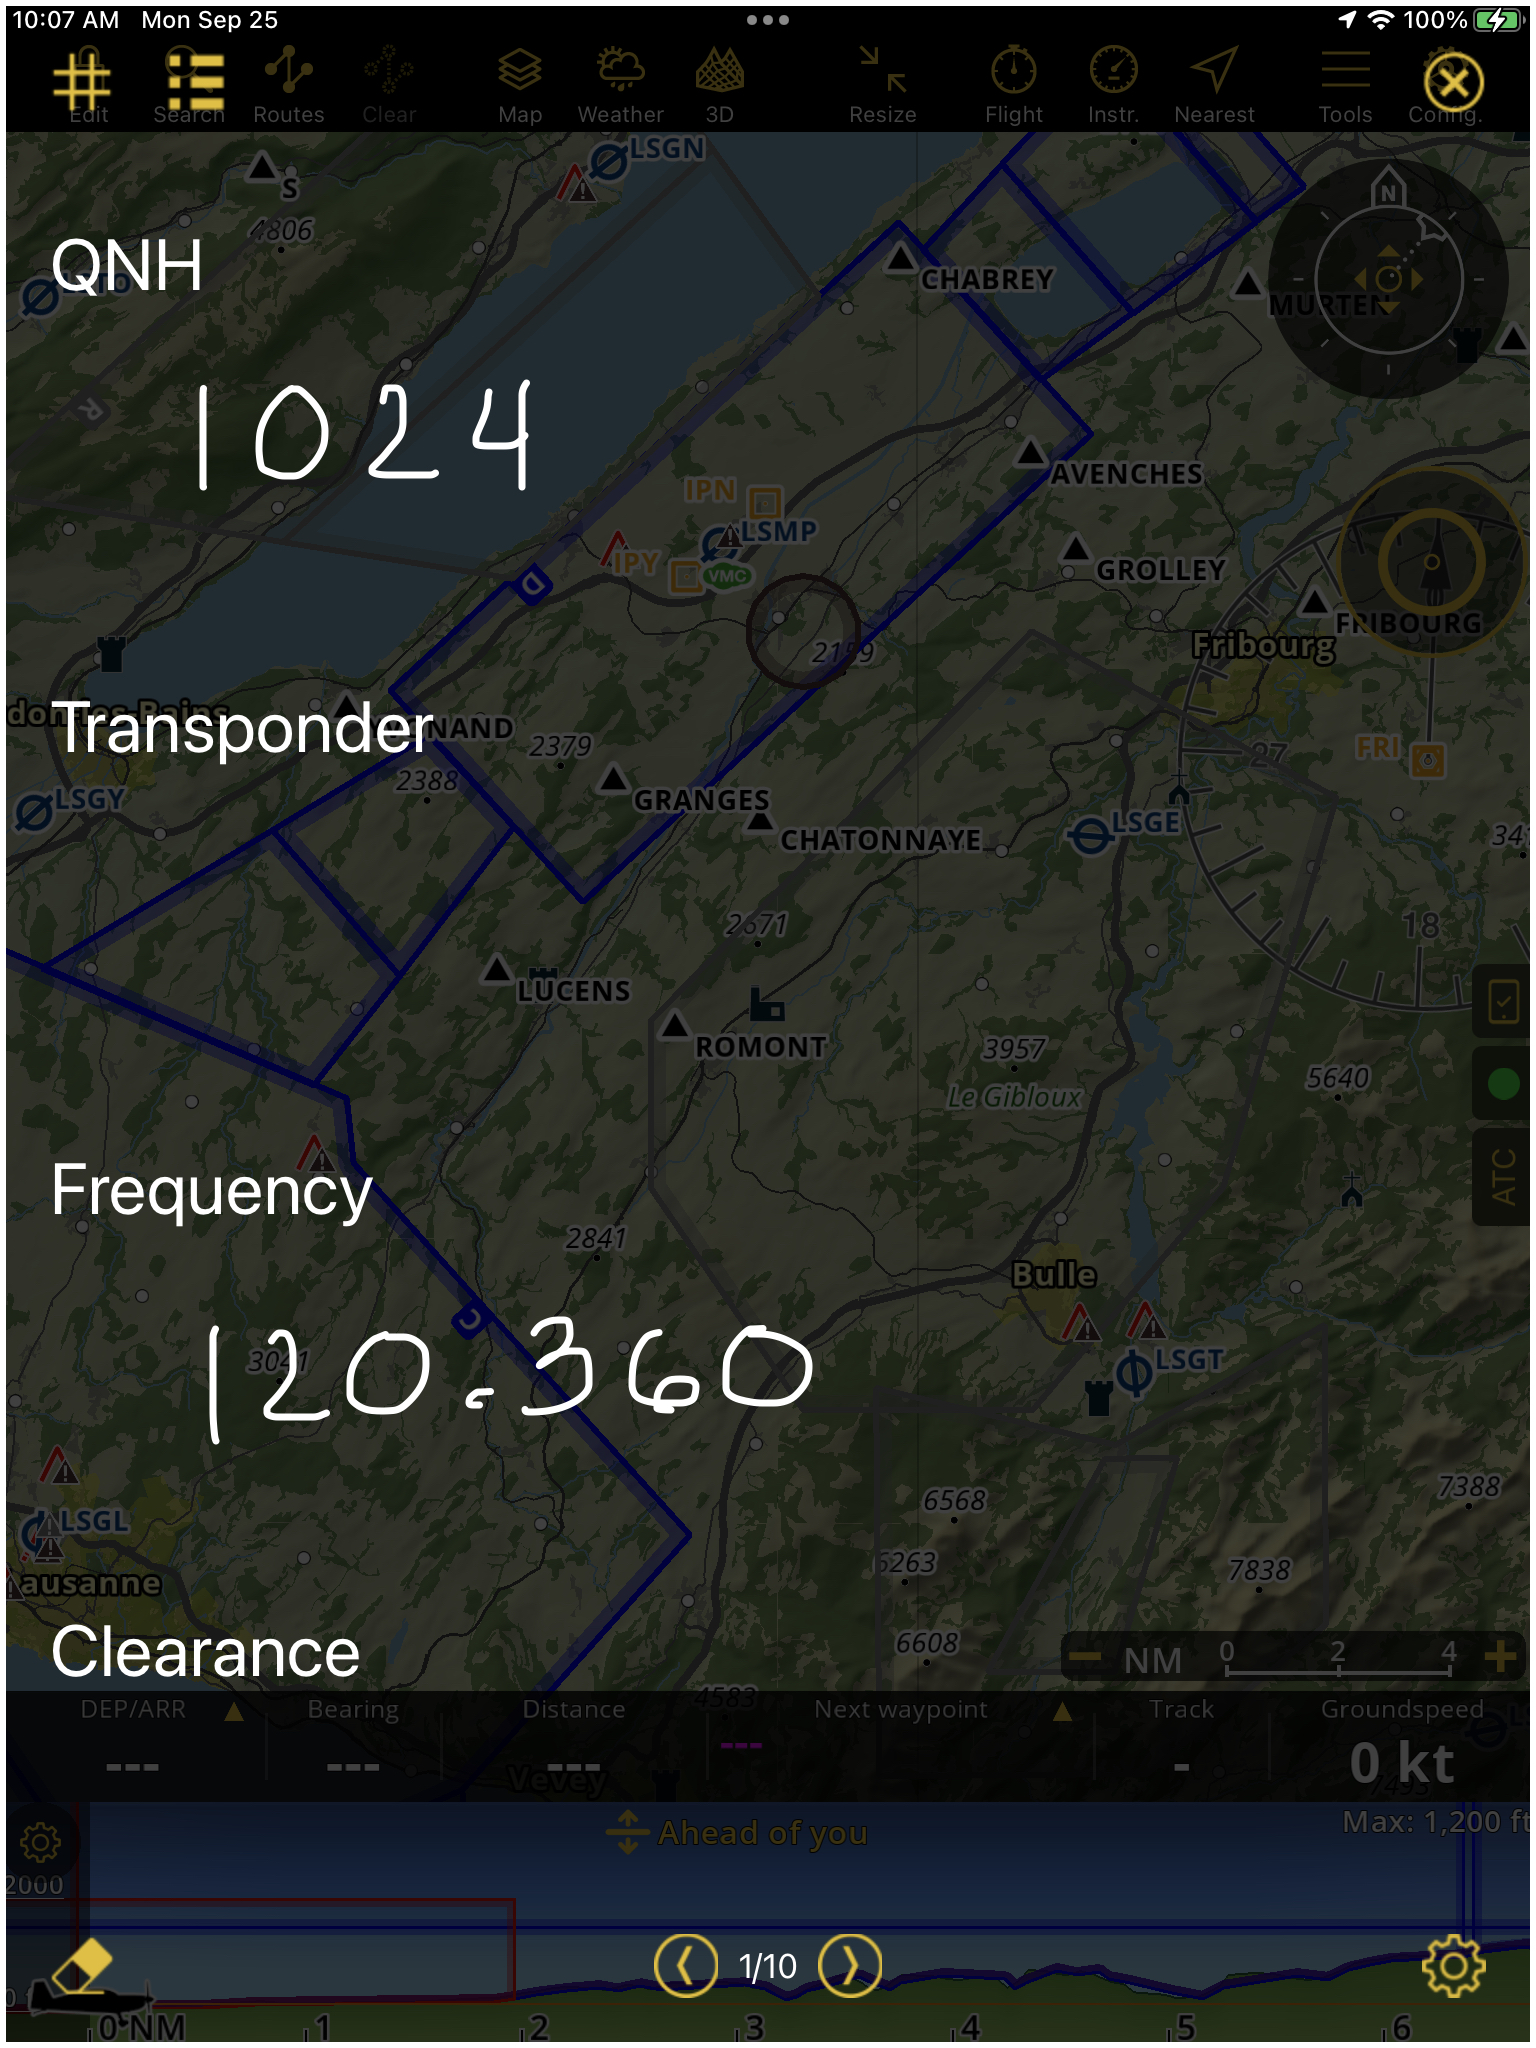
Like a notepad you can write down relevant information such as frequencies, transponder code, pressure data, etc. using your fingers.
Note
This feature is available on tablets, not on phones.
You can access the ScratchPad:
Hint
Swipe 3 fingers: On the map, swipe three fingers from right to left
Hint
Via Tools menu: On the Tablet Menu Bar > Tools > ScratchPad
Display grids#
Open the ScratchPad
Tap the hash sign at the top-left corner.
Display the ScratchPad label#
Open the ScratchPad
Tap the 3 line icon at the top-left corner (beside the hash sign).
Edit the ScratchPad label#
Open the ScratchPad.
Tap the gear icon at the bottom-right corner.
Tap Edit labels.
Modify default labels to your new labels.
Save by tapping OK.
Erase the notes in the ScratchPad#
Open the ScratchPad
Tap the eraser icon at the bottom-left corner.
Tap Erase.
Erase the notes in all pages#
Open the ScratchPad.
Tap the gear icon at the bottom-right.
Tap Erase all pages.
Close the ScratchPad#
Swipe three fingers from left to right or you can just tap the (x) button at the top right corner.
Documents#
The Documents panel allows you to search, export, and delete documents associated with waypoints. Documents may come from user uploads, installed approach charts, or Air Navigation Manager. You can access it on, Tools (phone: tap Configuration) > Documents
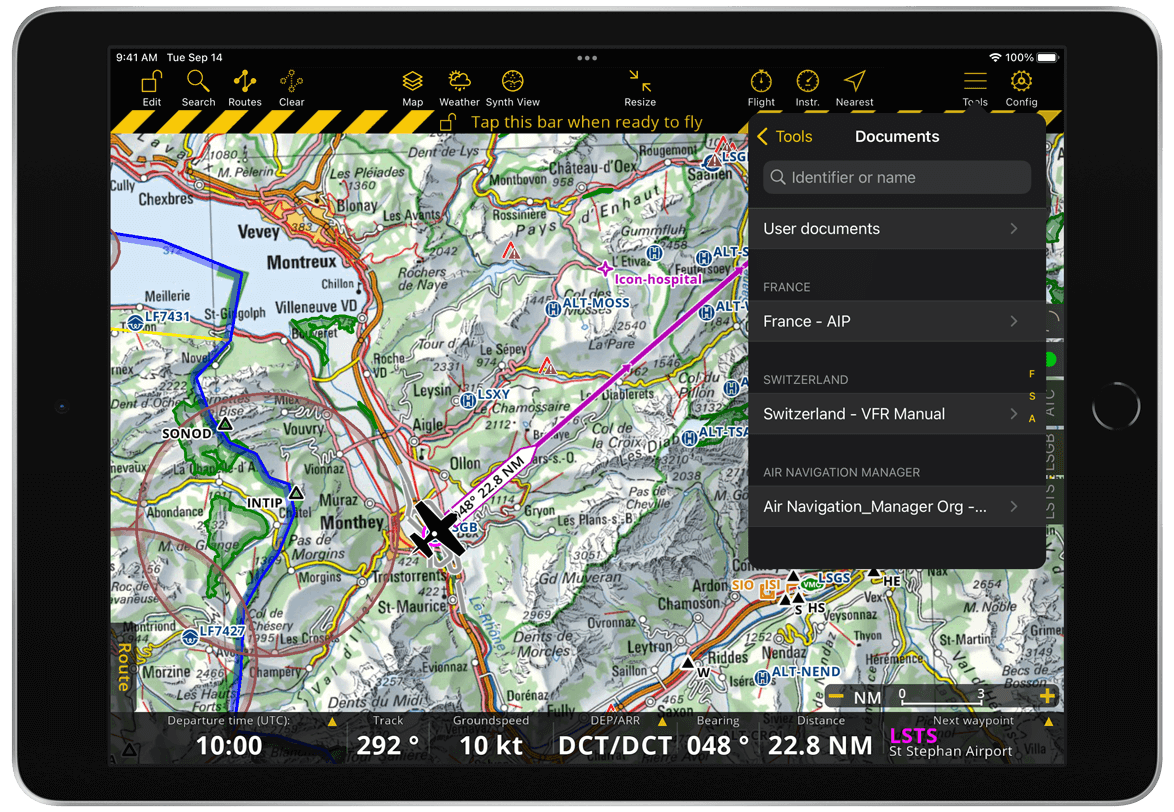
Import / Install Documents#
Documents can be added in the Documents browser by:
Installing Approach Charts
Sending PDF documents by email or device file manager and using the Share/Open With function.
Using WebDAV Server or Embedded Web Server to upload files
Synchronizing documents from your Air Navigation Manager organization
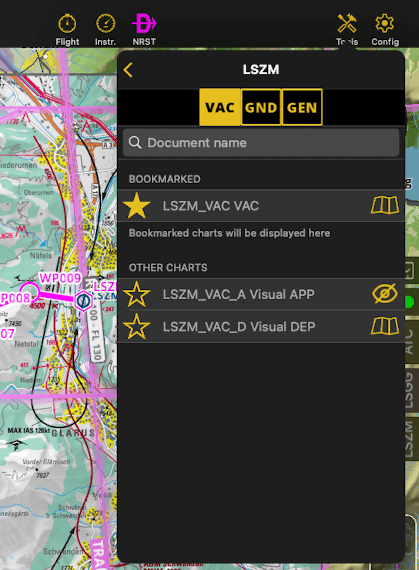
Installing Purchased Approach Charts#
Approach charts can be purchased from the Store . Once purchased, they can be installed via Manage Data and Products.
Approach charts include associated documents. After installation, PDF documents are stored per airfield and displayed in an indexed list with their identifier, name, and country.
Tap Config (phone: Configuration) > Manage data and products.
Tap the download icon for Georeferenced Visual Approach Charts, then select Install.
Tap Tools > (phone: Configuration) > Documents.
Open the approach charts folder where the documents were installed.
Search for and tap the airport waypoint.
Tap the desired document.
Note
Approach charts include additional installation options:
On demand (default): Downloads only charts relevant to your route to save device storage.
By file type: If both IFR and VFR charts are available, choose to install VFR, IFR, or both.
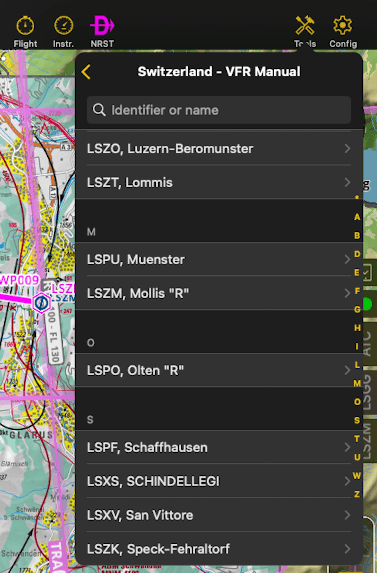
Searching Documents#
You can search for documents across available folders or within a specific folder using the search field.
Tap Tools > (phone: Configuration) > Documents.
(Optional) Open a folder (e.g. User documents, Approach Charts, Air Navigation Manager Organization).
In the search field, enter the document’s identifier or name.
Note
Documents in the Approach Charts folder can only be searched within their respective categories.
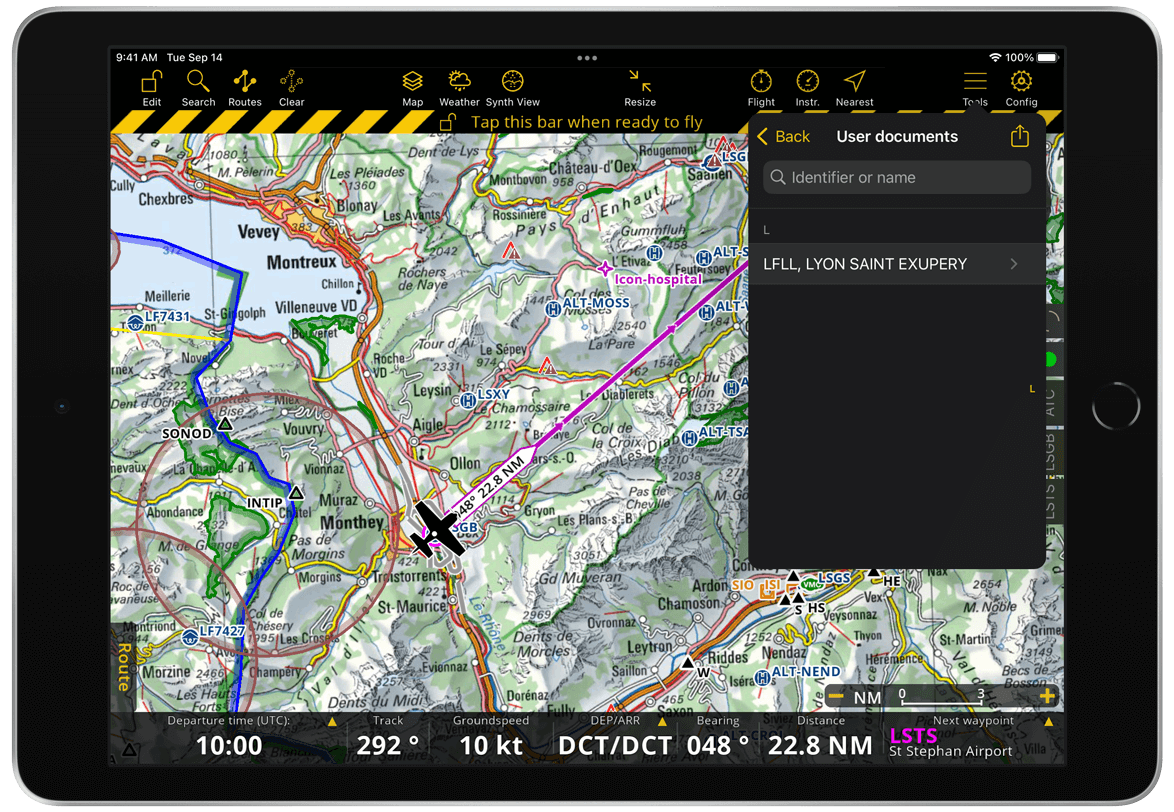
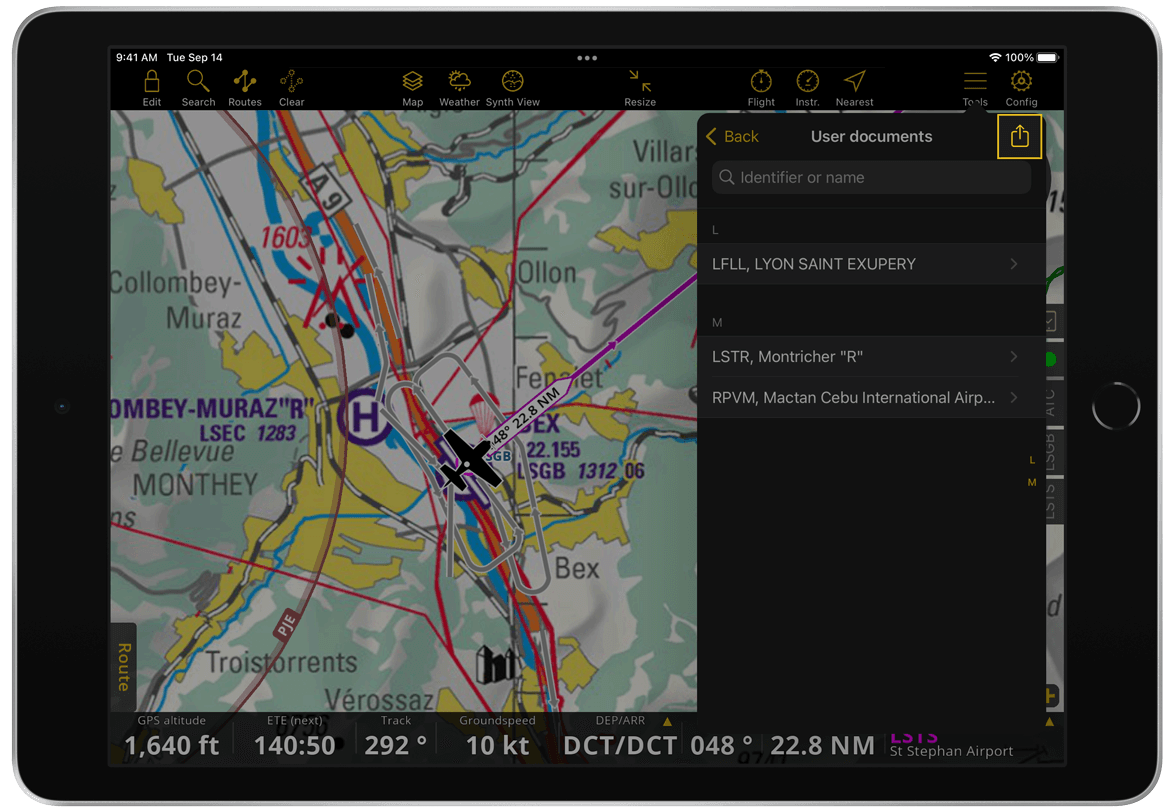
Exporting User Documents#
You can export user documents either in bulk or individually using the share function.
Tap Tools > (phone: Configuration) > Documents.
Tap User documents.
(Optional) Select a waypoint to export a specific document.
Tap Share.
After tapping Share, the Documents window closes and a share popup appears.
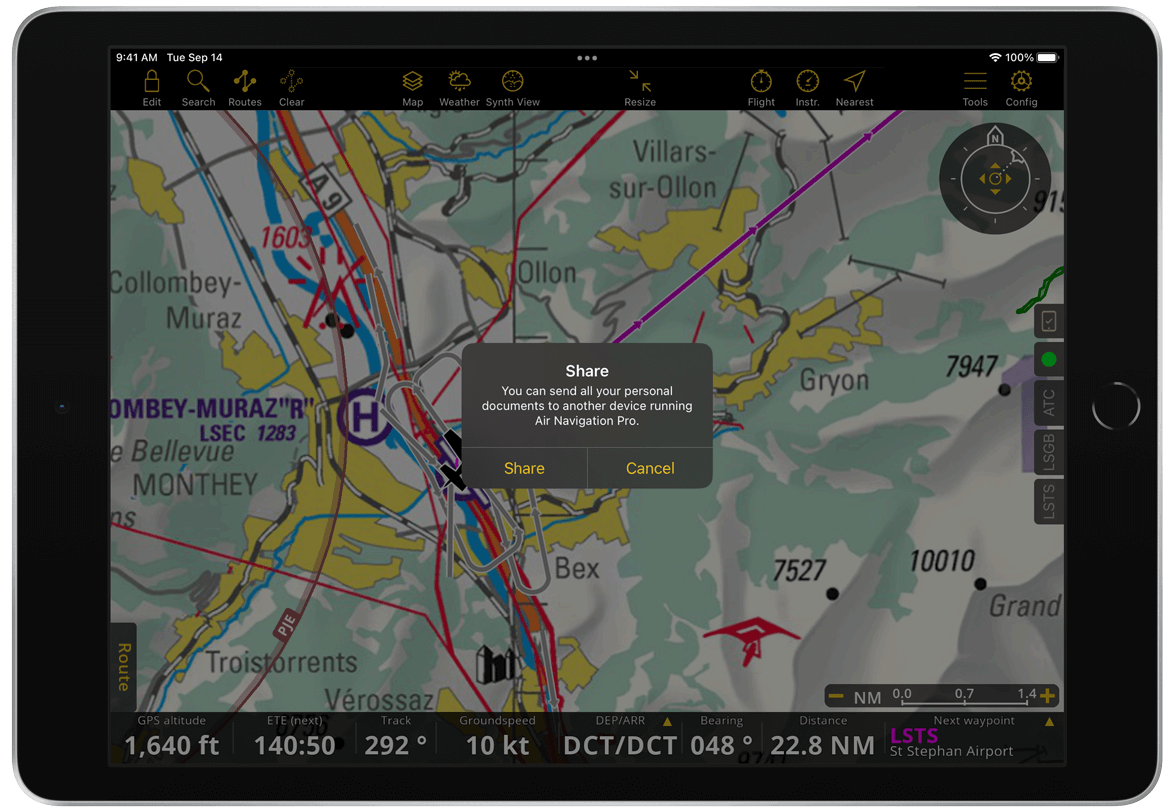
Note
The same share popup is used for both bulk and individual document export.
Deleting Documents#
Documents can be removed depending on their source.
Delete Uploaded Documents#
User-uploaded documents can be deleted directly from the Documents view.
Tap Tools > (phone: Configuration) > Documents > User documents.
Select the waypoint where the document is stored.
Swipe the document to the left.
Tap Delete.
Delete Installed Approach Chart Documents#
Installed approach chart documents must be removed via the Manage Data and Products panel, not from the Documents view.
Tap Config (phone: Configuration) > Manage Data and Products.
Select the installed Georeferenced Approach Charts.
Tap the Edit icon.
Select Not Installed.
Note
This action removes the entire Approach Charts folder, including all associated documents.
KML files & Map annotations#
All your imported KML files and created Map Annotations can be seen here.
KML files#
To display a specific KML you imported on the Moving Map, tap its file name. A checkmark will appear next to it indicating the KML is selected. Tap it again to deselect it. Unselected KML files will not be displayed. You can display one or more KML files on the map.
To delete a KML file from the app, swipe its name from right to left.
Note
KML files coming from Air Navigation Manager are listed under the Air Navigation Manager organization section and are always active. These files cannot be selected, deselected, or deleted from this list; only be viewed. Refer to the Manager Manual for more information.

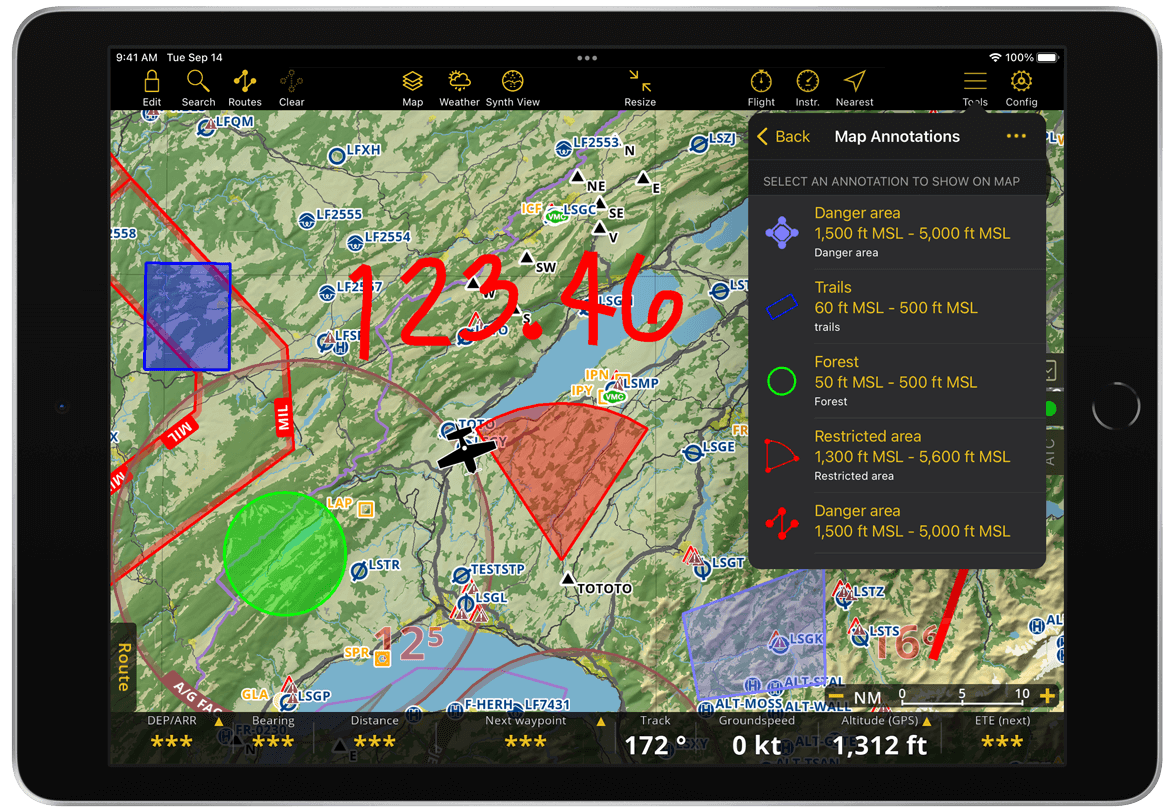
Map Annotations#
Inside the Map Annotations folder, you’ll find the list of all your annotations, including the label, altitude range and remark. Tapping an annotation from the list will center the selected annotation on the map and display its popover.
To delete annotations individually, swipe them from right to left. You can also delete all annotations by tapping the more options icon … on the top right corner and then selecting Delete all annotations.

Logbook#
The Logbook is a database where your flight times and flight details are stored. It includes all flights recorded using Air Navigation Pro.
To access the Logbook:
On tablets: tap Tools in the toolbar
On phones: go to Configuration > Logbook
Flights are displayed in reverse chronological order, with the most recent flights shown first.
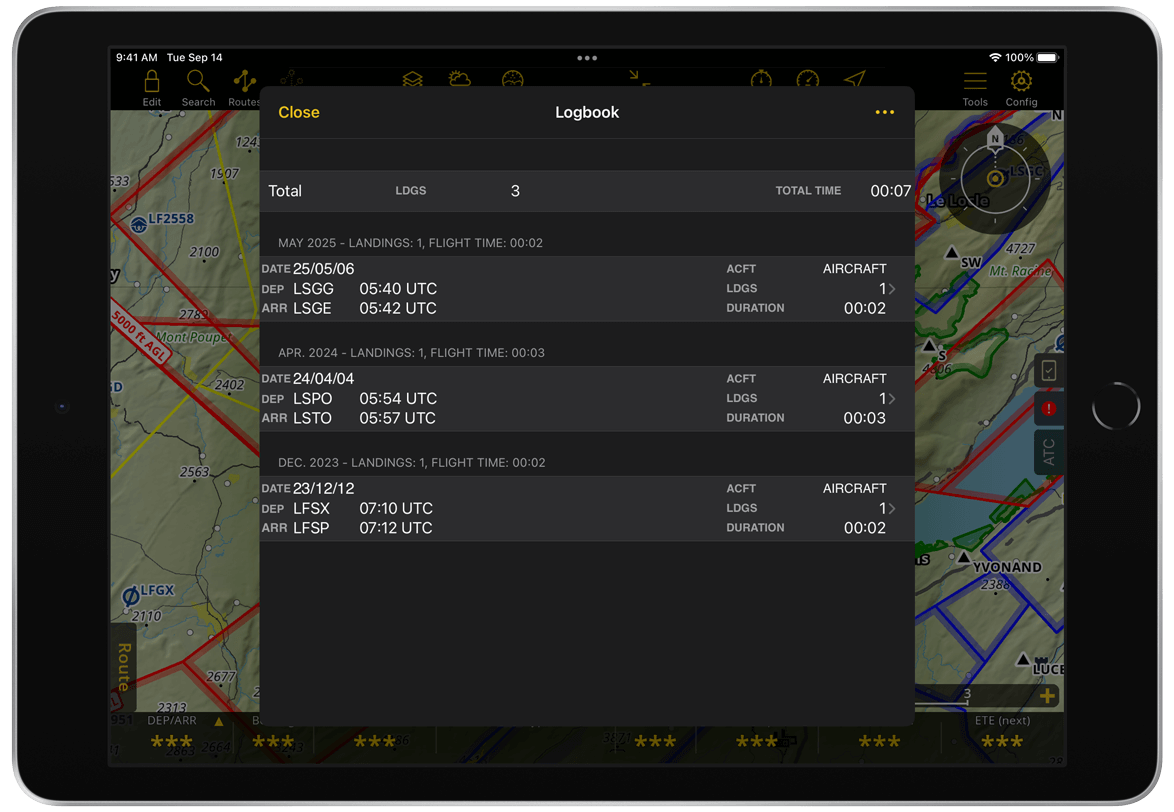
Example: Flights displayed from most recent to oldest.
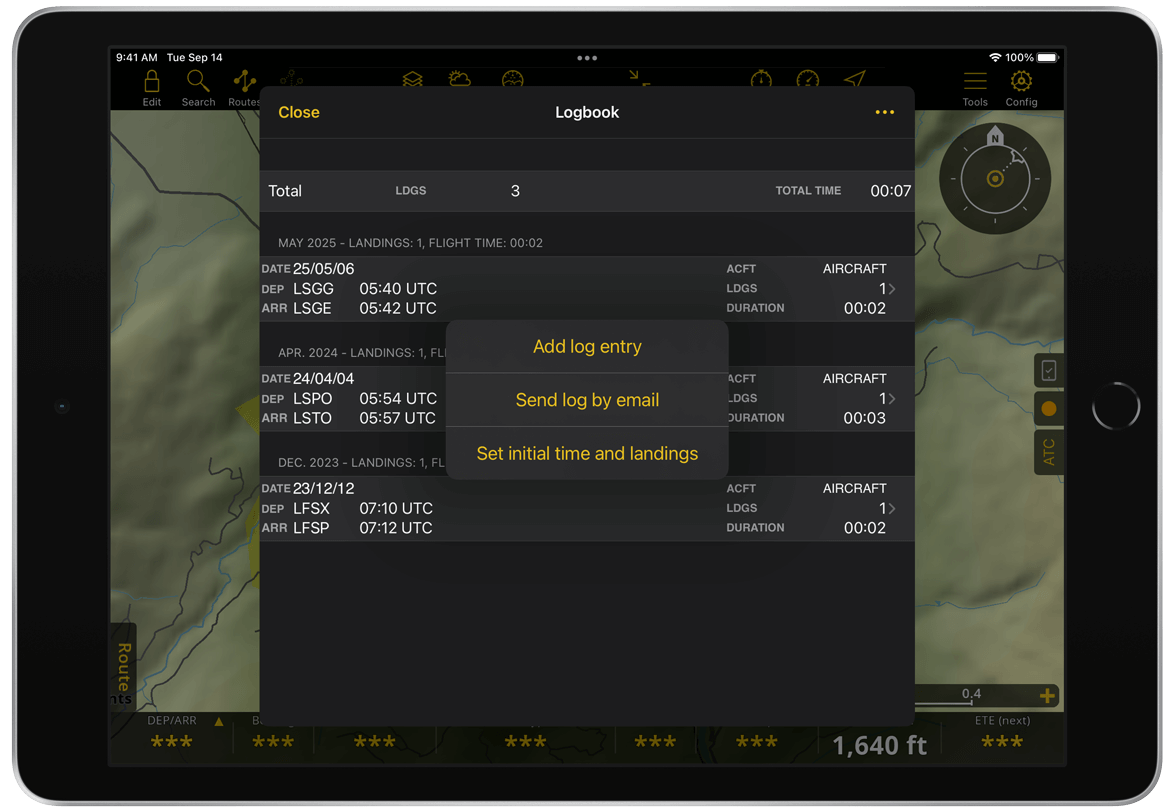
Tap ![]() in the upper right corner to access additional options:
in the upper right corner to access additional options:
Add log entry – Manually create a flight entry (see Flight Time)
Send log by email – Send the full logbook or selected flights via email
Set initial time and landings – Define initial total flight time and number of landings
Manual log entries#
When creating a manual entry, all fields must be entered manually, except for:
Block Time
True Flight Time
These values are calculated automatically based on the entered times.
Note
Time consistency is enforced. For example, landing time cannot be set before takeoff time. Each subsequent time field starts from the previously entered time. Example: If takeoff is set to 1 Sep 2019, 11:04 AM, the landing time cannot be earlier than this value.
Add a log entry#
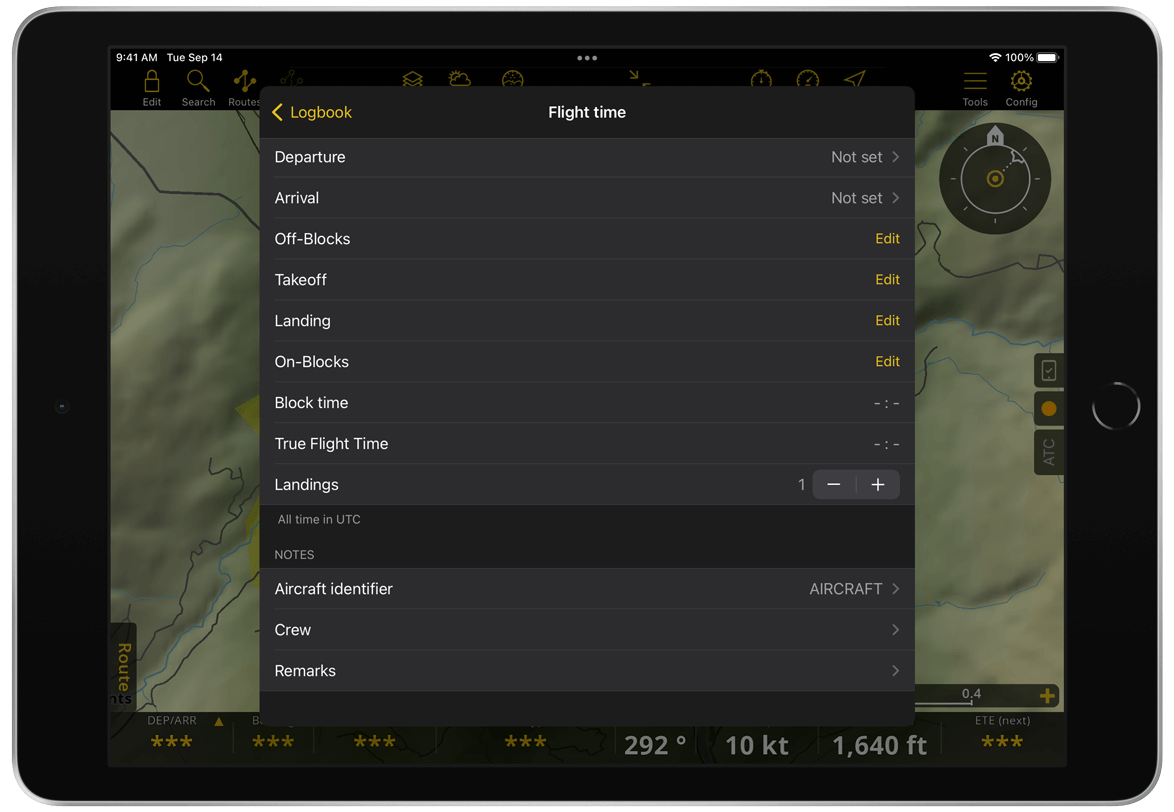
Go to Tools (on phones: Configuration > Logbook)
Tap
 in the upper right corner
Tap Add log entry
Enter the flight details (see Flight Time for more explanation)
Tap the back button to save and return to the Logbook
Set initial time and landings#
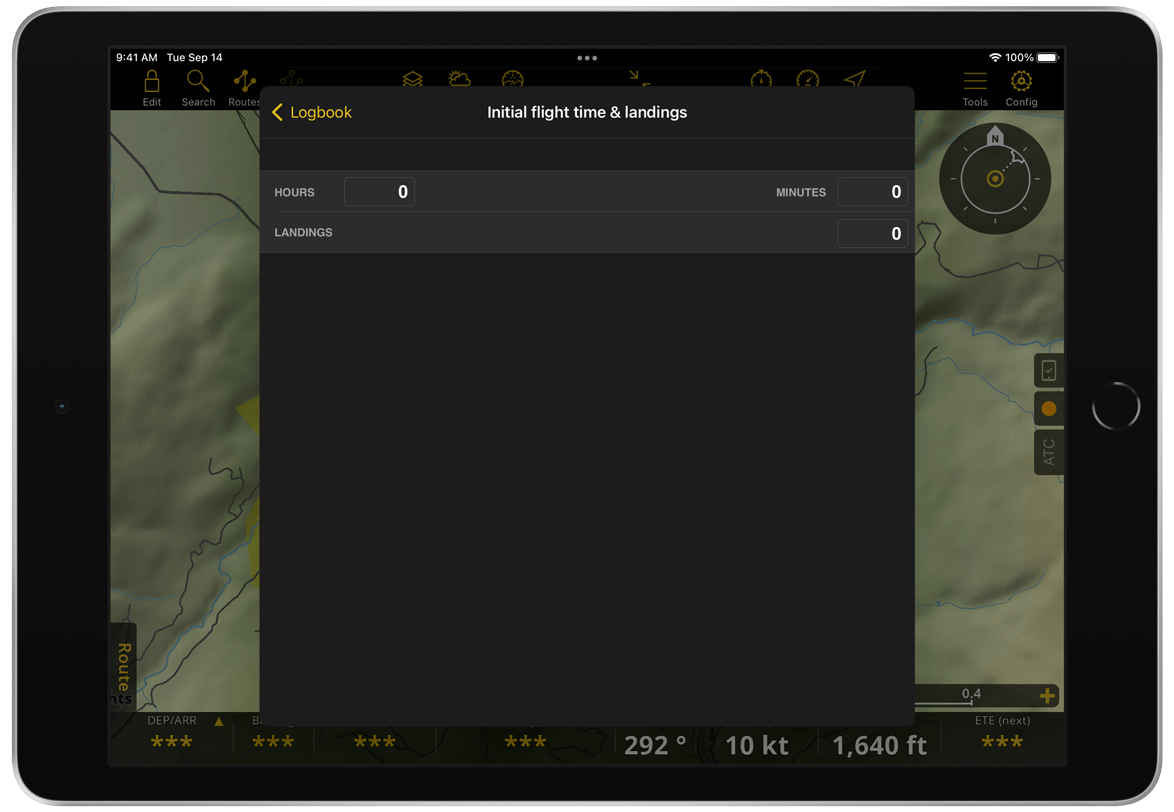
Go to Tools (on phones: Configuration > Logbook)
Tap
in the upper right cornerTap Set initial flight time and landings
Enter the required values
Delete a flight#
Go to Tools (on phones: Configuration > Logbook)
Swipe the flight entry from right to left
Tap Delete
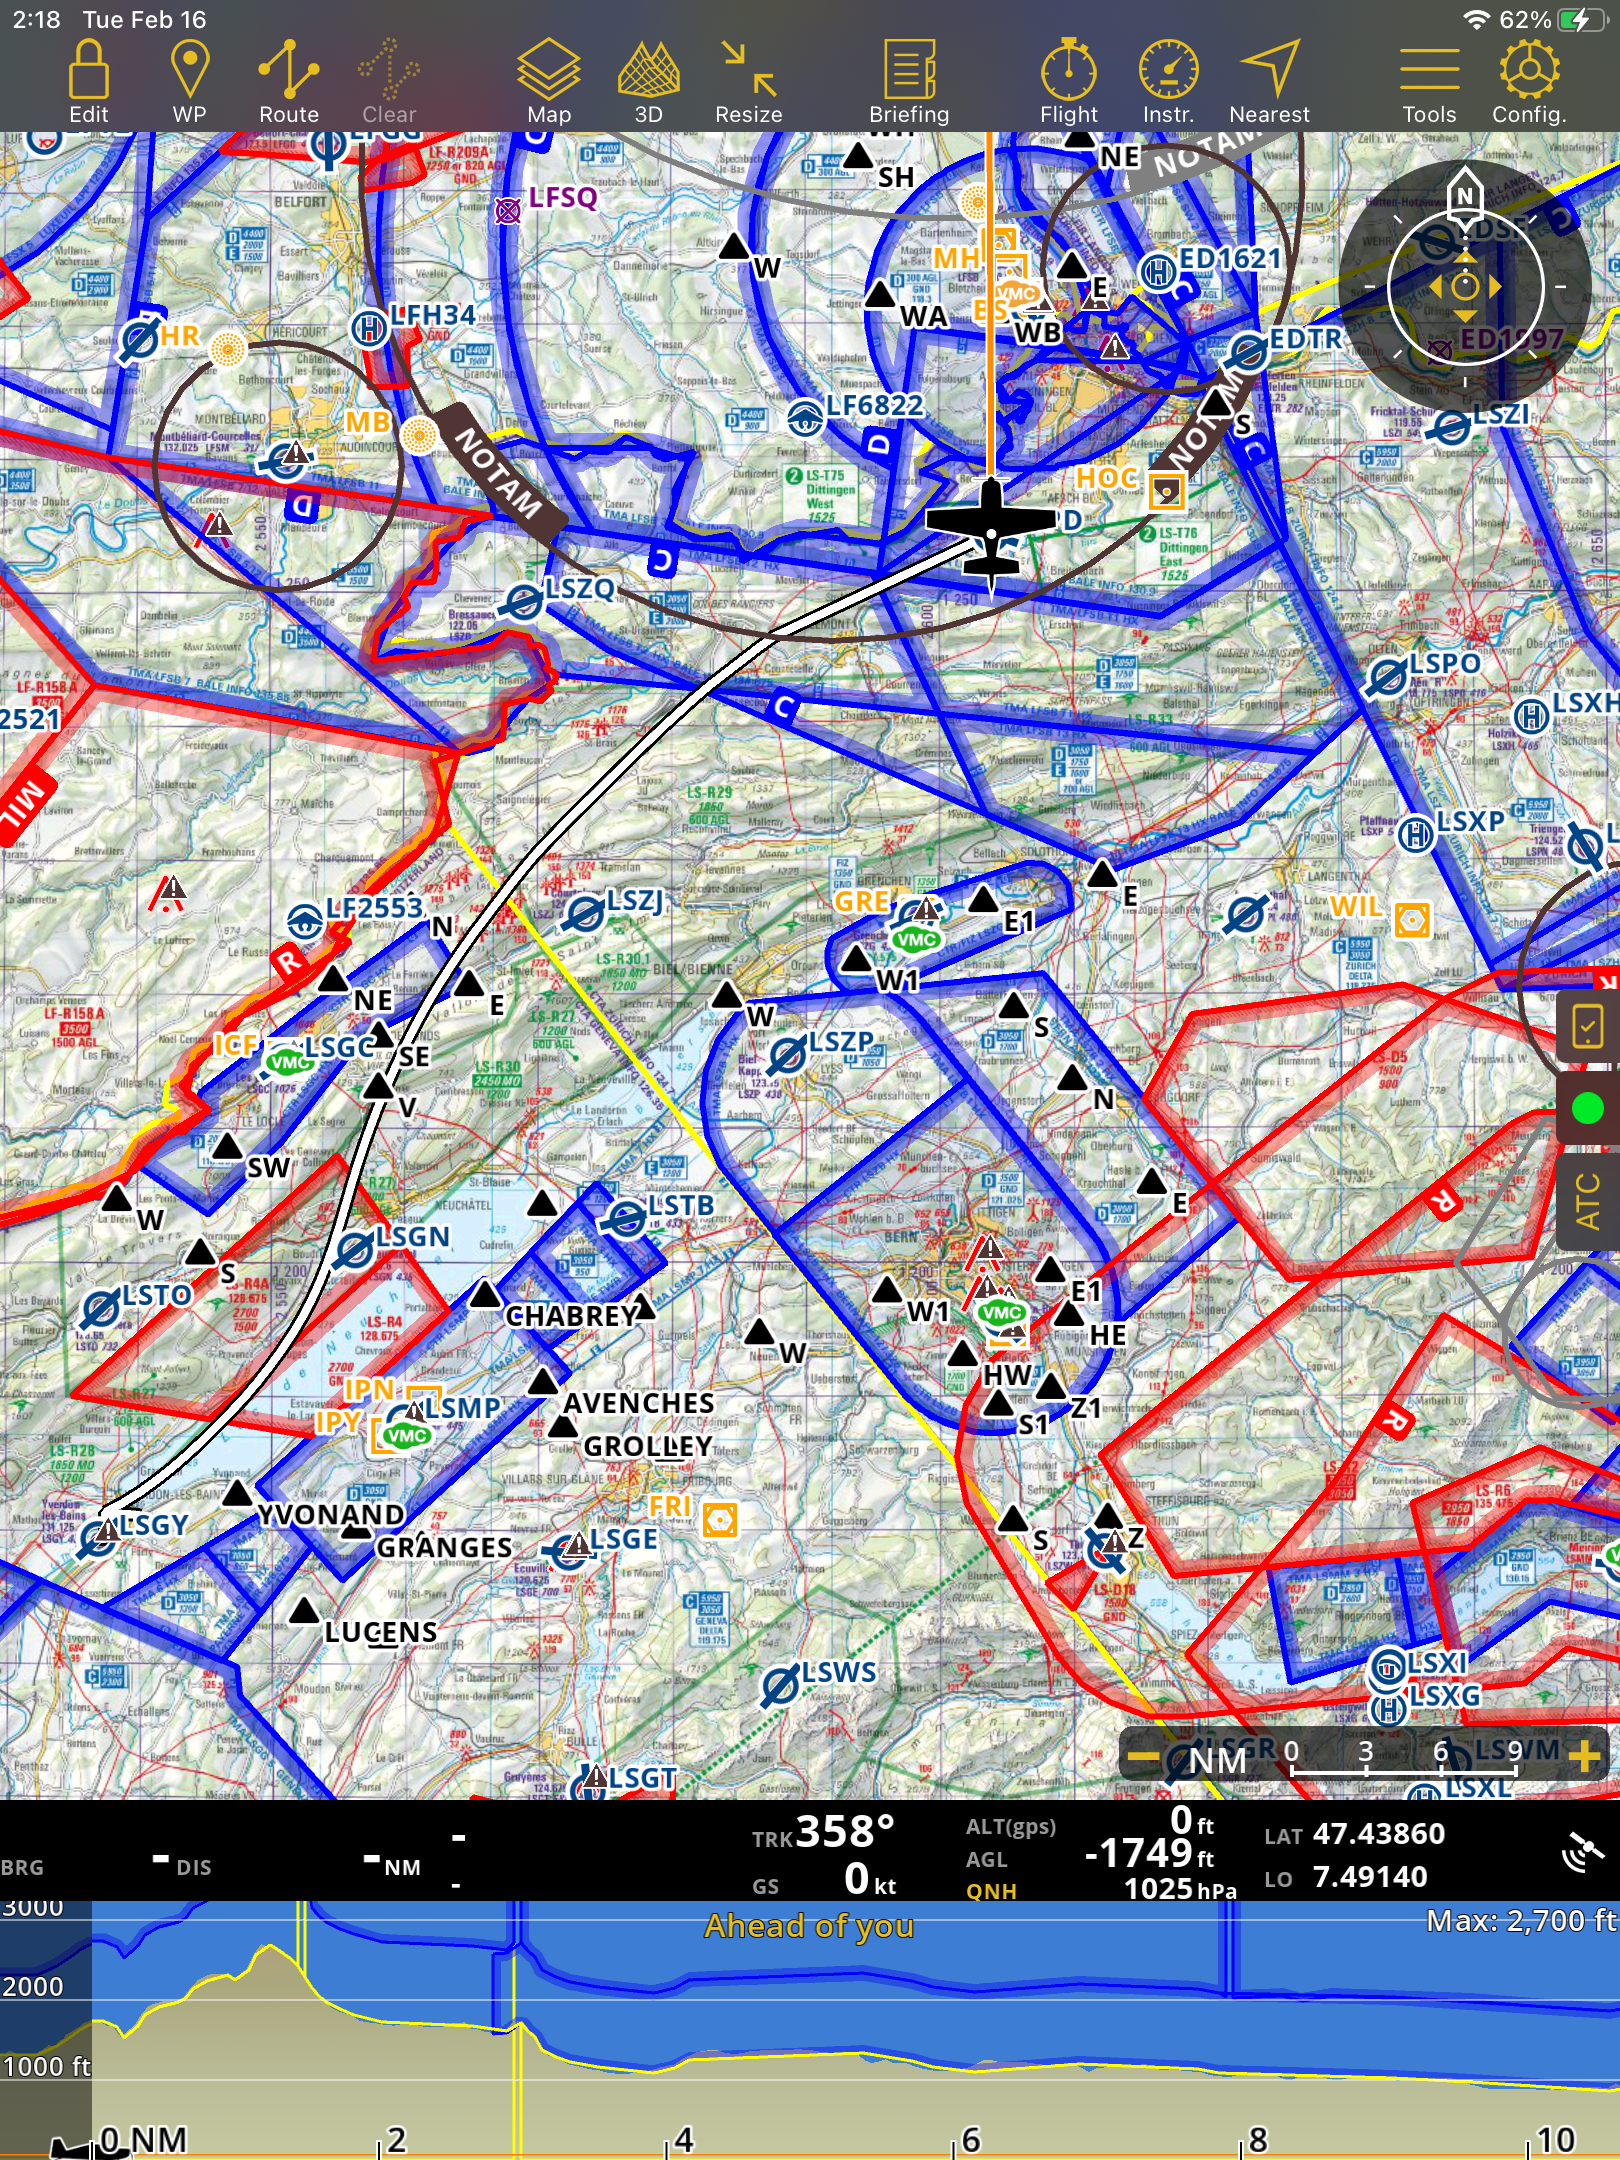
Flight Recorder#
The Flight Recorder allows you to record your flight path in real time.
Recording starts automatically when the Off-Block time is set and stops when the On-Block time is set.
For more details about flight detection, refer to Flight Time.
Flights can also be shared online via https://airnavigation.aero.
Flight sharing reminder#
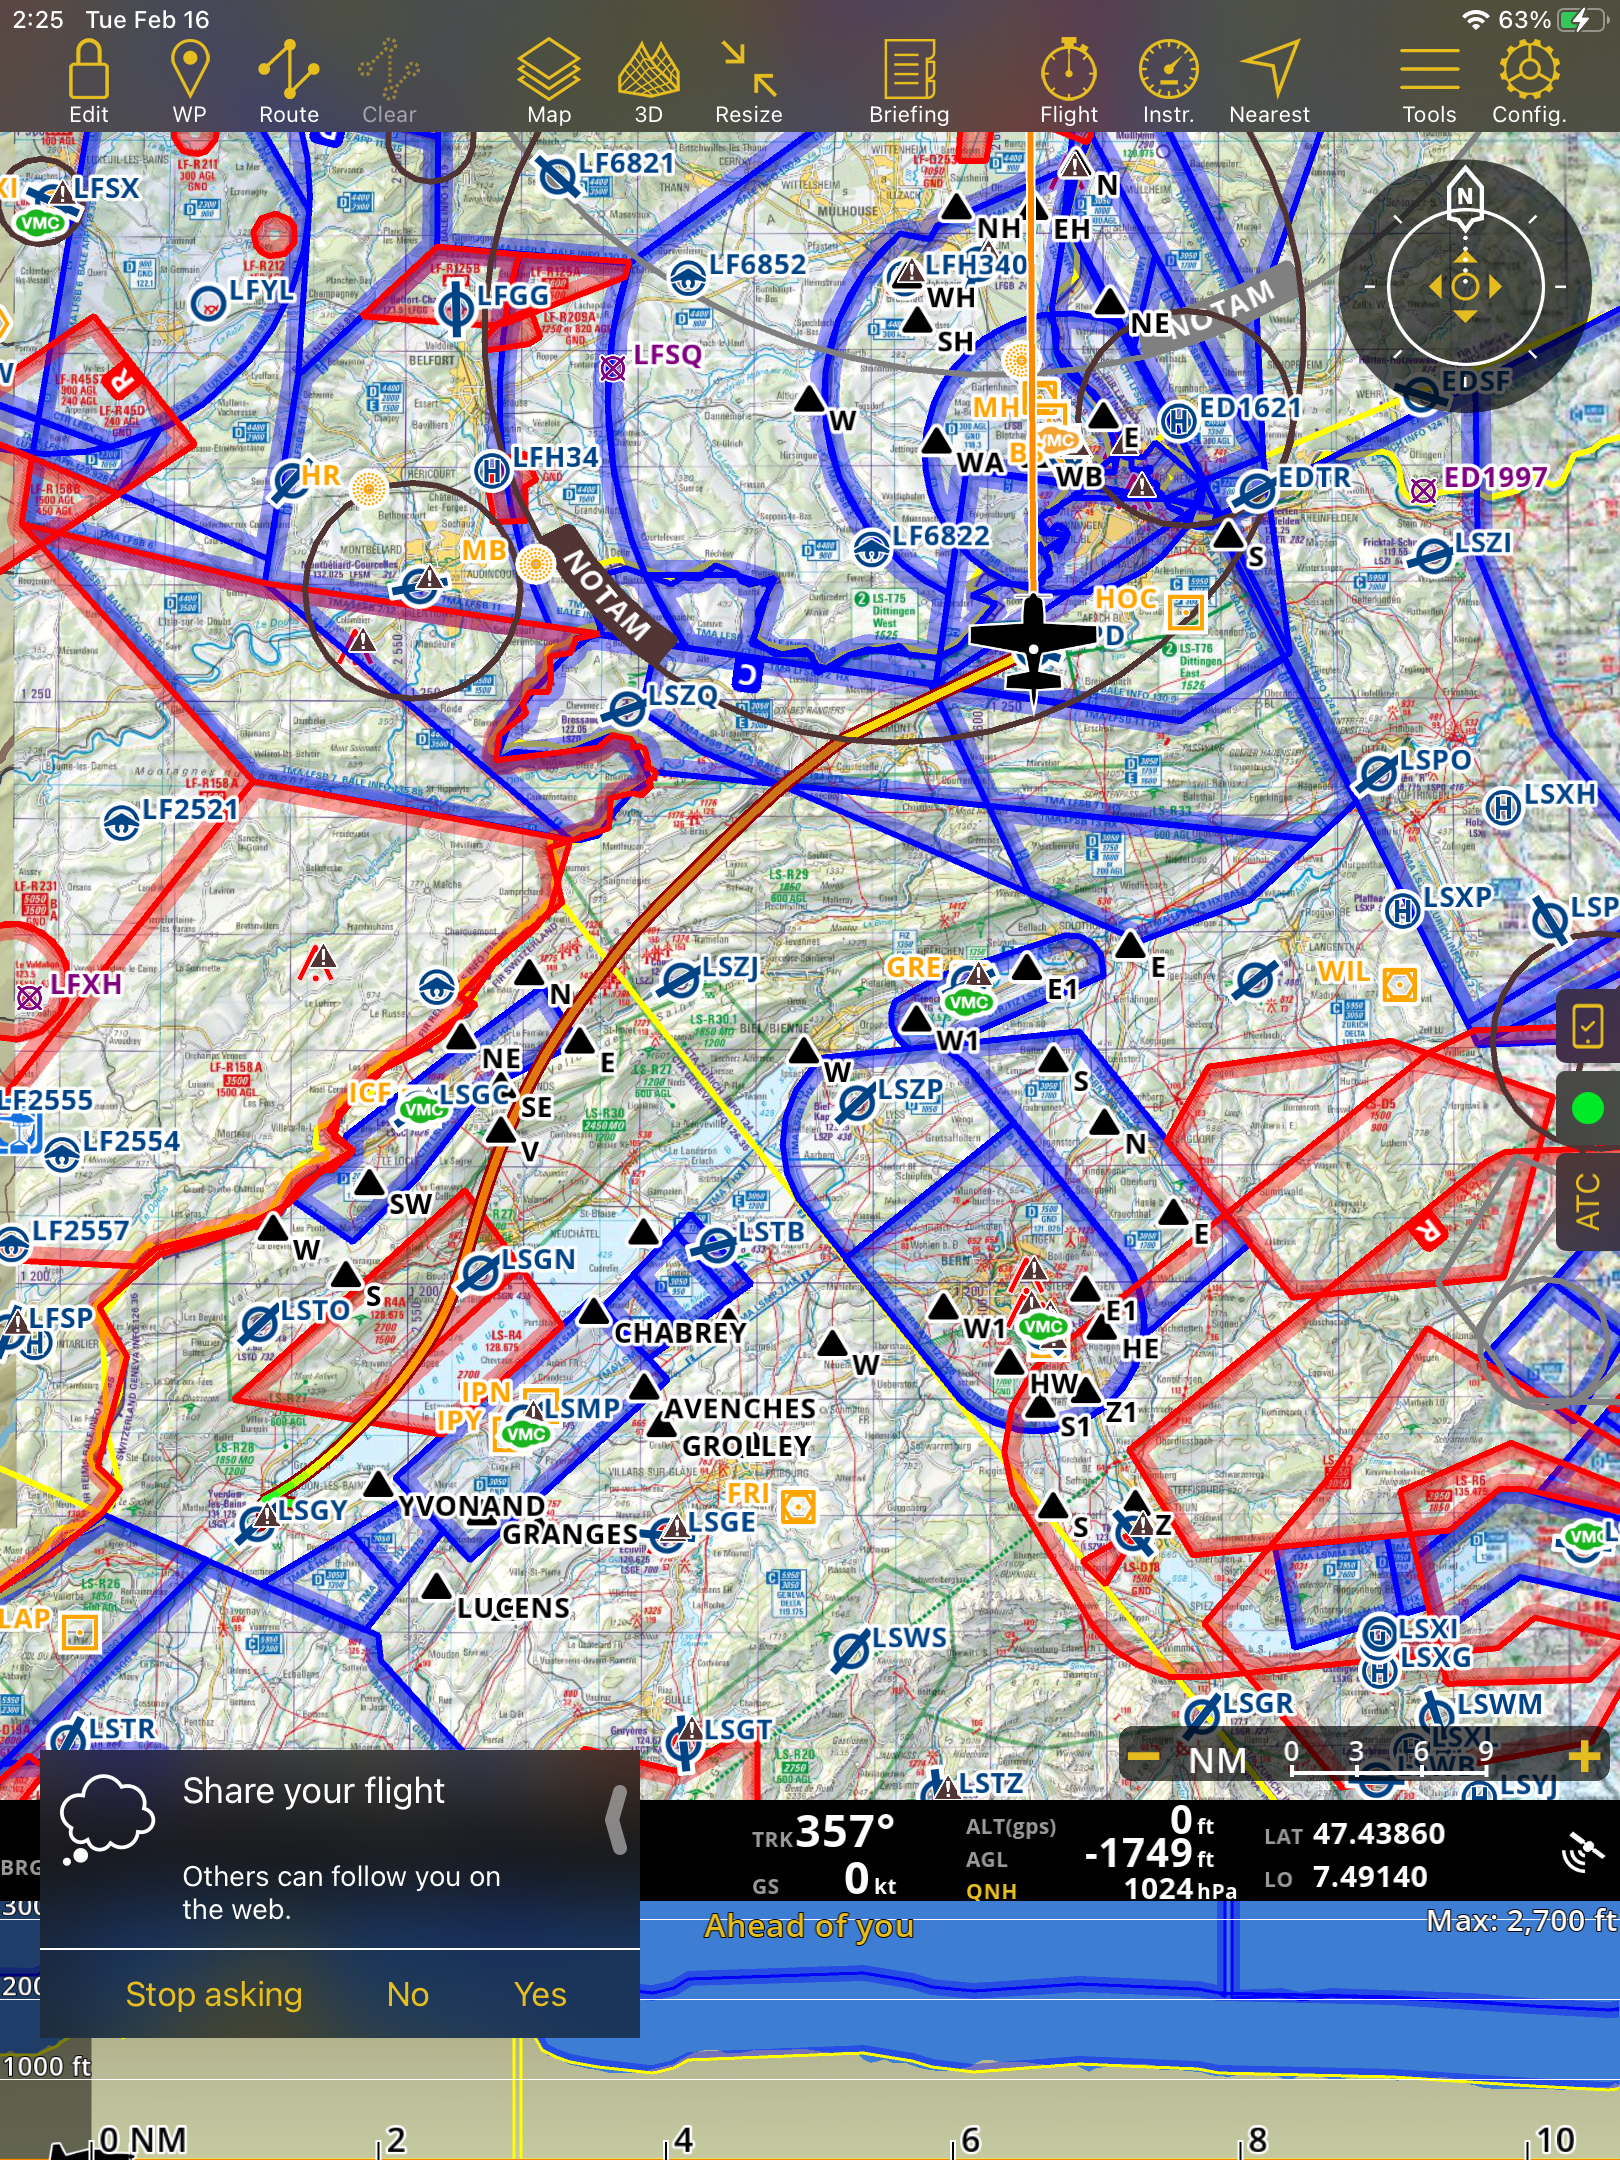
You can enable a reminder to share your flight after recording.
Go to Tools (on phones: Configuration > Flight Recorder)
Enable Remind me to share my flights
During the flight, a message will appear on the map with the following options:
Yes – Share the flight link
No – Dismiss the message
Stop asking – Disable future reminders
Display flight traces on the map#

You can display your recorded flight path (trace) on the map and choose how it is visualized.
Go to Tools (on phones: Configuration > Flight Recorder)
Enable When flying
Select a color mode:
No – Displays a white trace
With altitude:
0 – 2,000 ft: light grey → green
2,000 – 5,000 ft: green → yellow
5,000 – 10,000 ft: yellow → orange
10,000 – 15,000 ft: orange → red
15,000+ ft: red → white
With horizontal speed:
0.0 – 10.28 kts: dark grey → blue
10.28 – 30.86 kts: blue → green
30.86 – 51.44 kts: green → yellow
51.44 – 70.02 kts: yellow → orange
70.02 – 128.0 kts: orange → red
With vertical speed:
-12.0 to -5.0 m/s: dark blue → blue
-5.0 to 0.0 m/s: blue → white
0.0 to 5.0 m/s: white → red
5.0 to 12.0 m/s: red → darker
Example: White flight trace displayed when color mode is set to No.
Show a recorded flight#
Display a previously recorded flight on the map.
Go to Tools (on phones: Configuration > Flight Recorder > Recorded flights)
Select a flight
Tap Show recorded flight
Hide recorded flights#
Remove displayed flight traces from the map.
Go to Tools (on phones: Configuration > Flight Recorder > Recorded flights)
Tap Hide recorded flights from the map
Replay a recorded flight#
Replay a recorded flight as an animation on the Moving Map.
Go to Tools (on phones: Configuration > Flight Recorder > Recorded flights)
Select a flight
Tap Replay this flight
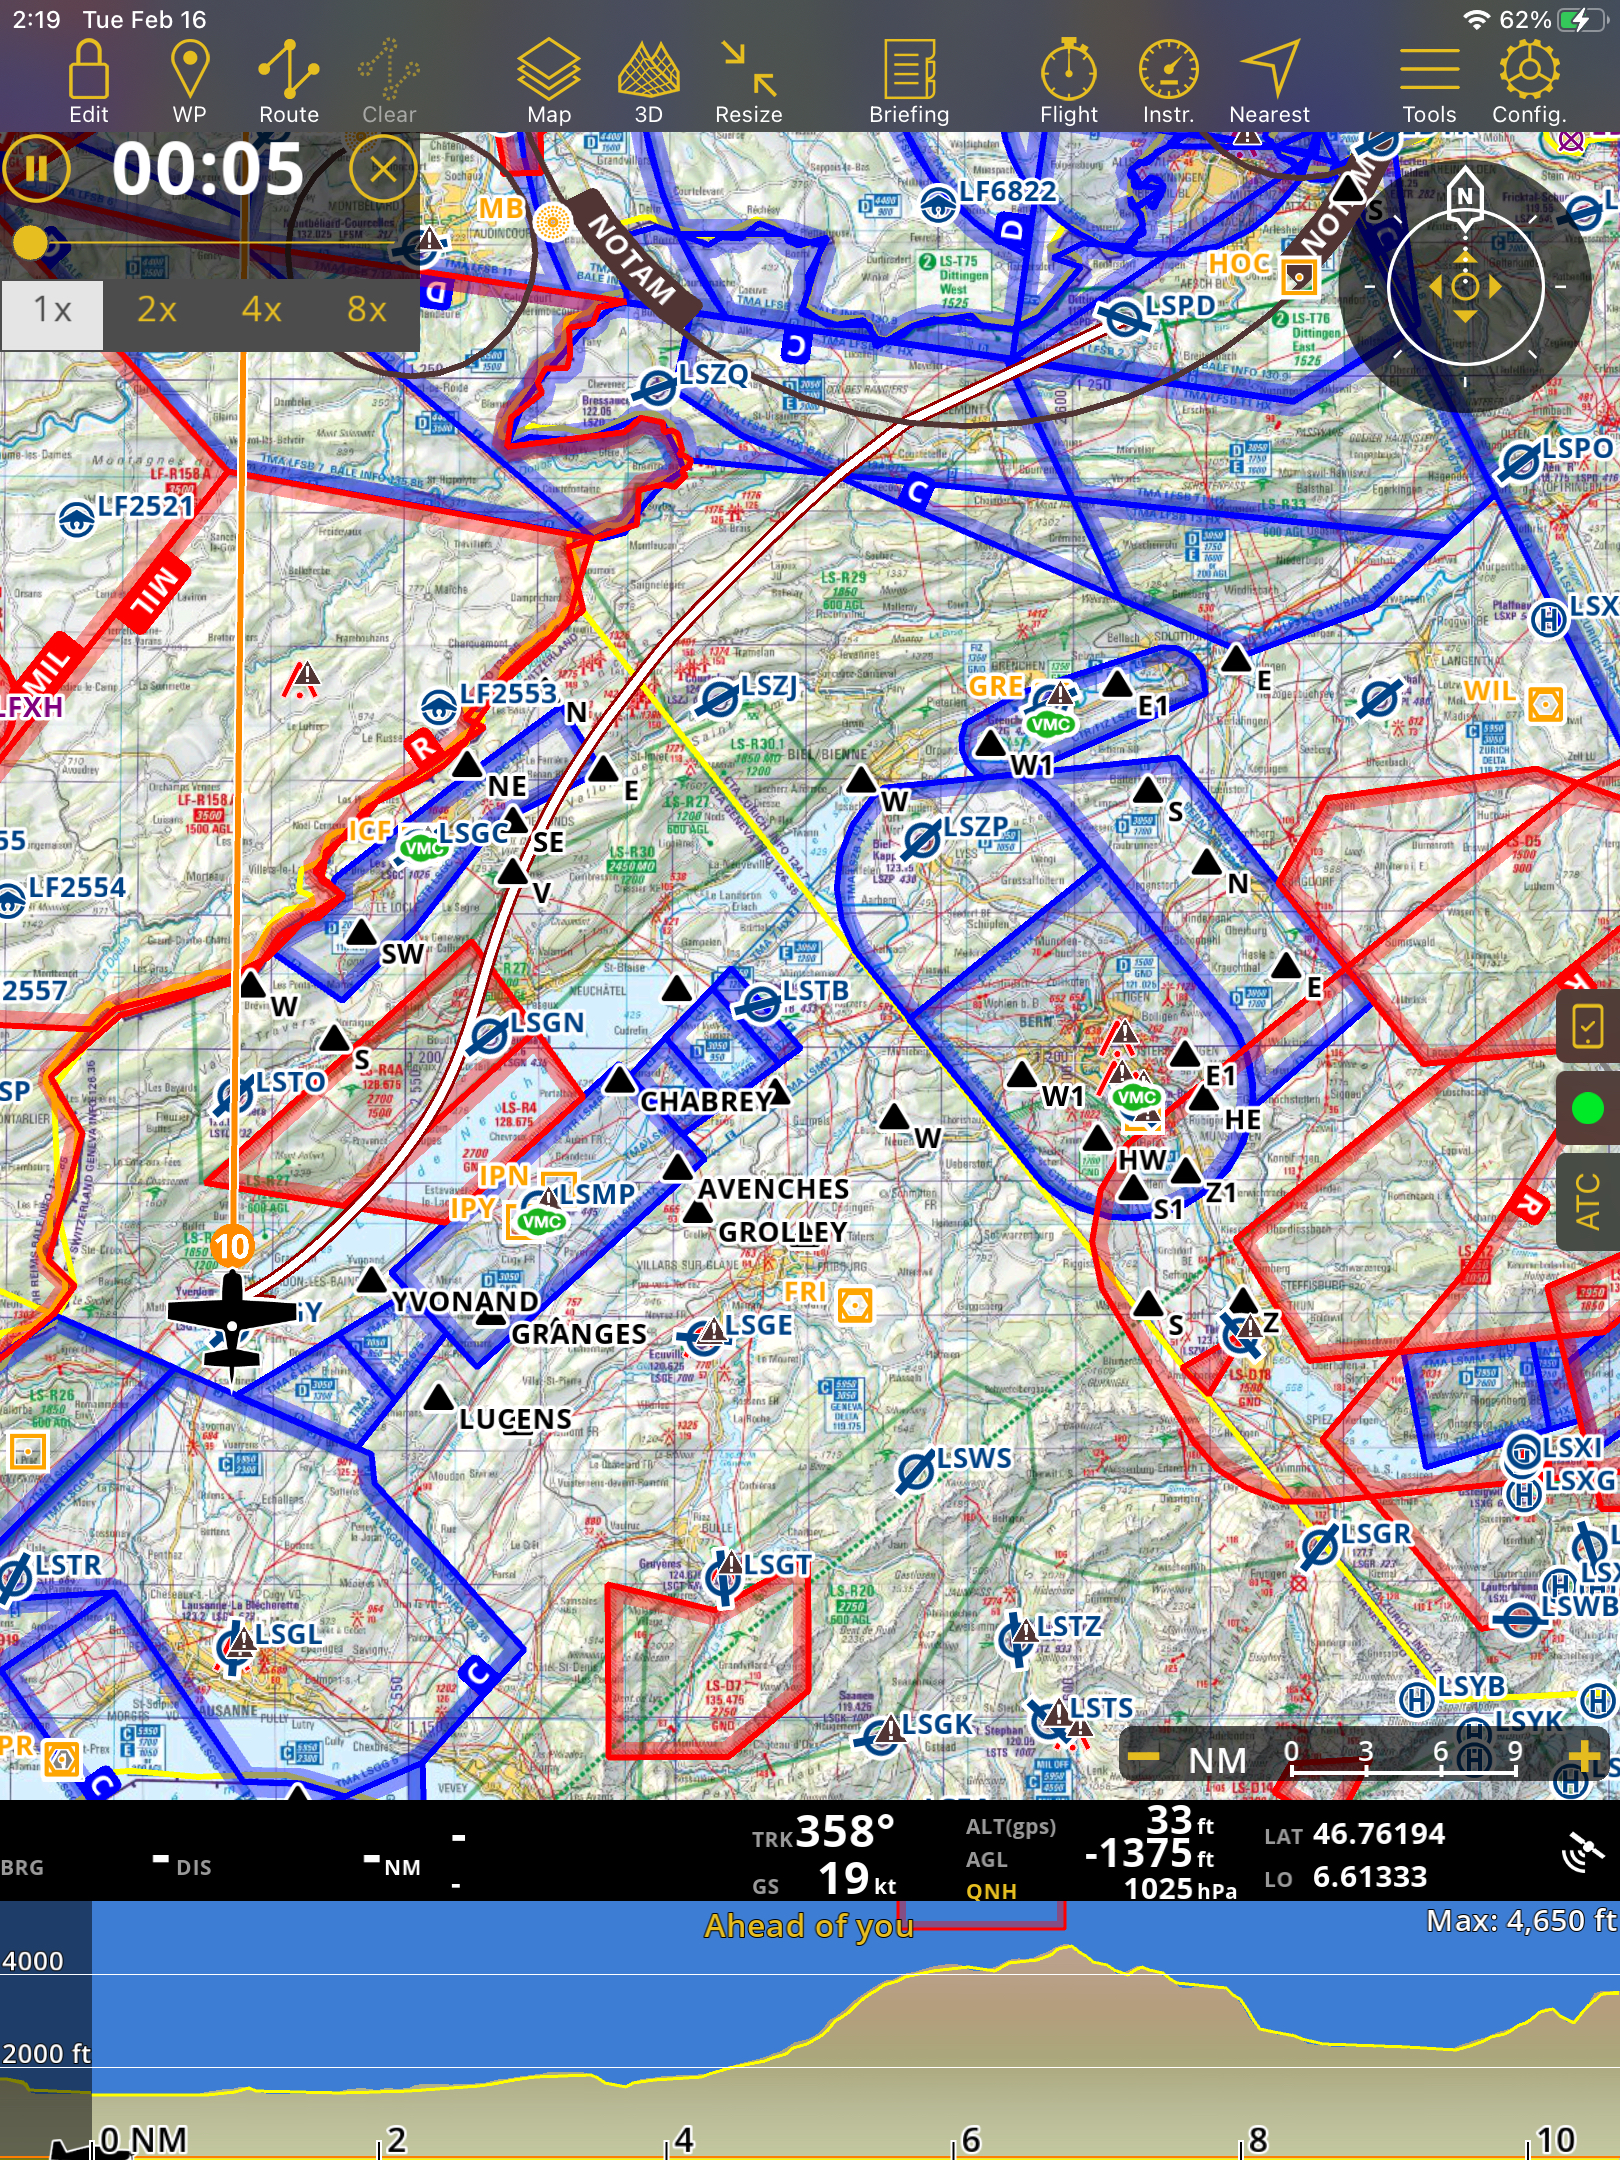
During replay, the following controls are available:
Play / Pause
Close
Time indicator (HH:MM:SS)
Progress indicator
Replay speed (1x, 2x, 4x, 8x)
Delete a recorded flight#
Go to Tools (on phones: Configuration > Flight Recorder > Recorded flights)
Swipe the flight entry from right to left
Tap Delete
Note
Deleting a flight removes it only from the app. Flights shared online remain available on https://airnavigation.aero and must be deleted there separately.
Recorded flights can also be exported as KML/GPS (see Recorded Flights) or shared via the web service (see Flight tracking service).