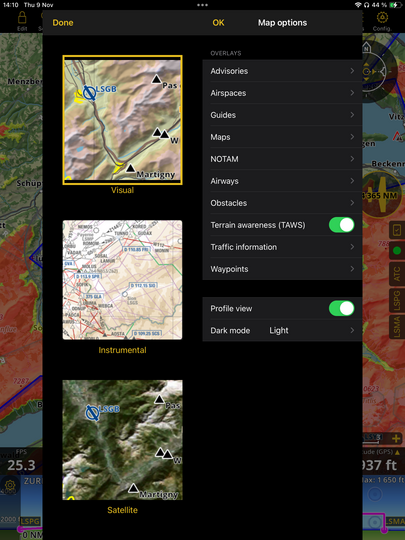
Map options menu#
Advisories#
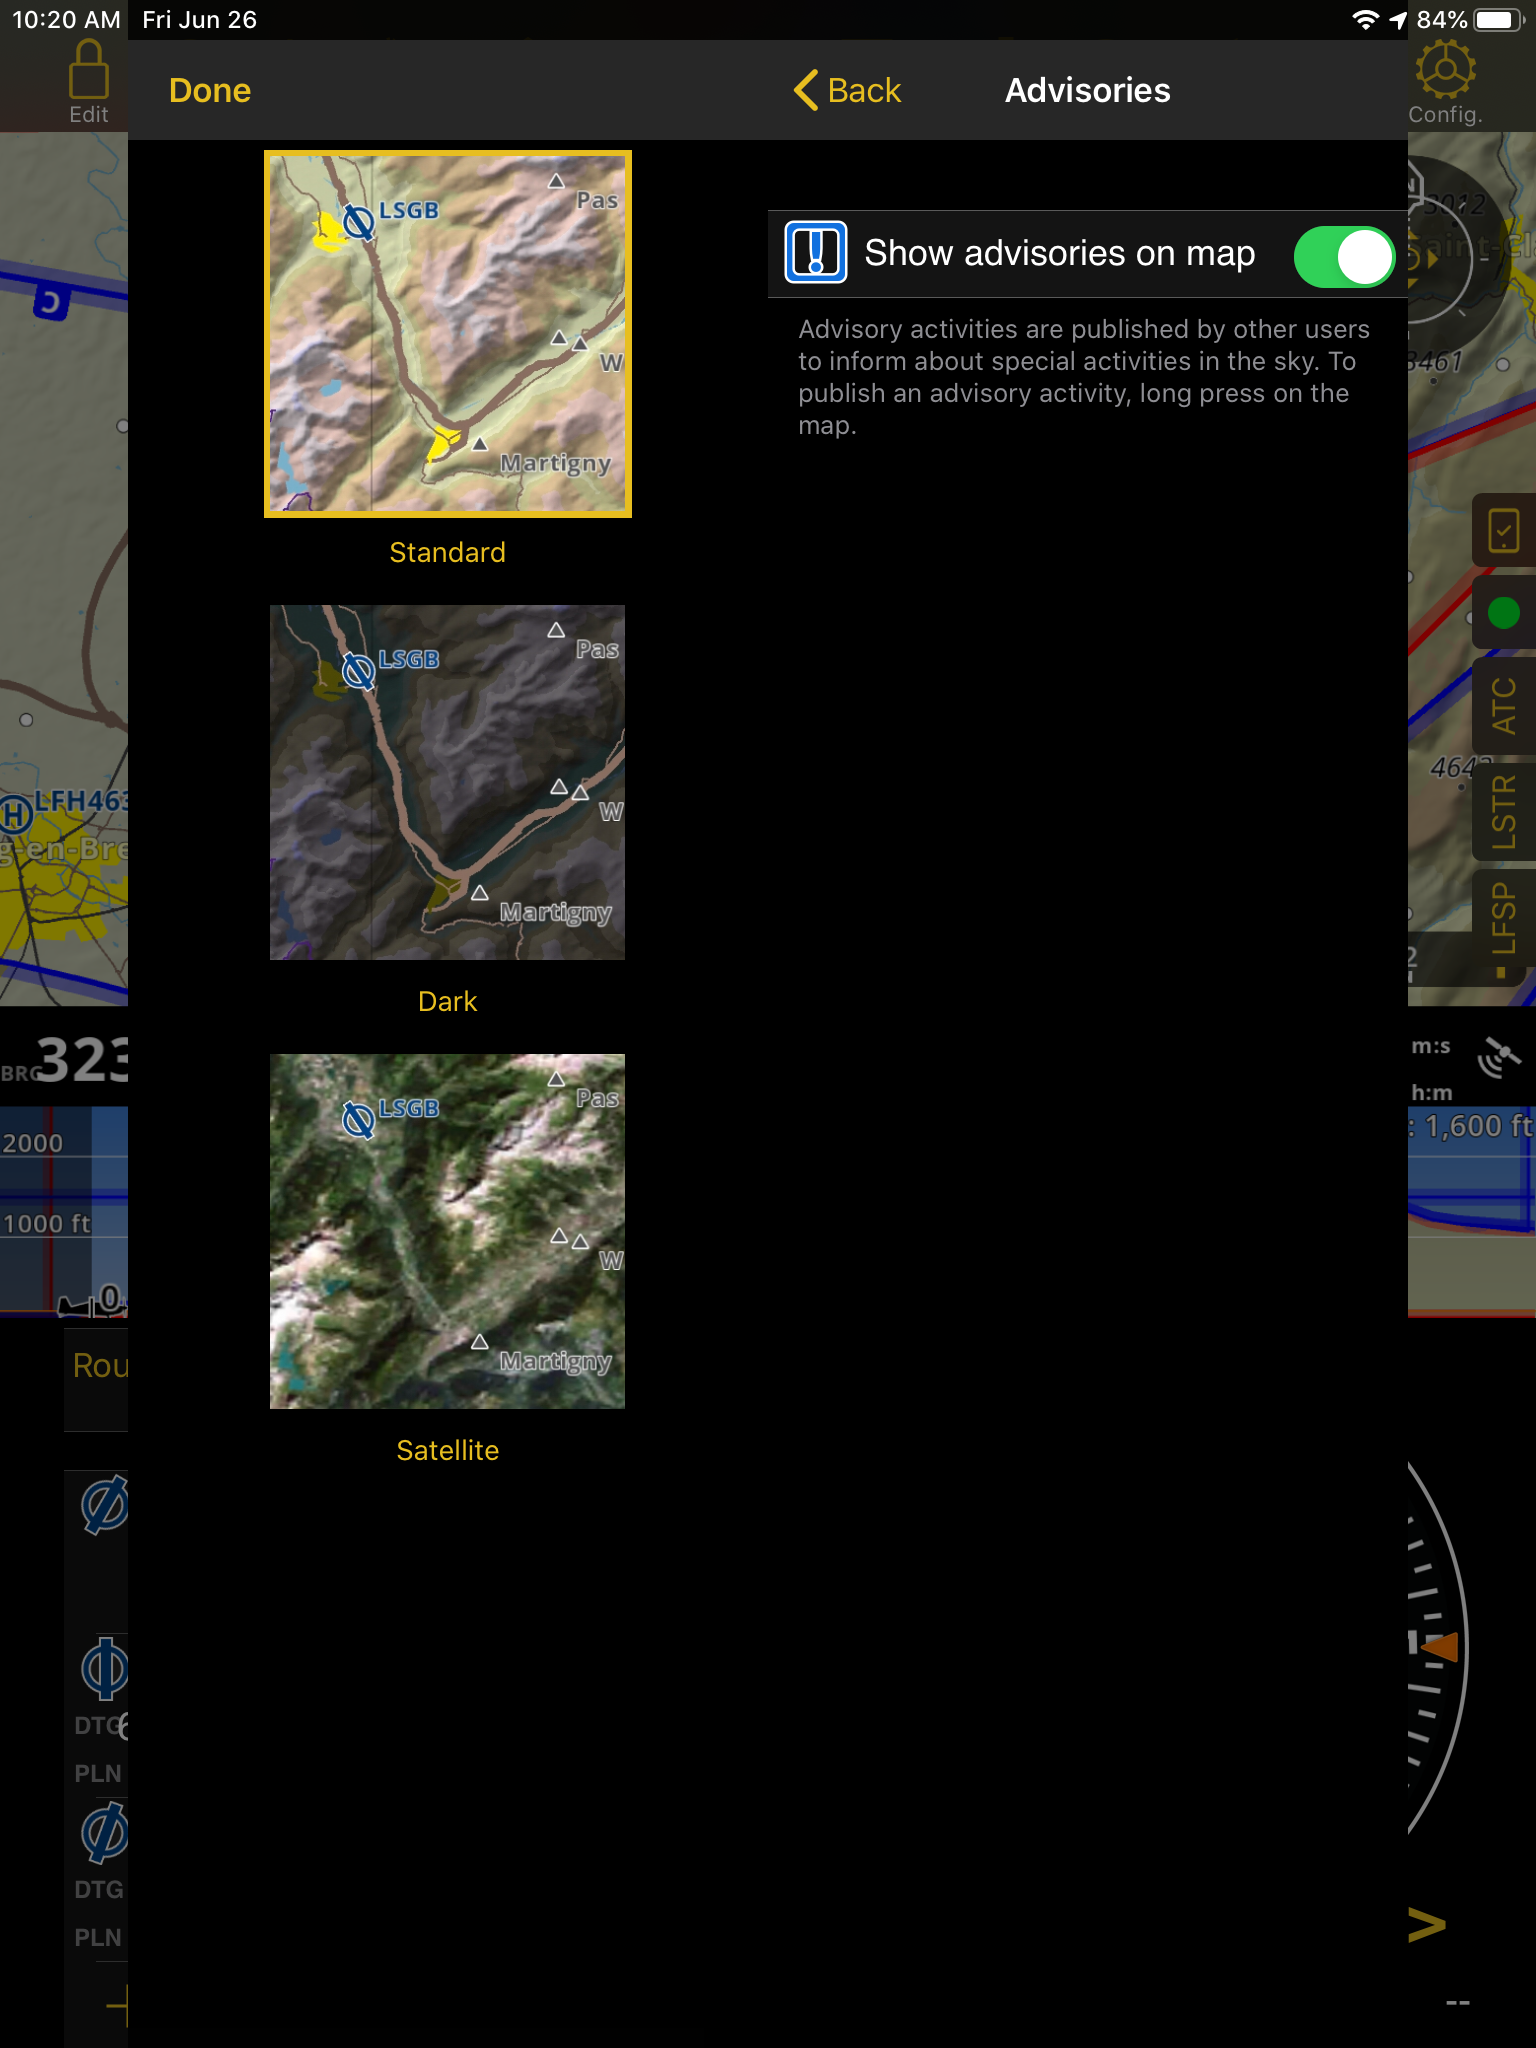
Choose to show/hide Advisories on the map. See Advisories for details.
Airspaces#
Change which airspaces will be displayed on the map from this menu. In particular, you filter airspaces by vertical limit or class.
Note
The vertical limit selector also applies to NOTAM.
Guides#
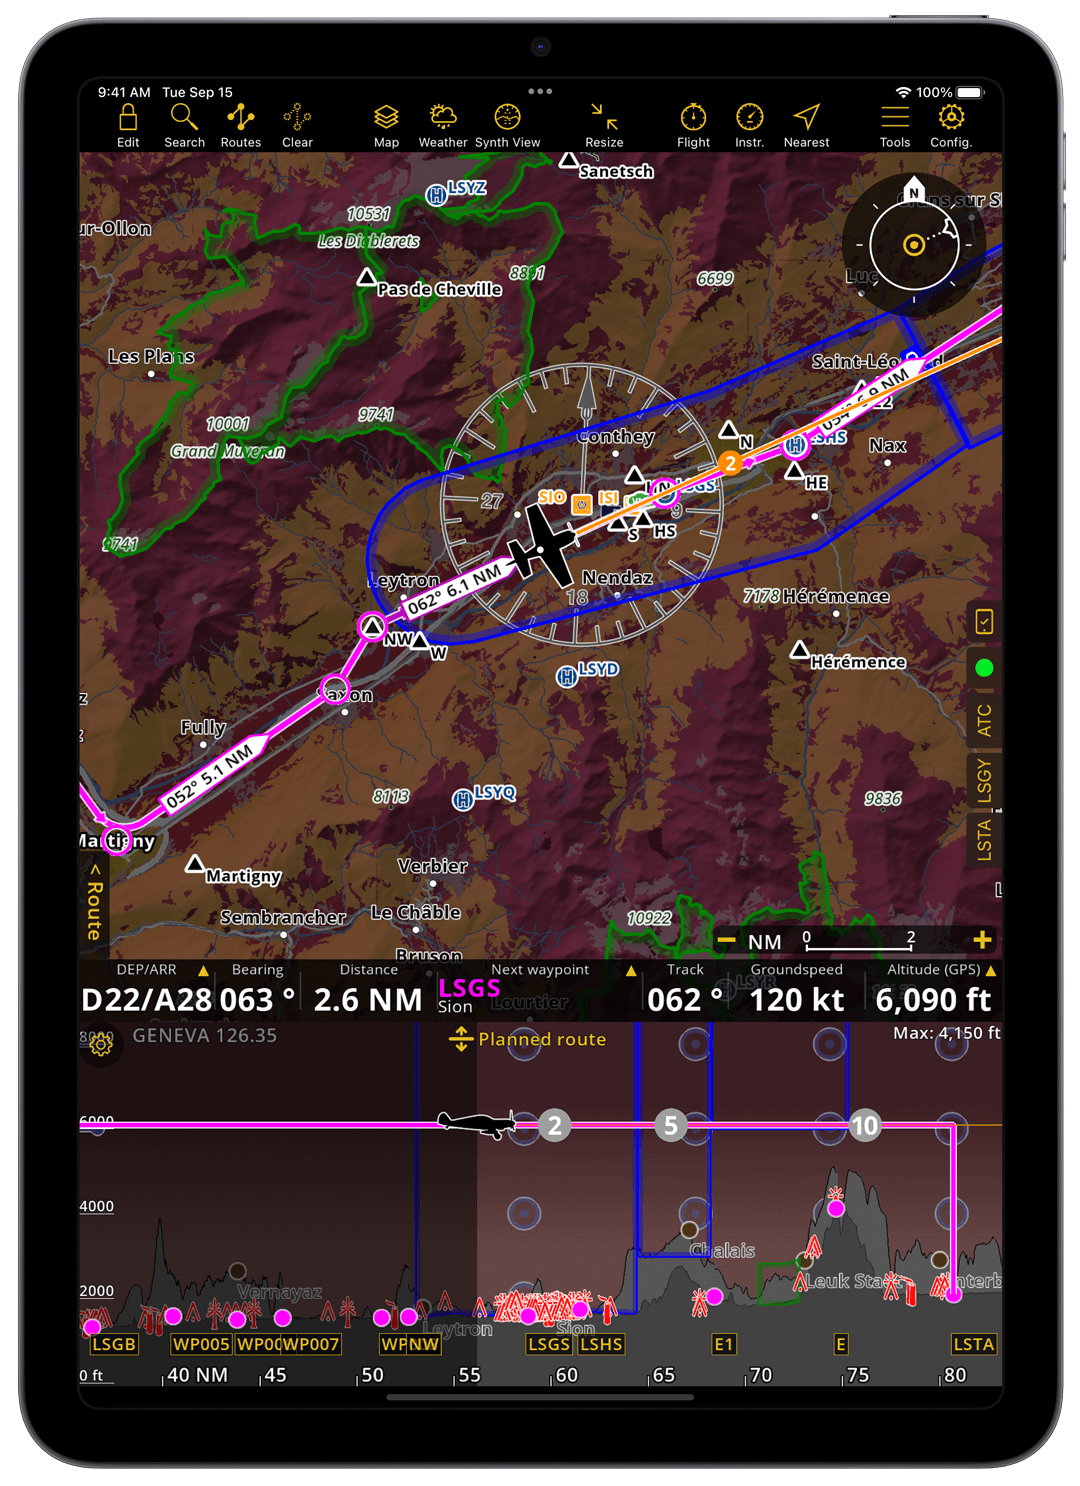
Activate visual aids for your flight on this section.
The app can display on top of the map visual guides that will give you useful information for your navigation. You can toggle on any of the following options:
Bearing line: A black line serves as visual reference indicating the direction to the next waypoint on your route.
Note
Bearing line only works properly if a route has been set beforehand.
Flightpath trend: An orange line with 2, 5, 10 min indicators estimates your trajectory over time helping you to adjust your course or speed to ensure you reach the waypoints on your route within the desired timeframe.
Big Runway Identifiers: Instantly identify the first and last airports of your route with prominent runway indicators.
Wind vectors: Get live wind information displayed on the map at your current location and along your route.
Procedure selectors: Serve as shortcut to choose departing and arriving procedures directly on the map instead of the navbar by easily tapping on them.
Dim elevation above: Darken the map above a specific elevation for enhanced terrain awareness. When activated, a new field appears, allowing you to set the preferred elevation.
Maps#
Select the charts from among those you own and have installed (See Store) that you wish to see on top of our SmartChart.
The first one is displayed above the second one and so on. You may reorder the charts by drag and drop. SmartChart is always at the bottom and may not be disabled.
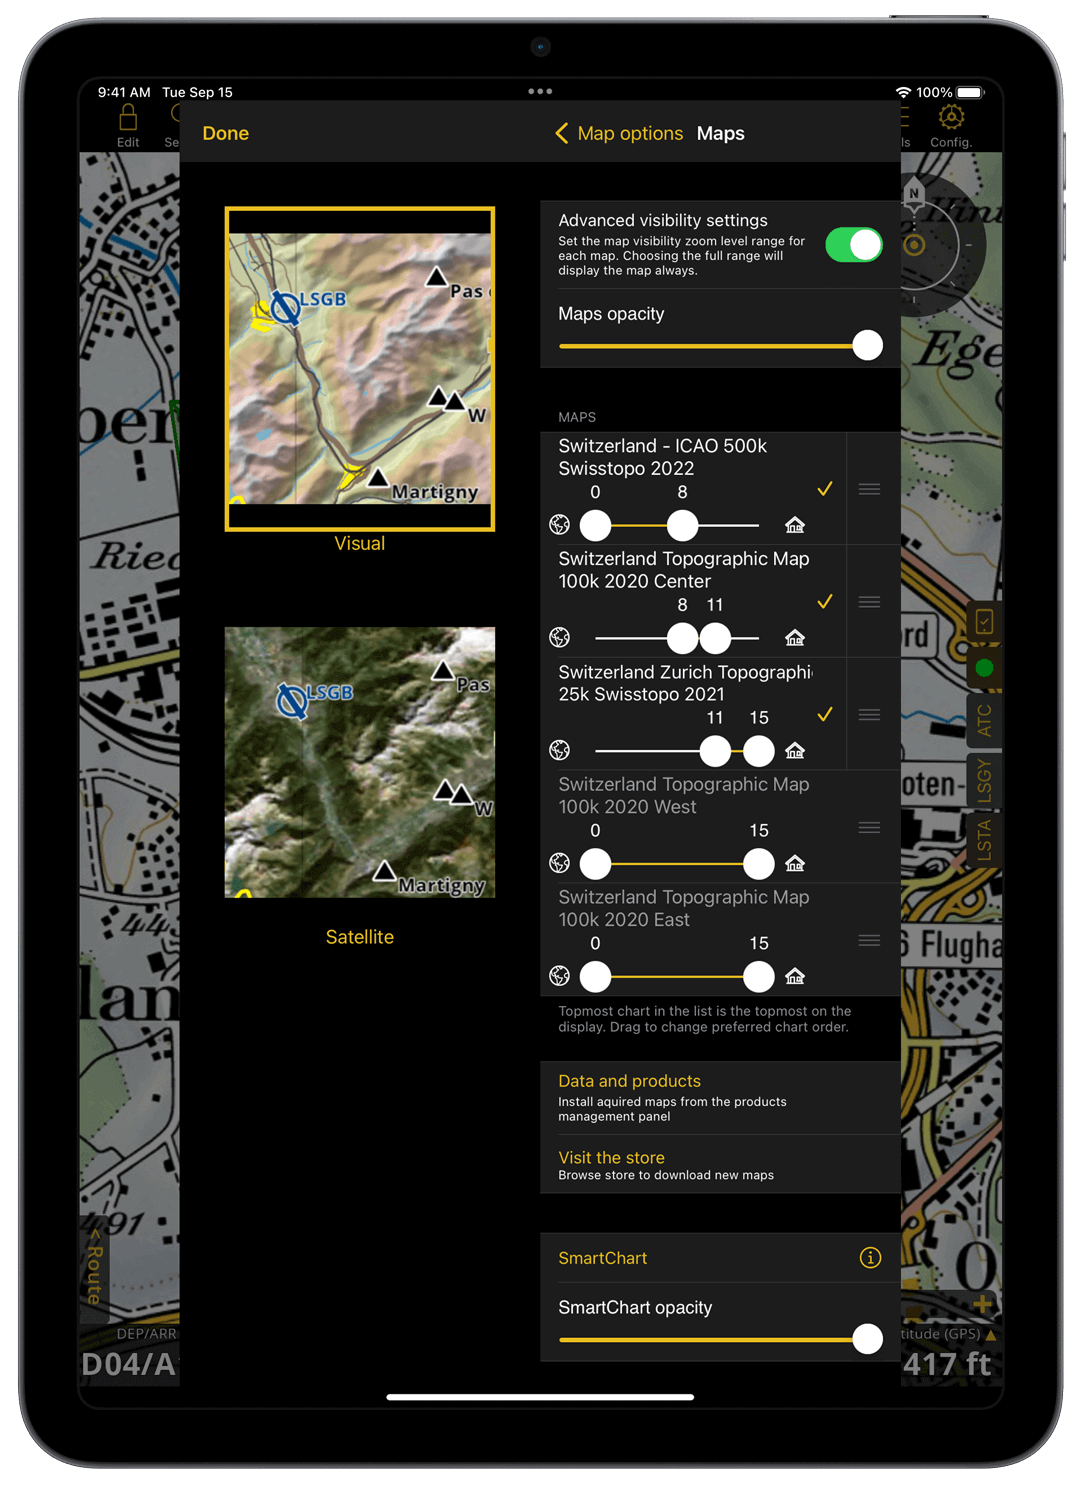
Advanced visibility settings: Control the overlapping of your maps by setting custom zoom level ranges for them. The app will display the map you want at each zoom level while zooming in and out.
Maps opacity: The transparency level of all maps layer displayed on the app. By adjusting, you can control how much the map is visible over the Smartchart.
Smartchart opacity: The transparency level of Smartchart displayed on the app. By adjusting, you can control how much the Smartchart is visible over another maps.
NOTAM#
You may set display properties of the NOTAM from this menu. See NOTAM for description of our NOTAM management.
Obstacles#
Air Navigation Pro offers a large database of obstacles to the navigation, not only AREA 1. From this menu, you may review the last update and select vertical filtering options.
For select countries, you can color some power lines according to their height above ground. Currently only applicable to Norway.
Note
To see this menu entry, you need to acquire the Obstacles product, either as standalone, as part of our subscriptions plans, or if your Air Navigation Manager organisation provides a specific database.
Terrain awareness (TAWS)#
For additional terrain awareness, you can activate a color layer overlay onto the Moving Map to easily identify whether the surrounding terrain is at or above your current altitude. The feature distinguishes between:
Red: Terrain above your current altitude
Yellow: Terrain below current position up to 50 meters
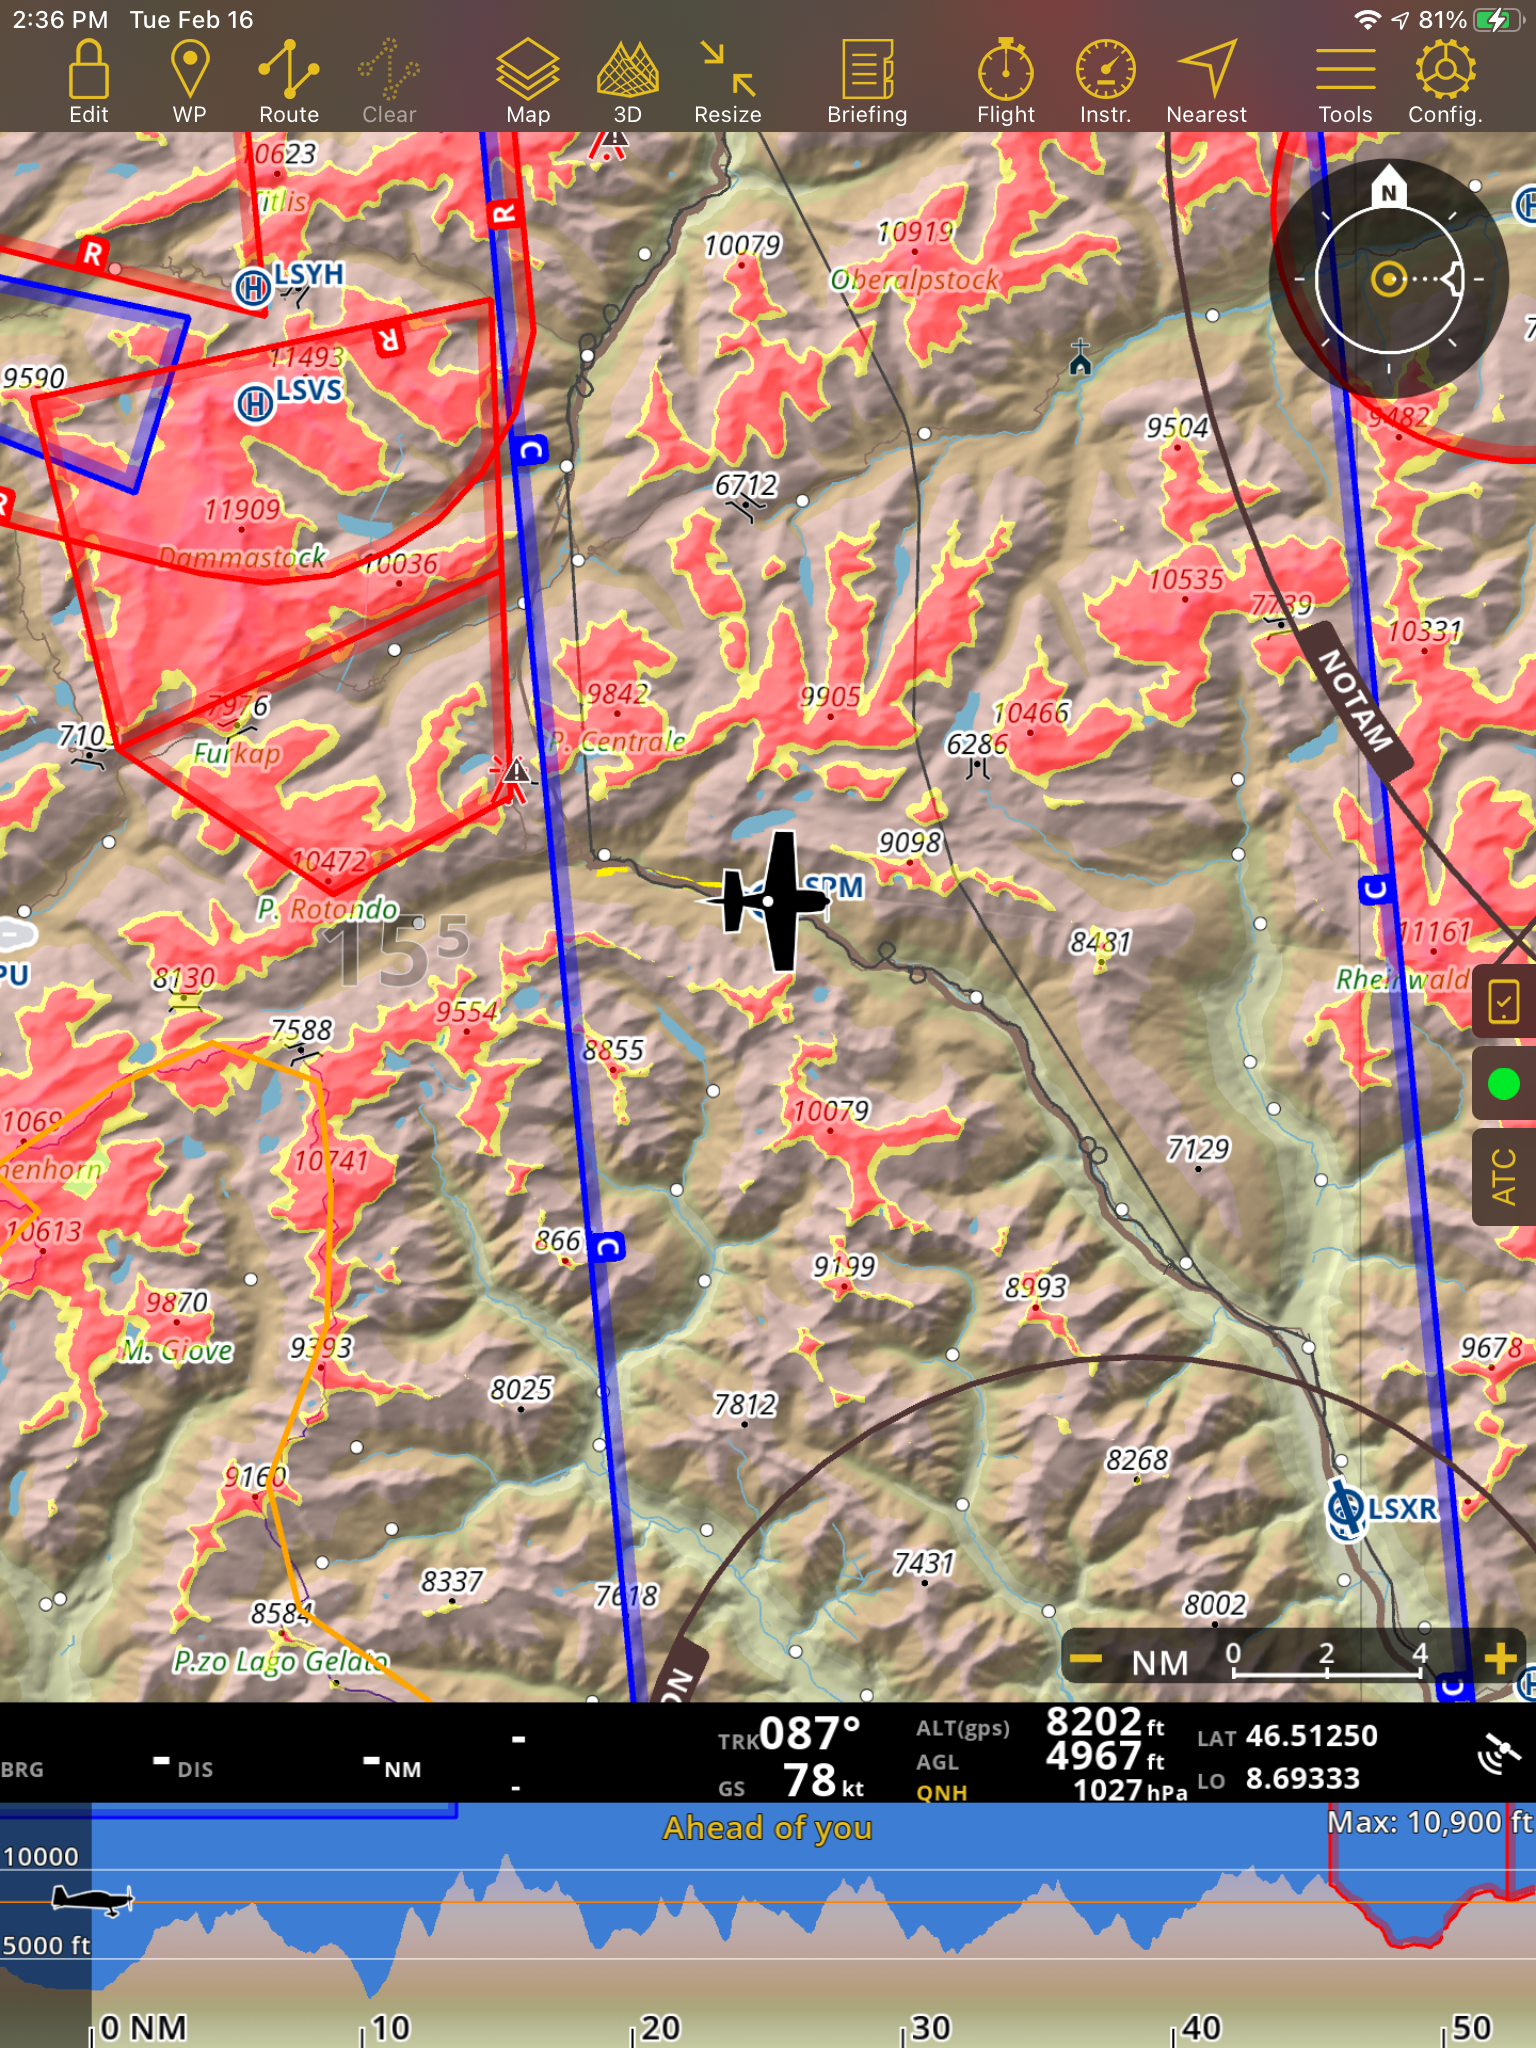
Terrain awareness works also in combination with the Synthetic View.
Traffic information#
This feature requires you to have an internet connection, an ADS-B, SafeSky, or a FLARM device. You can choose here how traffics should be displayed on the map, as well as activating or deactivating alerts.
The Traffic information menu includes the following options:
Display traffic on map
Consider traffics at your altitude +/-
Appearance
Alerts on nearby/conflicting traffics
SafeSky
Note
Seeing the traffic on the map requires either an internet connection, an ADS-B receiver, SafeSky or a FLARM device. Then turned on, the TCAS algorithm is working to predict conflicts. (See the Traffic collision).
Display traffic on map#
Set your traffic icon preference on Map Options > Traffic Information. Choose between the following options:
None (selected by default): no traffic icons displayed
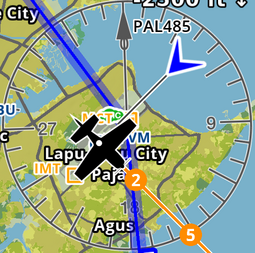
Generic symbols: traffic displayed as arrows
Aircraft Symbols: traffic displayed as representative icons based on the aircraft type: Unknown, Glider, TowPlane, Helicopter, Parachute, ParachuteDropPlane, Hangglider, Paraglider, Aircraft, Jet, UFO, Balloon, Airship, UAV, Obstacle, Ultralight, UAM_VTOL, and Gyrocopter
TCAS Symbols: traffic displayed using TCAS icons


Note
Traffic display on map is deactived by the default which may result in traffic not showing, even if a connection to a traffic information source has been successfully established.
Consider traffics at your altitude +/-#
Traffics can be filtered by altitude difference to avoid displaying irrelevant traffics. Only traffics that are within (+/-) the selected threshold will be displayed in that case:
2000 feet / 610 metres
3000 feet / 914 metres
4000 feet / 1219 metres
5000 feet / 1524 metres
6000 feet / 1829 metres
7000 feet / 2134 metres
8000 feet / 2438 metres
All
Appearance#
You can further customize the appearance of the traffics displayed:
Show tail number
Larger symbols
Alerts on nearby/conflicting traffics#
Get immediately notified in case of nearby conflicting traffic directly on the map. You have the option to enable alerts by type:
Visual alerts
Audio alerts
Choose one or both as preferred. Audio alerts will be reproduced in the language set for the app.
To ensure alerts function, make sure you have:
connected the app to a Traffic Sources on sensors or to SafeSky via native integration
selected a symbol preference on the Display traffic on map section (if None is selected, traffic won’t be displayed!)
toggled on the preferred alert option on Map Options > Traffic Information > Alerts on nearby/conflicting traffics
Note
Traffic alerts will only work if take-off has been detected or triggered and GPS accuracy is good enough to display the current position of the aircraft on the map.
The traffic algorithm is smart and will only alert your of converging traffics. It distinguishes between two level of alerts:
Traffic Information: Alerts about nearby traffics on a collision course that are less than 45 seconds away
Traffic Warning: Alerts about nearby traffics on a collision course that are less than 20 seconds away
SafeSky#
Our subscription plans (Smart Lite, Smart Classic and Smart Advanced) include a SafeSky subscription. You can turn on this feature to have SafeSky’s live traffic data directly displayed on the map and stream your position to SafeSky’s servers as soon as a take-off is detected. Thanks to this native integration, there is no need to download SafeSky’s app nor to have it open in the background or as split screen anymore. As part of the activation, you will be requested to enter an e-mail address and an aircraft registration (in case no aircraft has been set yet). You can deactivate this feature at any time.
To benefit from SafeSky’s real-time traffic information, follow these steps:
Check you have app version 8.3.200 or higher
Get or upgrade to one of the new subscription plans: Smart Lite, Smart Classic or Smart Advanced
Go to Map Options > Traffic Information > SafeSky and toggle on Connect to SafeSky
Accept the Terms of Use and follow the given instructions
Check that you have selected a symbol preference on the Display traffic on map section (if None is selected, traffic won’t be displayed!)
Once you are connected to SafeSky and selected any display traffic style, traffics will be displayed around the center of the map or your current location when flying.
Important
By connecting to SafeSky you agree to their Terms and Conditions. Open the Terms of Use link to read the information.
Note
SafeSky is a collaborative traffic sharing service using data connection of your device. Connecting to SafeSky requires a subscription plan that includes the service.
Waypoints#
You can define here the waypoints to be displayed. You can show/hide our database, useful if you are using an own database (via Air Navigation Manager for example).
You may filter aerodromes with short runways, and you can filter to only show those with asphalt/concrete surfaces. Filtered aerodromes will be displayed dimmed and interaction with them is not possible.
Profile view#
Hide/show the profile view.
Color Theme#
Easily adapt your map appearance to changing light conditions. In Map options > Color Theme choose between Light, Dark or Automatic. Our optimized Dark Mode features red tones for better contrast and usability in low-light conditions, making it ideal for night flights. Effortlessly switch between Light and Dark modes or let the app adapt automatically based on your device’s system time settings. With Automatic mode, as the sun sets, your map transitions into Dark mode, ensuring optimal visibility at all times.