
Configuration#
From the configuration menu, you may set several properties for your app.
Note
The display is different on tablet and phone.
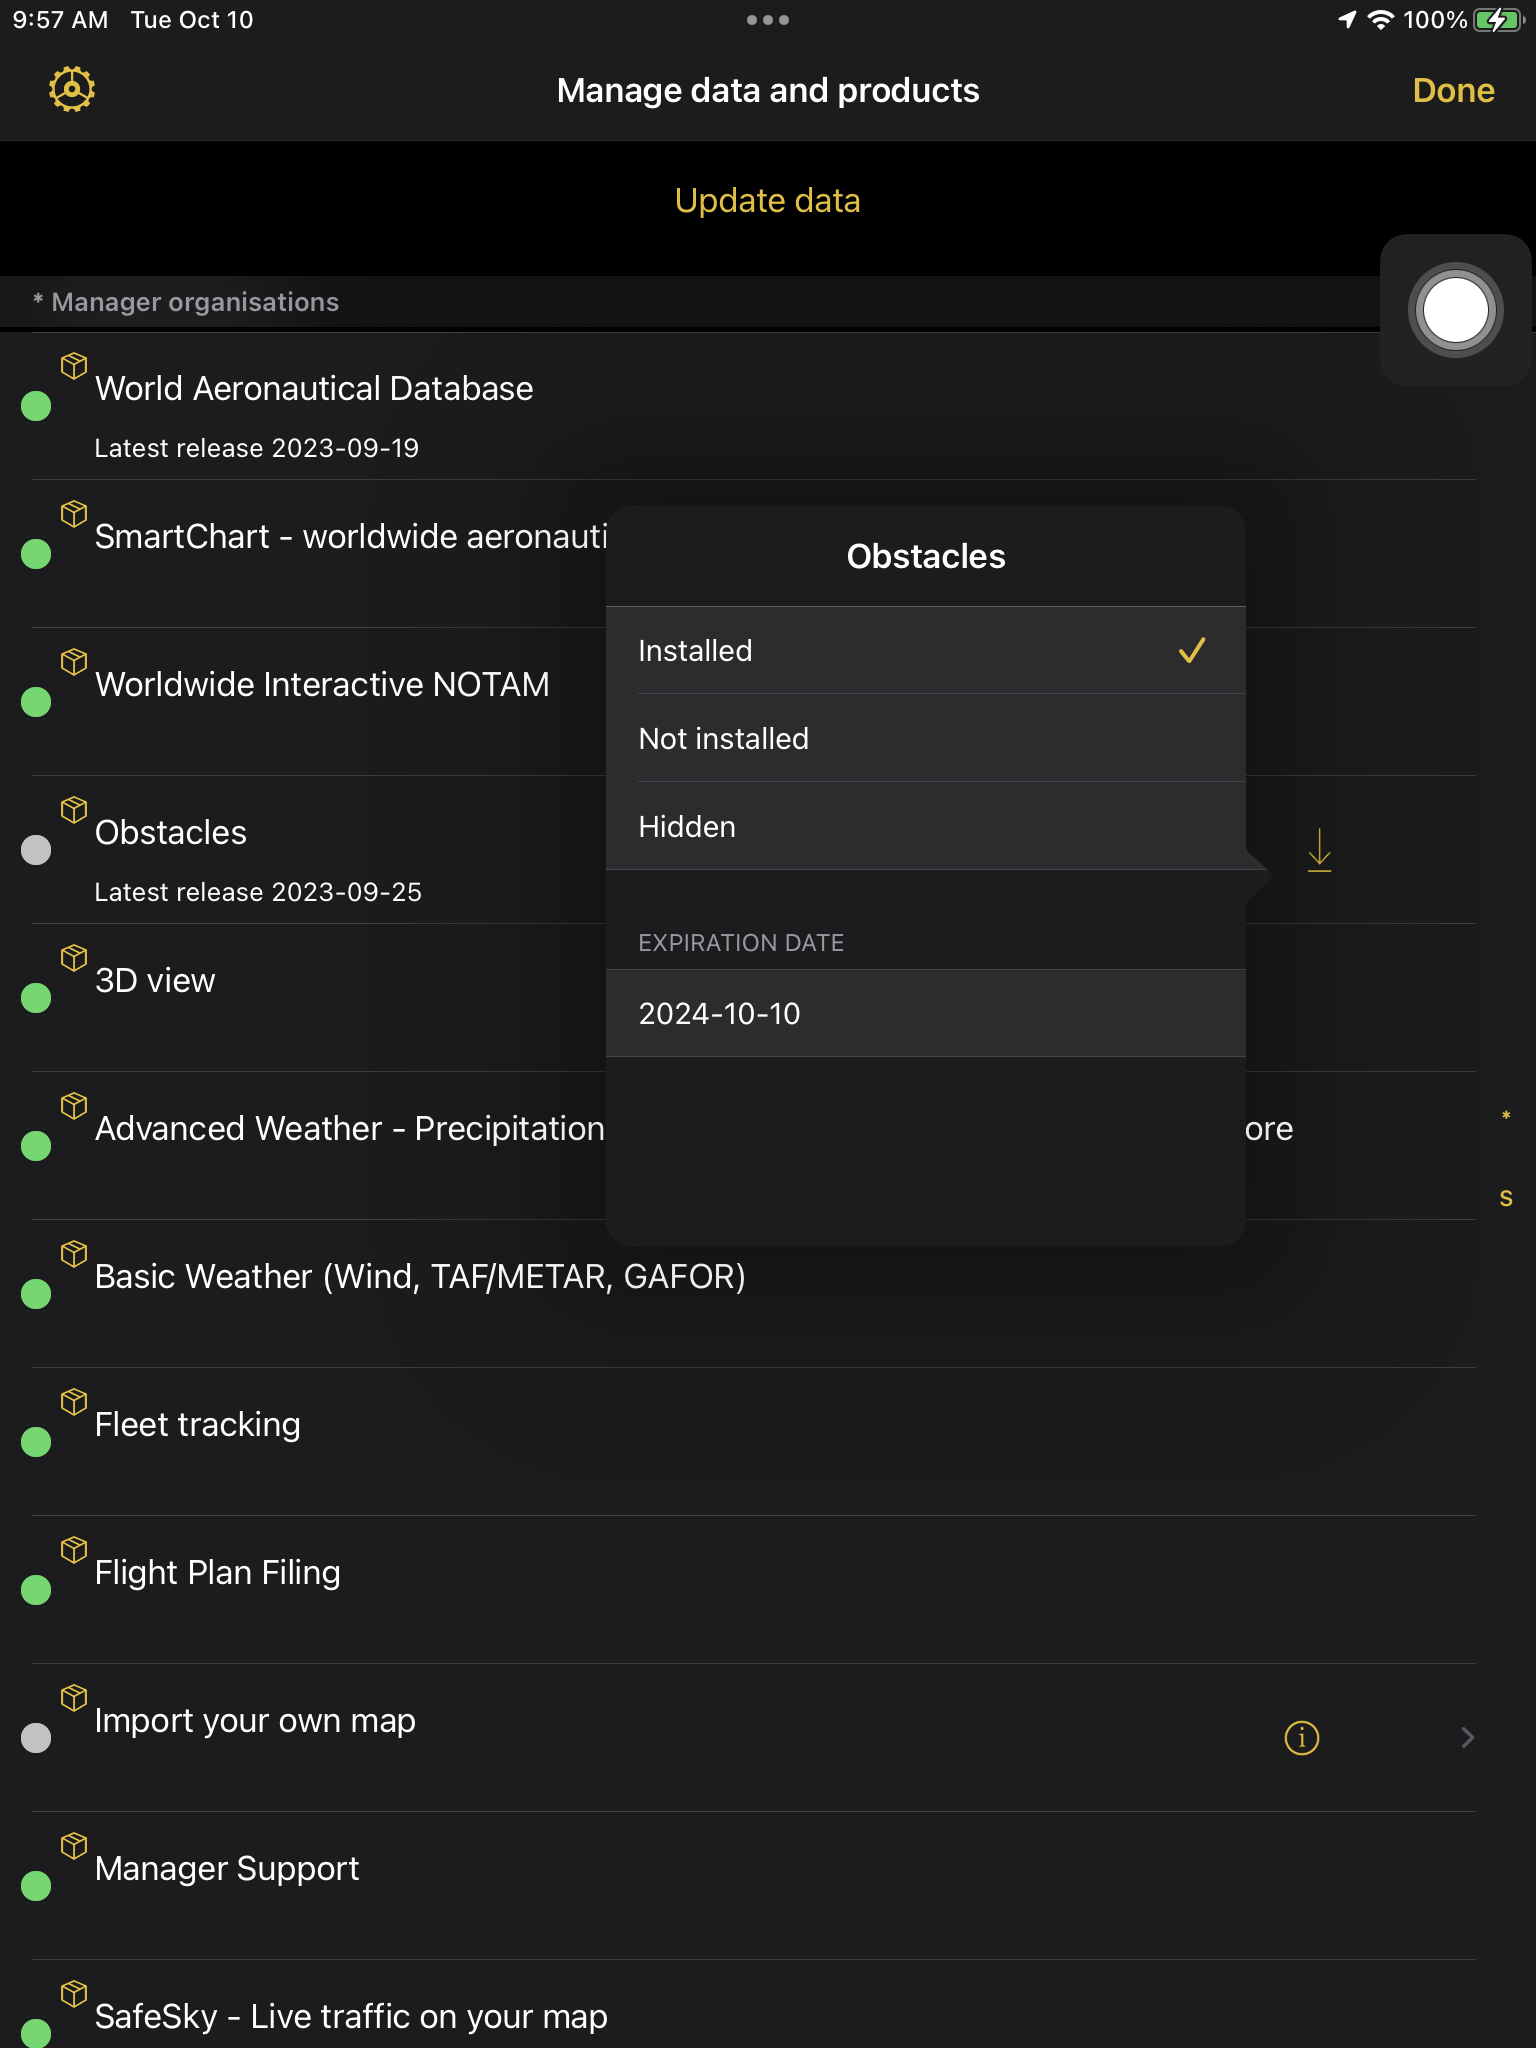
Manage data and products#
In Manage data and products, you can review all your acquired products. (Un)Installation of products can be done by tapping on the download icon and selecting the Installed / Not installed options. You may hide products that you don’t use for the mean time by tapping on the Hidden option. To unhide them again press on the ⚙️ and turn on the option Show hidden products.
Product Settings#
The products settings offers the option to manage your hidden products, product updates and restore your purchases.
Show hidden products - Enabling this option displays all your hidden products in Manage data and products window.
Product updates - Product updates might be available; you have the option to automatically update product when connected to the Wifi or you may want to Manually update them.
Restore Purchases - Restore all purchases from your account.
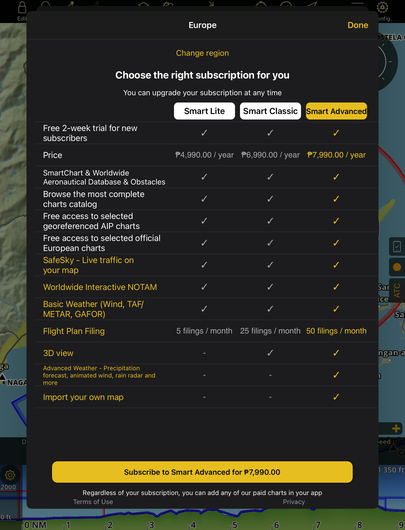
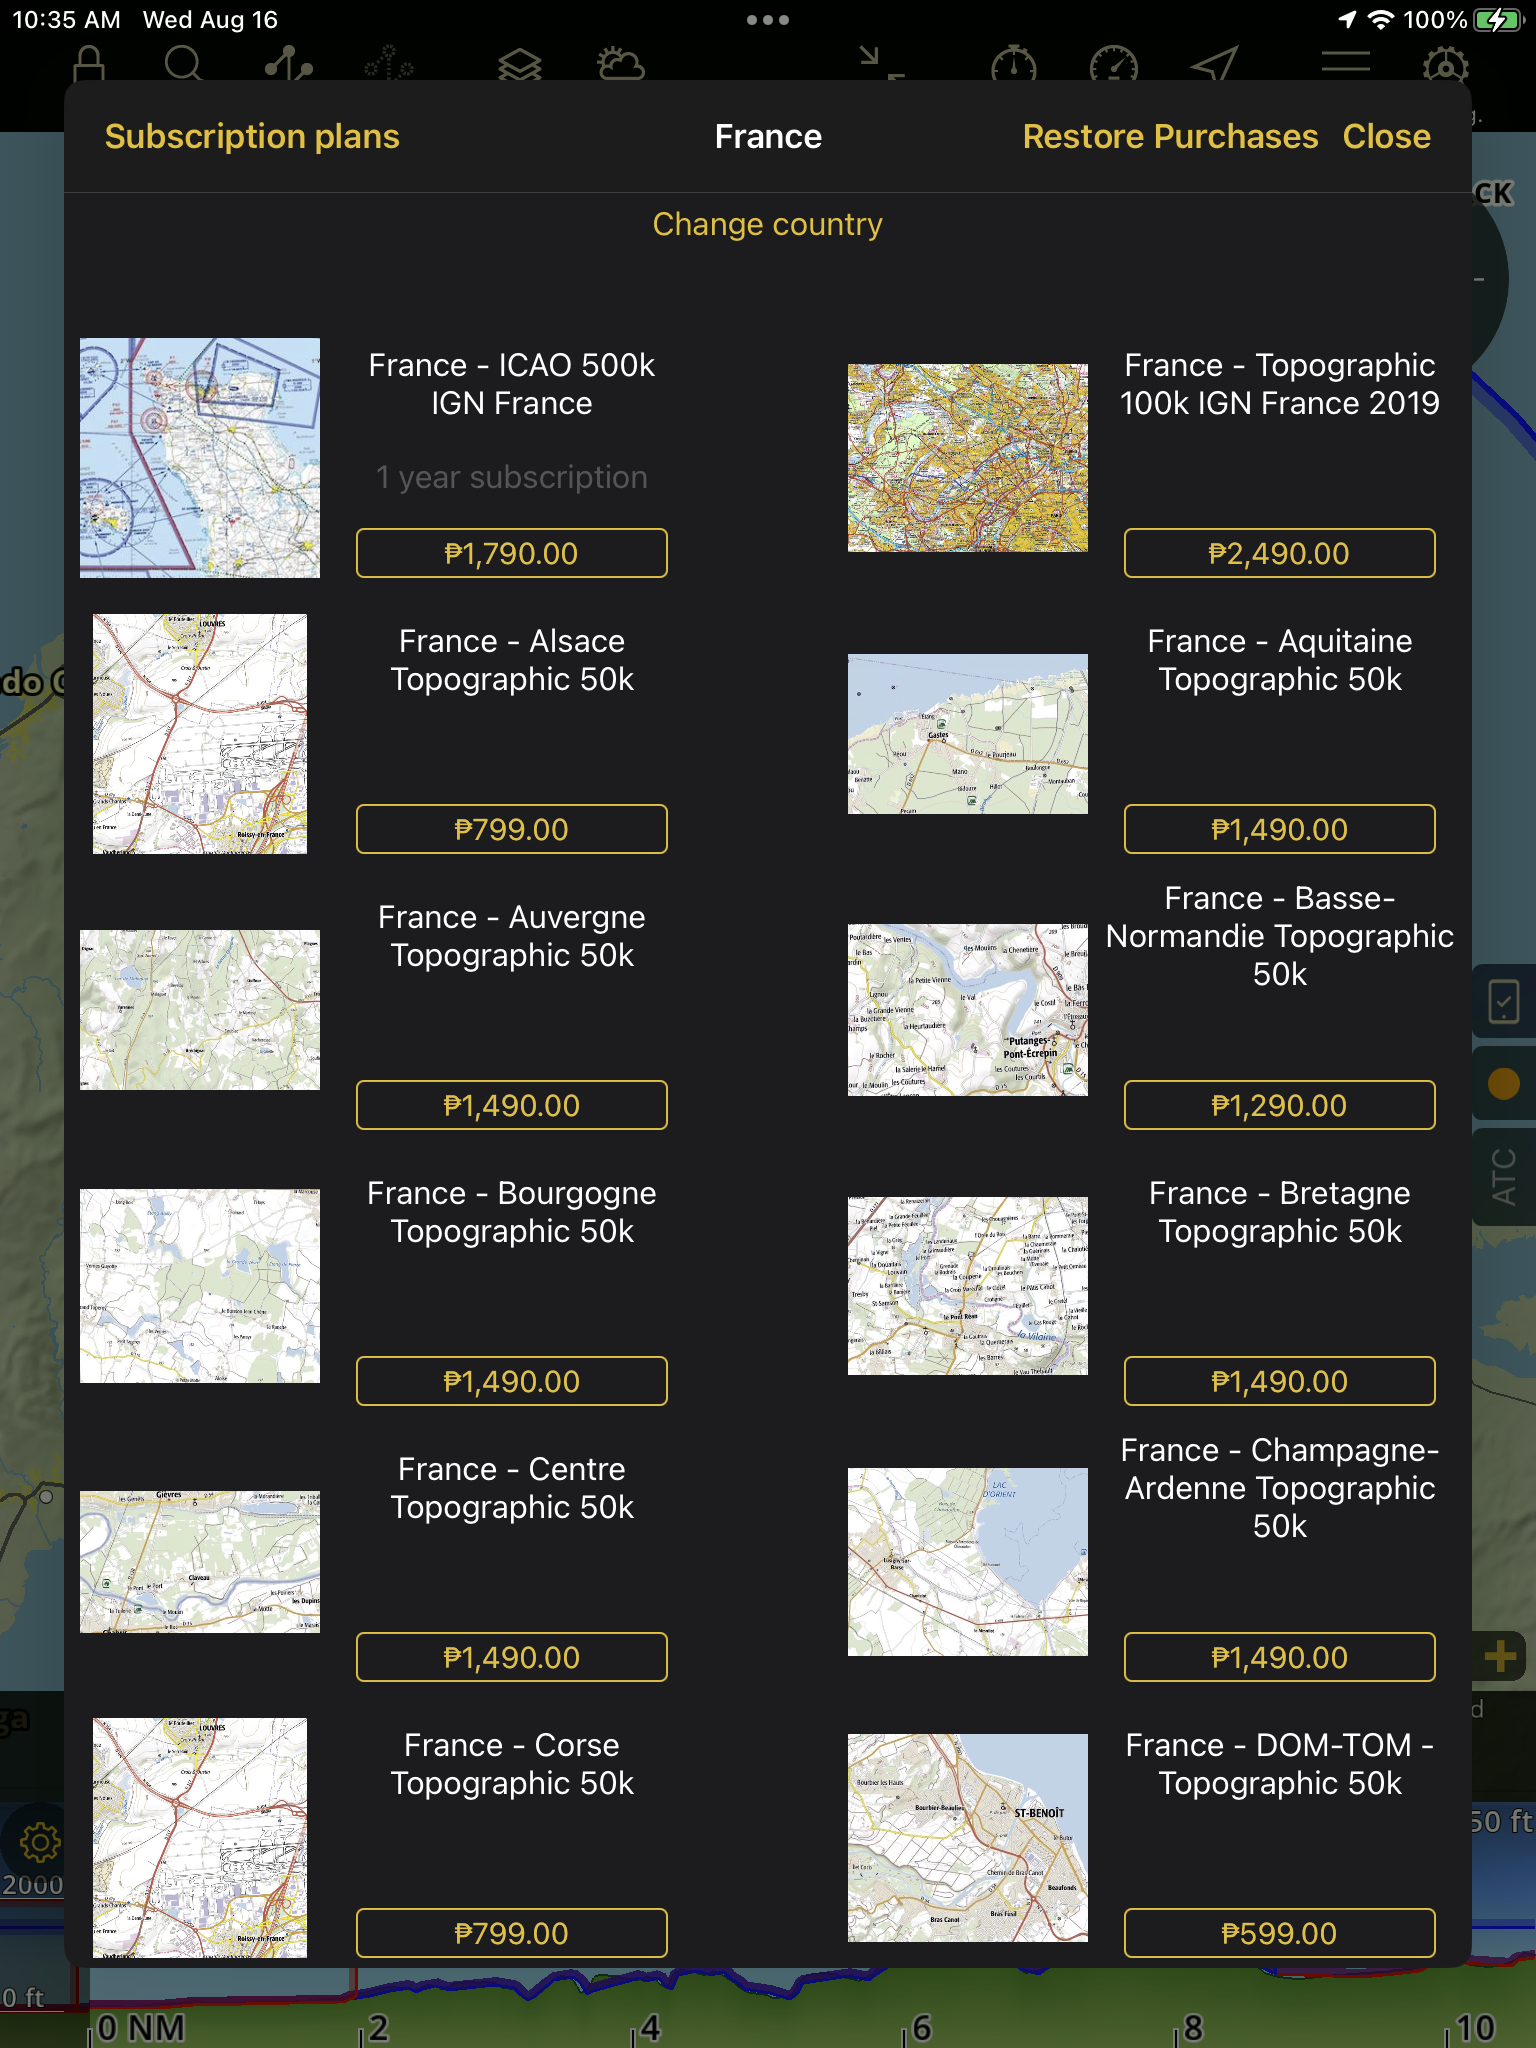
Store#
The store gives you access to our catalogue of charts, maps and data. Purchases done in the app will use the OS payment service.
Account#
An accout will give you access to some advanced features like
route synchornization among devices.
products synchronization across different operating systems (Android/Google/Windows)
flight review thanks to the flight tracking functionality.
Create/connect to air navigation services through social media or an email account. 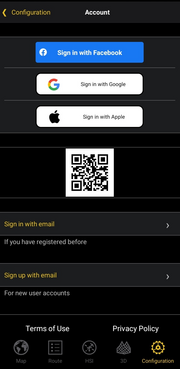
Link a Device using a QR Code#
You can sign in or link your account to another devices using a QR Code especially on Windows where Apple or Social login is not yet available.
In the Account window, sign in first to any iOS/Android device
Tap ‘Link a Device’ then allow access to Camera. Note that in Android, you may have to wait for some additional installations and tapping again the button multiple times.
On the other device to be linked, go to Account window to display the QR Code
Using the first device, scan the QR Code presented on the 2nd device
Wait for a while until successfully signed in
You can link up to 3 devices per account.
Air Navigation Manager#
Review your Air Navigation Manager organizations. Choose which organization’s data should be shown on the map.
Language#
Change your app language. Mind that you need to restart the app to apply the changes.
Instrument#
Choose which Instrument is shown when resizing the screen.
Settings#
Set your own preferences that affect the whole functionign of the app:
Change the units to be used for distance, speed, runway length, altitude, pressure, coordinate and time.
Specify your preference for approach chart display:
Manual
automatic for departure and arrival aerodrome
automatic for all aerodromes along the route
automatic for the aerodrome closest to your current position.
Choose either magnetic north or true north for tracks and bearings.
Clear the cache of downloaded data (Such as SmartChart tiles)
Change the instruments’ north reference
Enable or disable the audio effects
Allow mobile network download. Mind that activating this option may induce additional operator fees.
Activate the WebDAV server
Specify the Pilot In Command (PIC)
Show METAR/TAFs in raw or decoded
Activate or deactivate the disclaimer shown when the app starts
Send a report: Use this option on request from our support team. It provides us with valuable debug information regarding your application, device, products, sensors, map, etc.
Reset settings to factory defaults
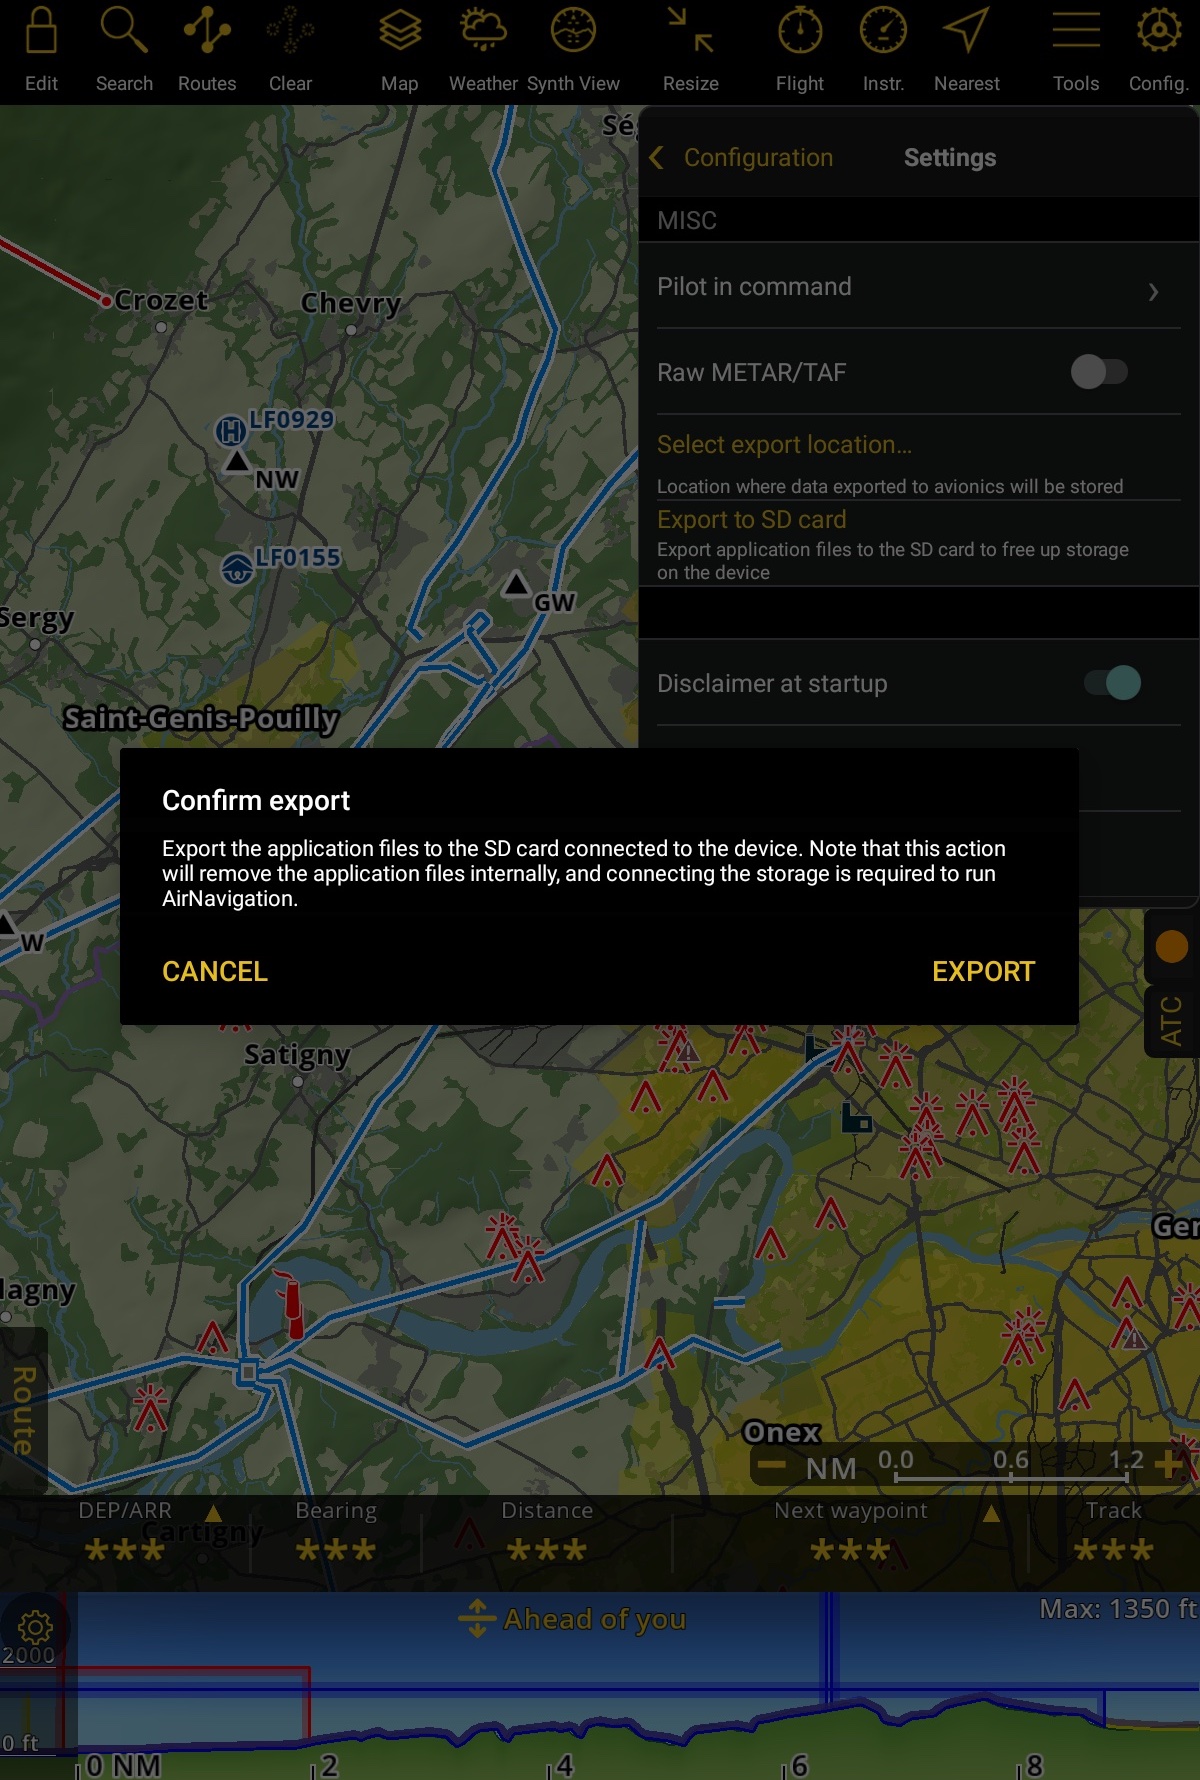
Export to SD Card (Android only)#
By moving data to an SD card, you free up internal storage on your device and more space to download large files.
Requirements:
SD card properly installed in the device with at least read/write speeds from 30MB/sec (SDXC U3 or better).
Ensure your SD card has enough space before exporting the data
Tap Config (Configuration) > Settings.
Scroll until the MISC section.
Tap ‘Export to SD card’.
Tap ‘EXPORT’ to confirm.
After the process, restart the application to apply the changes.
About#
This panel displays the current Air Navigation Pro version, necessary when communicating with our support team.
It gives also access to the What’s New information
Finally you can view the licences of the different software libraries that are used within the app.
Disclaimer#
Displays the disclaimer.
Privacy policy#
Redirects to our privacy policy.