Briefing#
Air Navigation Pro offers a convenient way to access and generate essential flight documents. After Route Creation and navigating to Briefing, the app generates the following pre-flight forms:
Once the flight is saved in the Logbook , an additional post-flight document— Post-flight —is automatically created.
Access Briefing#
On iPads/Tablets: From the Tablet Menu Bar, → Flight →
 Briefing.
On Phones: Config → Flight Parameters →
Briefing.
The flight briefing is generated for each flight. A flight is defined by its date, origin/destination, and aircraft. If any of these details change, a new flight briefing will be created automatically.
Briefing Status#
Each briefing will have a status, indicating its current stage:
 Draft: A briefing that was created but has no generated PDF and has never been flown.
 Planned: A draft for which at least one PDF has been generated.
 Active: A planned flight that has become active upon detecting takeoff.
 Archived: An active flight that has been automatically archived or saved to Logbook after detecting landing. It is read-only, and is available as a PDF file.
All documents ![]() can be stored and exported as PDF files for easy sharing as describe in Manage Briefing. They can also be regenerated by either disabling the Keep document option or editing it for Windows devices.
can be stored and exported as PDF files for easy sharing as describe in Manage Briefing. They can also be regenerated by either disabling the Keep document option or editing it for Windows devices.
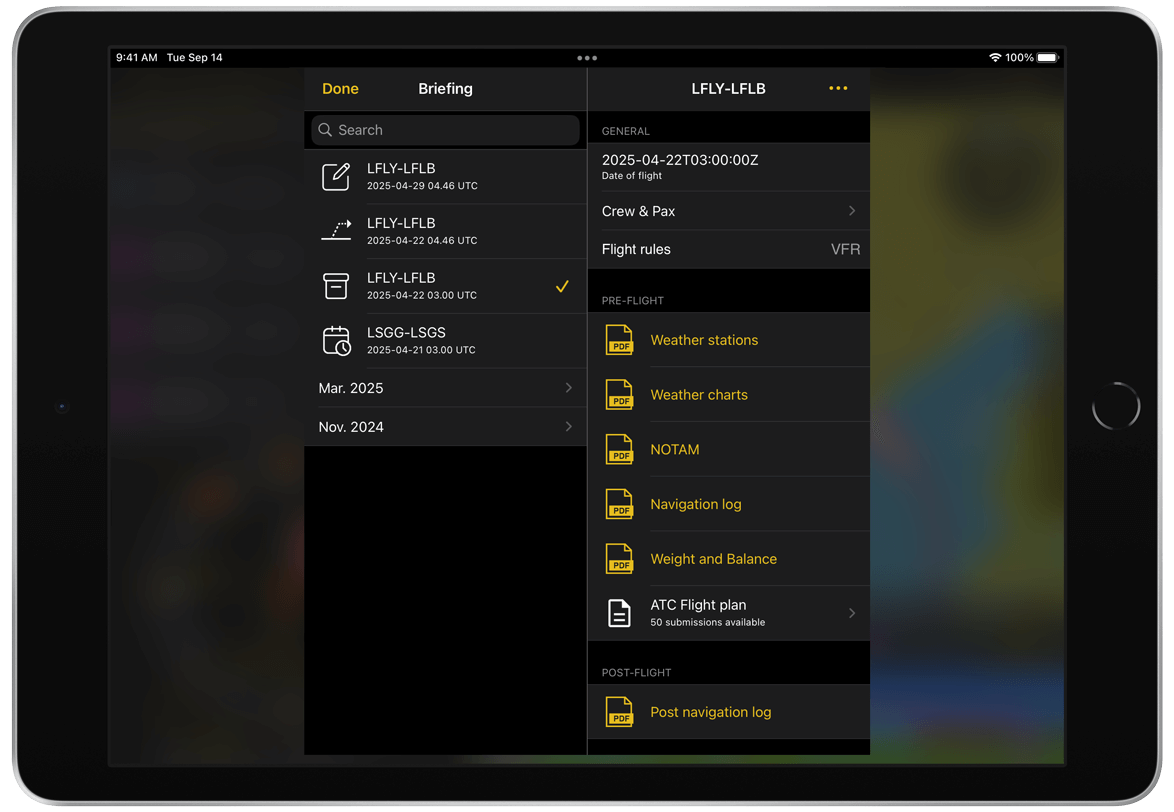
General Section#
Each Flight Briefing includes a GENERAL section, which is applicable to both PRE and POST flight briefings. This section contains details such as the Date of Flight, Crew & Pax, and Flight Rules.
Date of Flight#
Automatically set upon creation but can be modified in Edit mode via Navigation Dashboard → Departure Time.
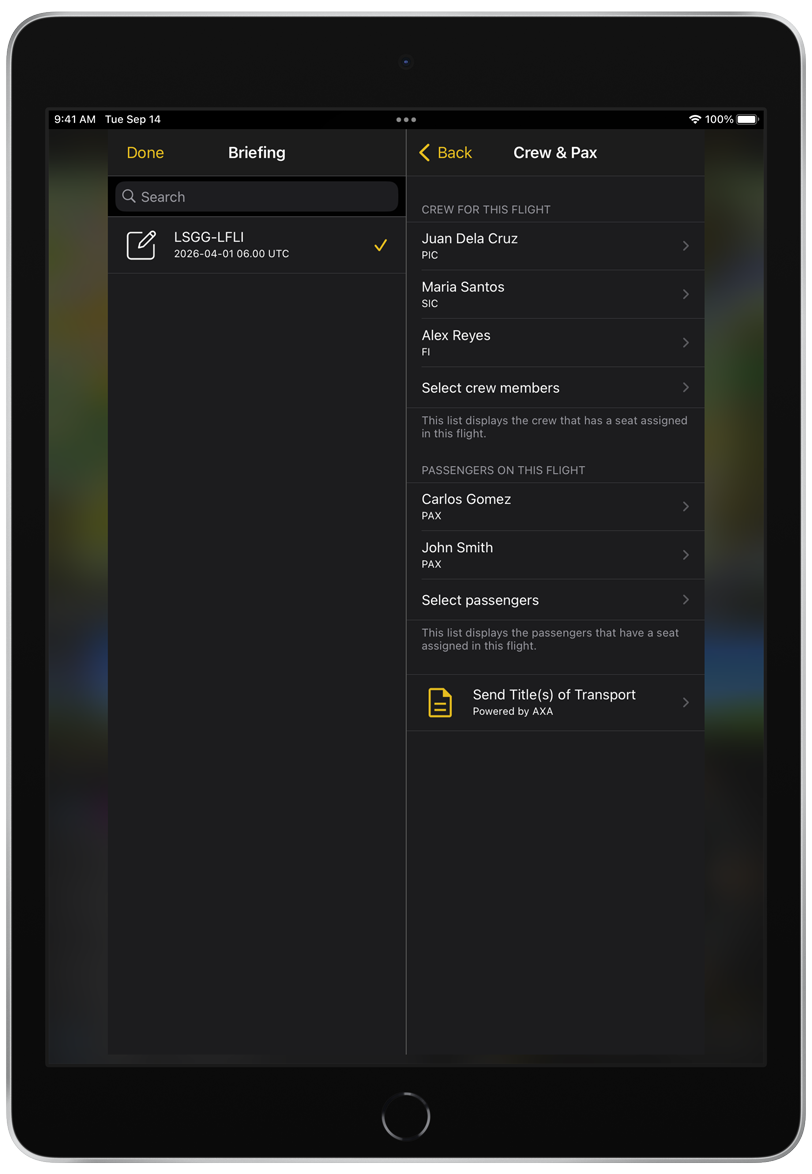
Crew & Pax#
This section allows you to create and manage information about the flight crew and passengers, including assigned roles, seats, weights, and other personal details. The information entered here can also be reused for other flight briefings. Additionally, this panel enables you to Send Title(s) of Transport for routes intersecting the LSAS FIR or when using a Switzerland-registered aircraft.
Add Crew member or Passenger:#
Tap Crew & Pax from the main menu.
Tap Select crew members or Select passengers.
Tap
 to create New Occupant.
Tap New Occupant, assign seat or leave unassigned.
Select Role and enter Name.
Fill other fields as needed.
Tap Back to save changes.
Note
Assigned crew/passengers appear in the selected list.
Unassigned entries remain for reuse.
Hint
Delete by tapping ![]() icon.
icon.
Note
Cannot edit once Navigation Log or W&B PDF is generated.
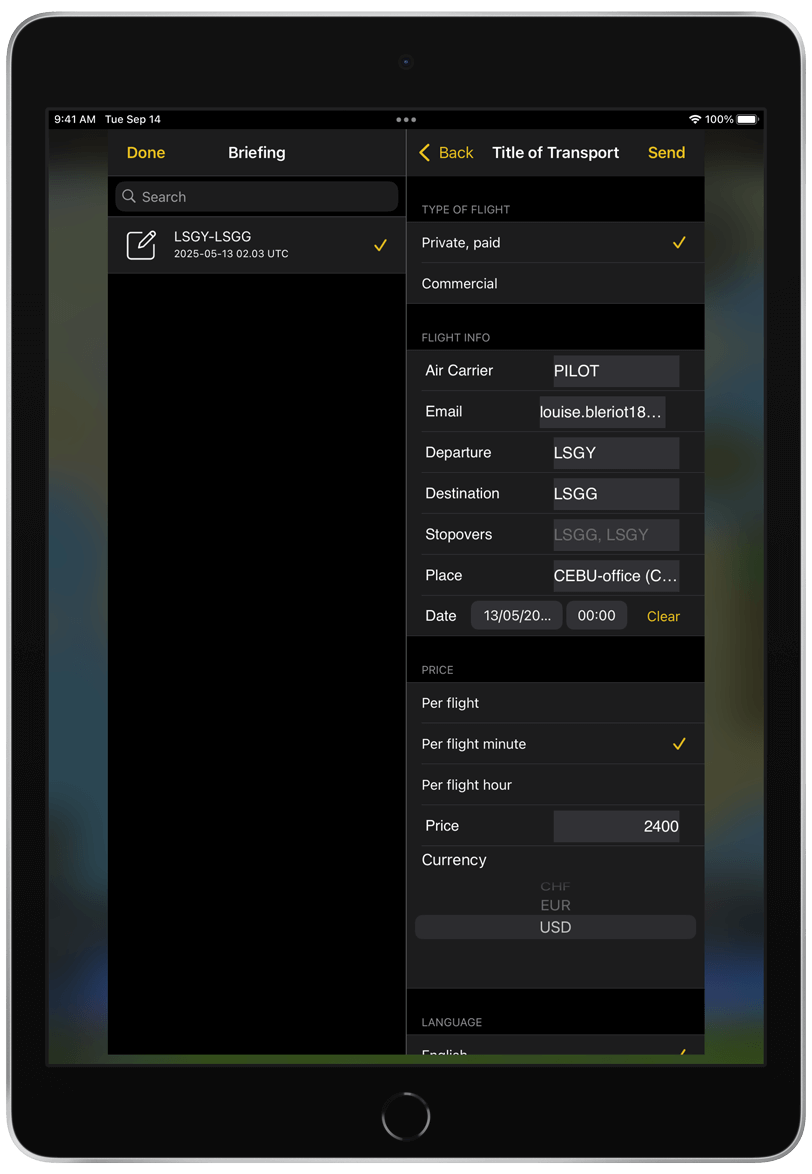
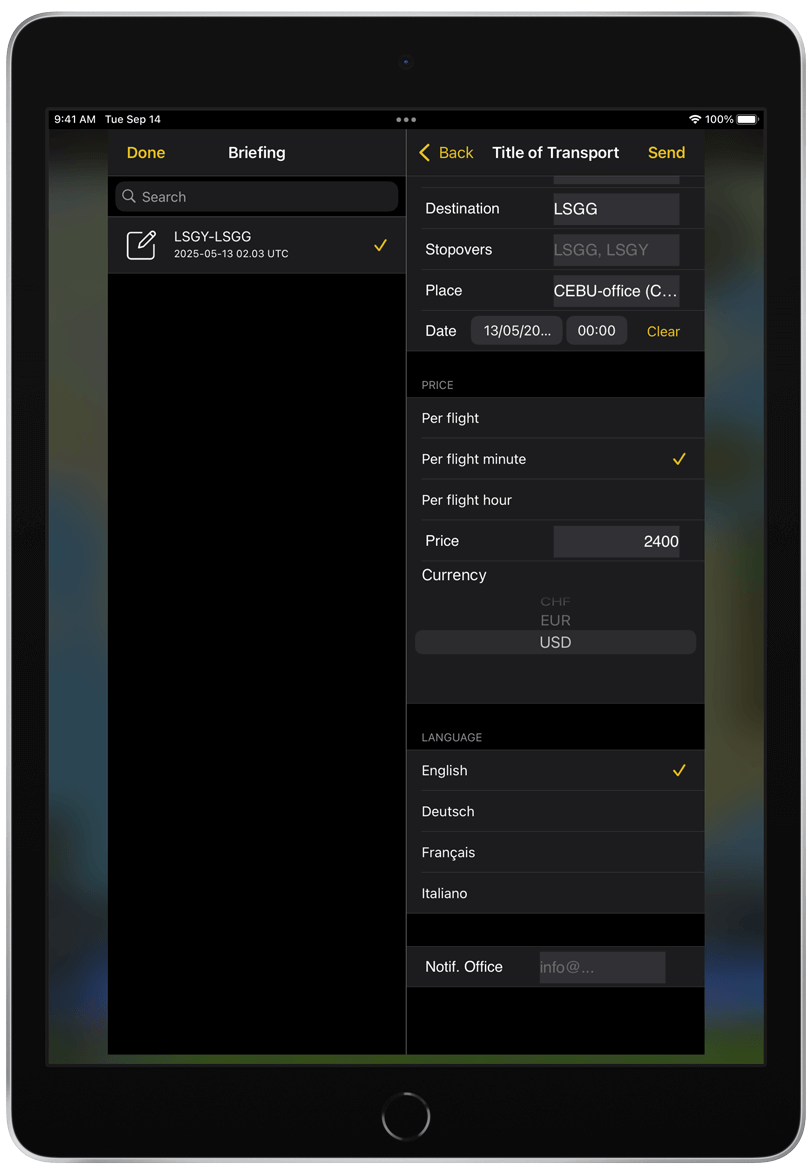
Send Title(s) of Transport#
Generate official Title of Transport documents for passengers.
To generate and send this document:
After route creation, go to Briefing → Crew & Pax.
Select crew members, add passenger information, and assign seats.
Tap Send Title(s) of Transport.
Complete required fields: Type of Flight, Flight Info, Price, Language, Notification Email.
Tap Send.
An email containing the Title of Transport will be sent to the air carrier and to each passenger. The email subject and content are generated automatically based on the selected language.
Note
Only available if route intersects LSAS FIR or aircraft is Swiss-registered (HB).
The Air Carrier, Passengers, and Price fields must be completed before the document can be sent.
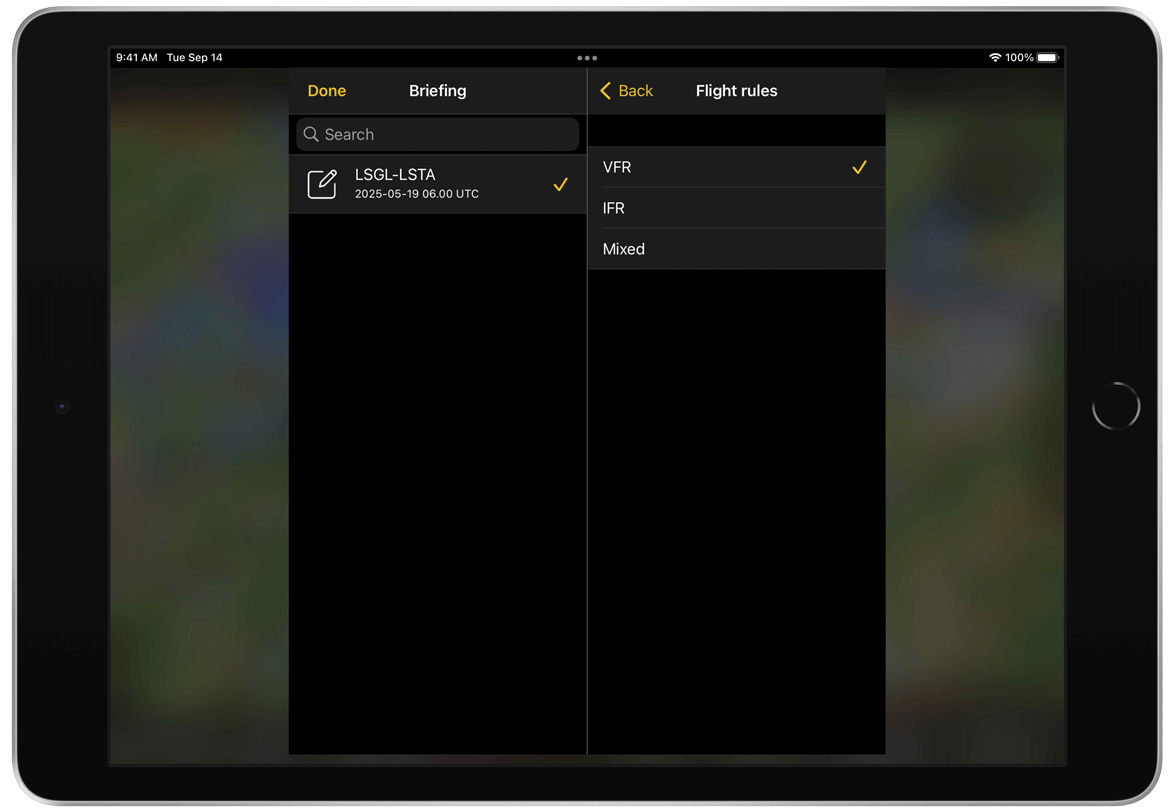
Flight Rules#
Set regulations applied across the app, including Navigation log, ATC Flight Plan, and Cruise altitude.
Note
Cannot edit Flight Rules after generating Weather Charts or Navigation Log PDFs; changes must be made in ATC Flight Plan.
Pre-flight#
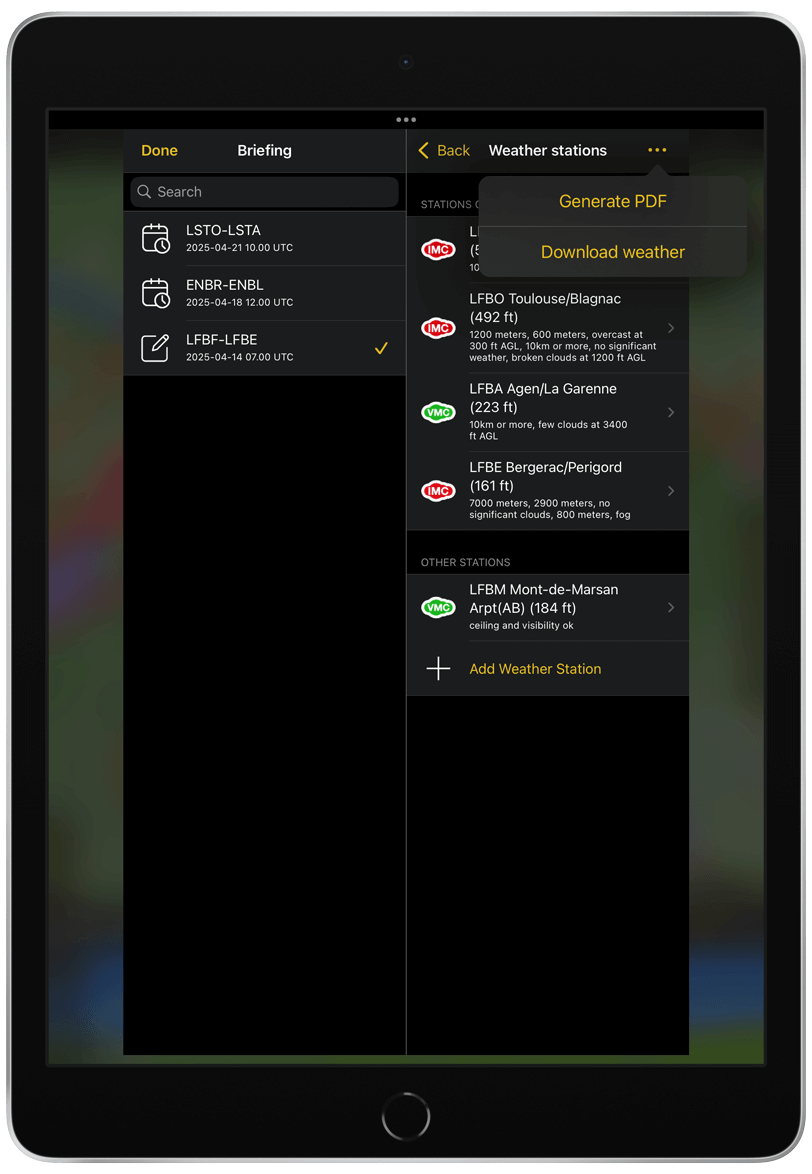
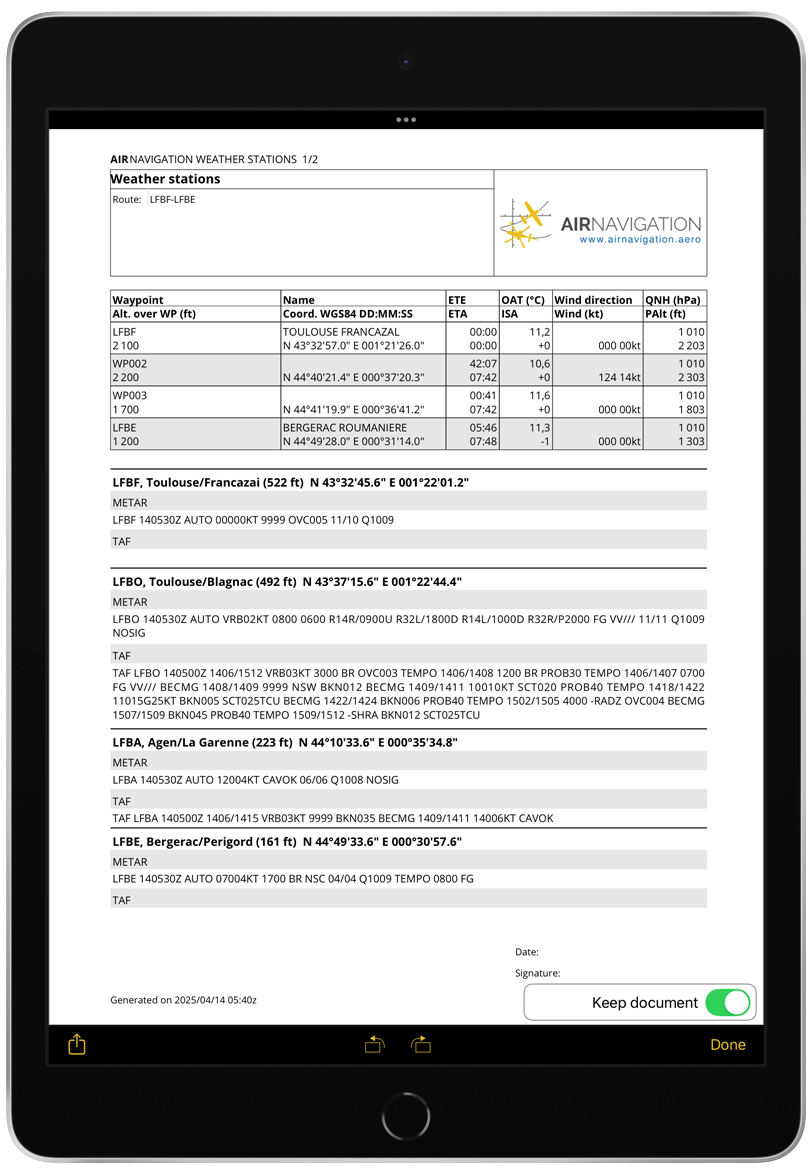
Weather stations#
Generate route-based TAF and METAR briefings.
Steps:
Load/create route.
Go to Menu → Flight → Briefing.
Select PRE-FLIGHT → Weather Stations.
Tap stations to view details.
Tap
 → Download weather → Generate PDF.
Enable Keep document to save.
Tap
 to print/share PDF.
Hint
Swipe to delete added weather stations.
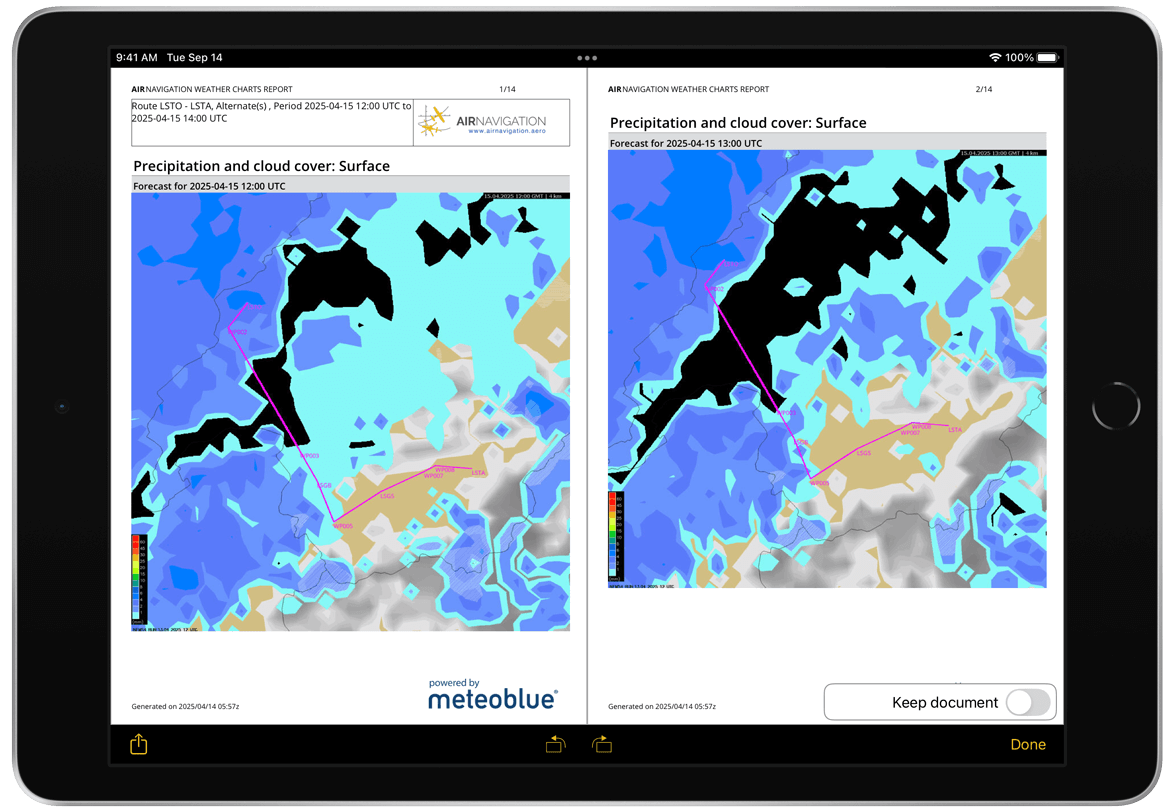
Weather charts#
Available for Advanced subscribers. Includes 1-hour forecasts for precipitation, clouds, and wind at various altitudes.
Steps:
Load or create a route on the moving map.
Go to Tablet Menu Bar → Flight (Flight Parameters on Phones) → Briefing.
Select your route from the list.
In the PRE-FLIGHT section, tap Weather charts.
Tap the
 icon to download the Weather chart data and generate PDF.
In the document, enabling Keep document saves it to the PDF view.
Click the
icon to share or print the PDF. Share and print options may vary on Windows device and the PDF viewer in use.
Note
You cannot generate Weather Charts for a date more than one week in the future.
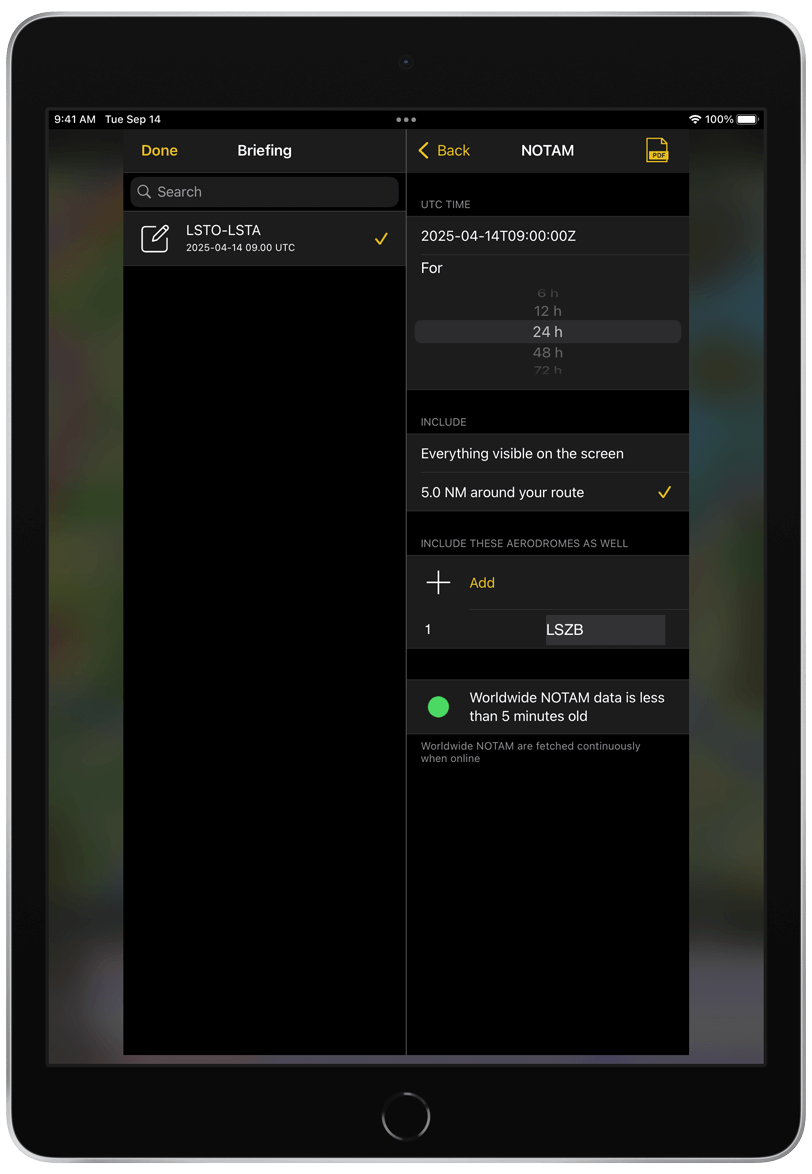
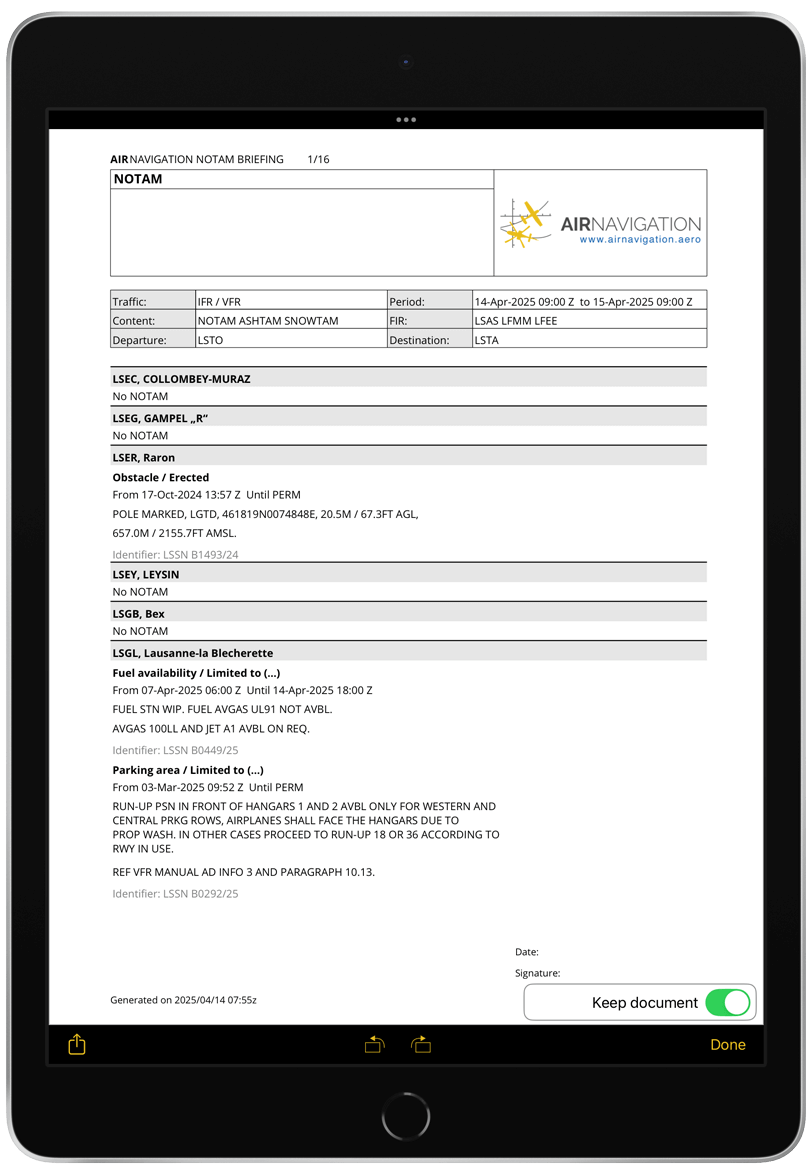
NOTAM#
Include route-specific NOTAMs in pre-flight briefing.
Steps:
Load/create route → Briefing → NOTAM.
Set UTC time and filter for your flight.
Choose Everything visible or 5NM around route.
Add additional aerodromes if needed.
Tap
to generate document → to print/share.
Note
Requires valid ICAO codes for departure/destination. Dates cannot be in the past.
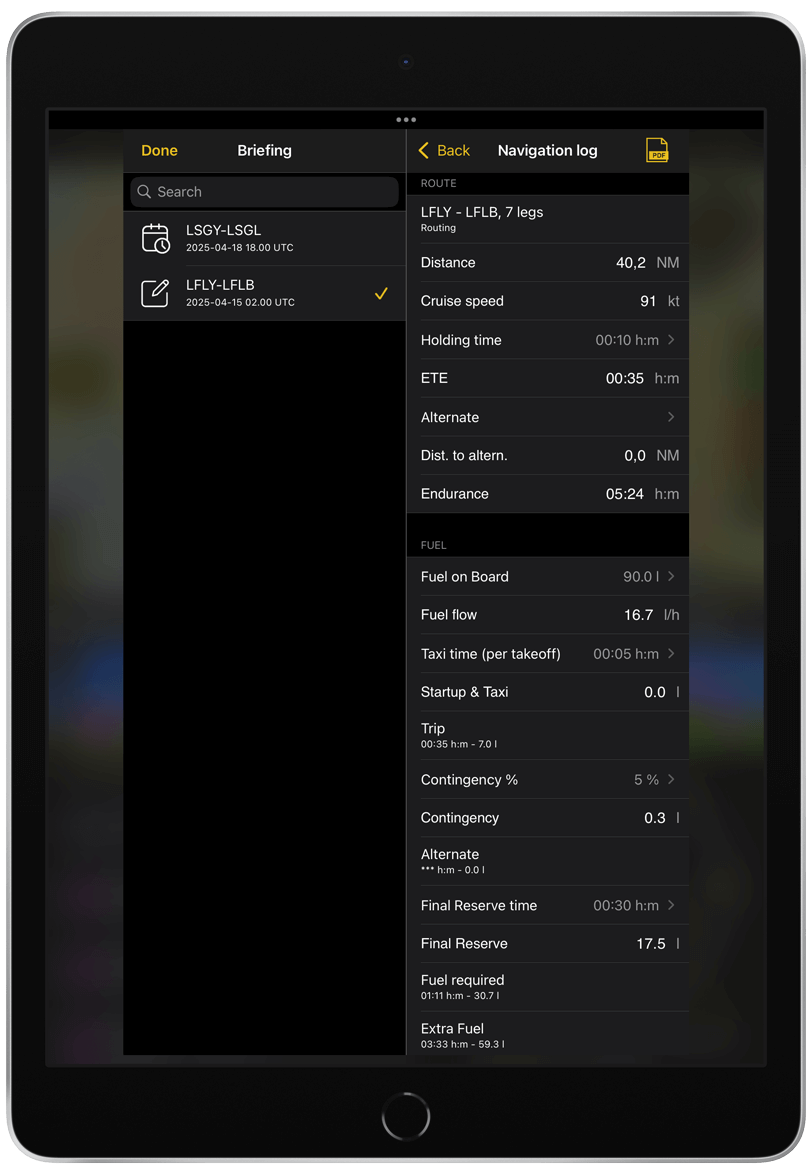
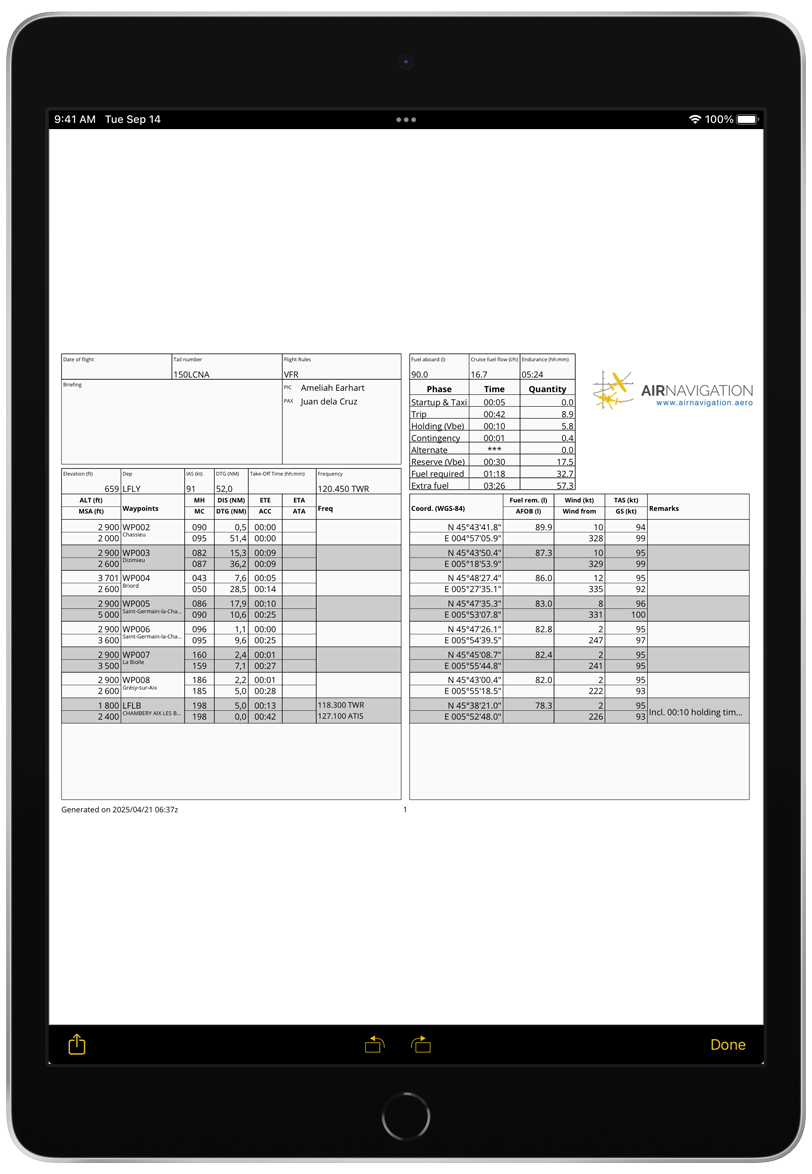
Navigation log#
Generate a detailed operational flight plan with route and fuel information.
Steps:
Load/create route → Briefing → Navigation Log.
Set route details (Holding time, Alternate) and fuel info.
Tap
→ enable Keep document → .
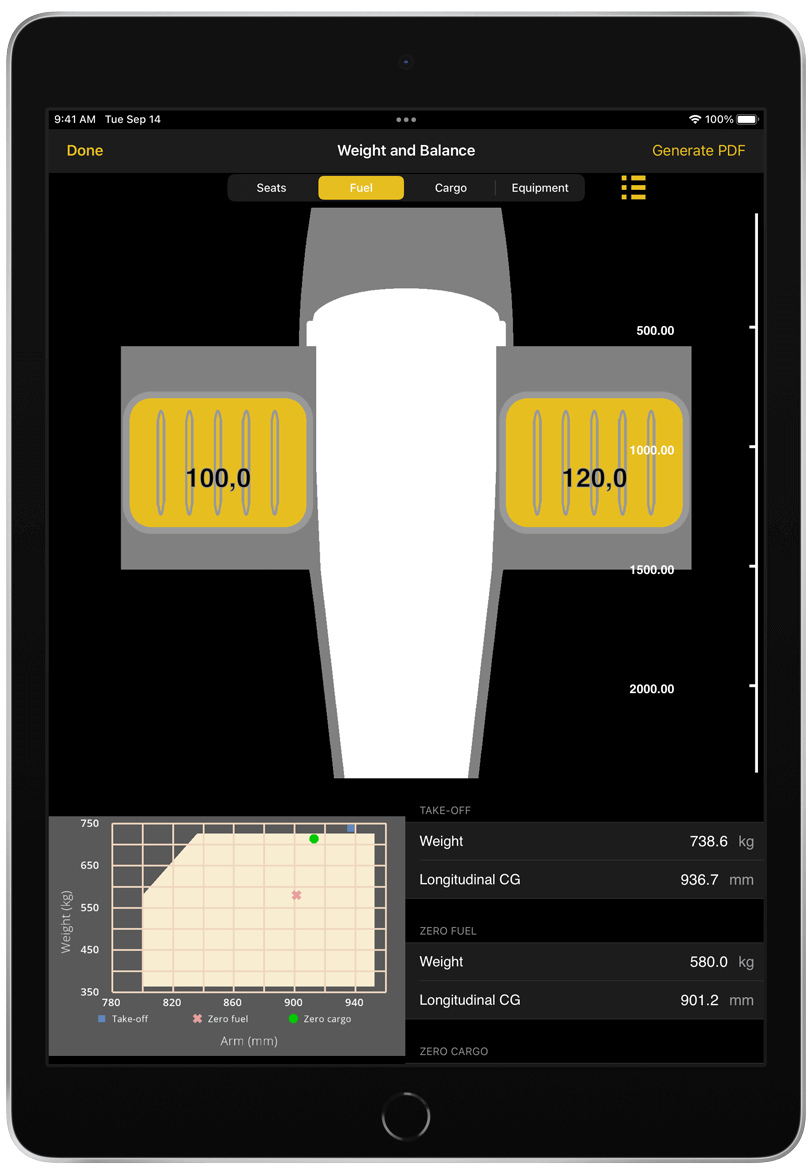
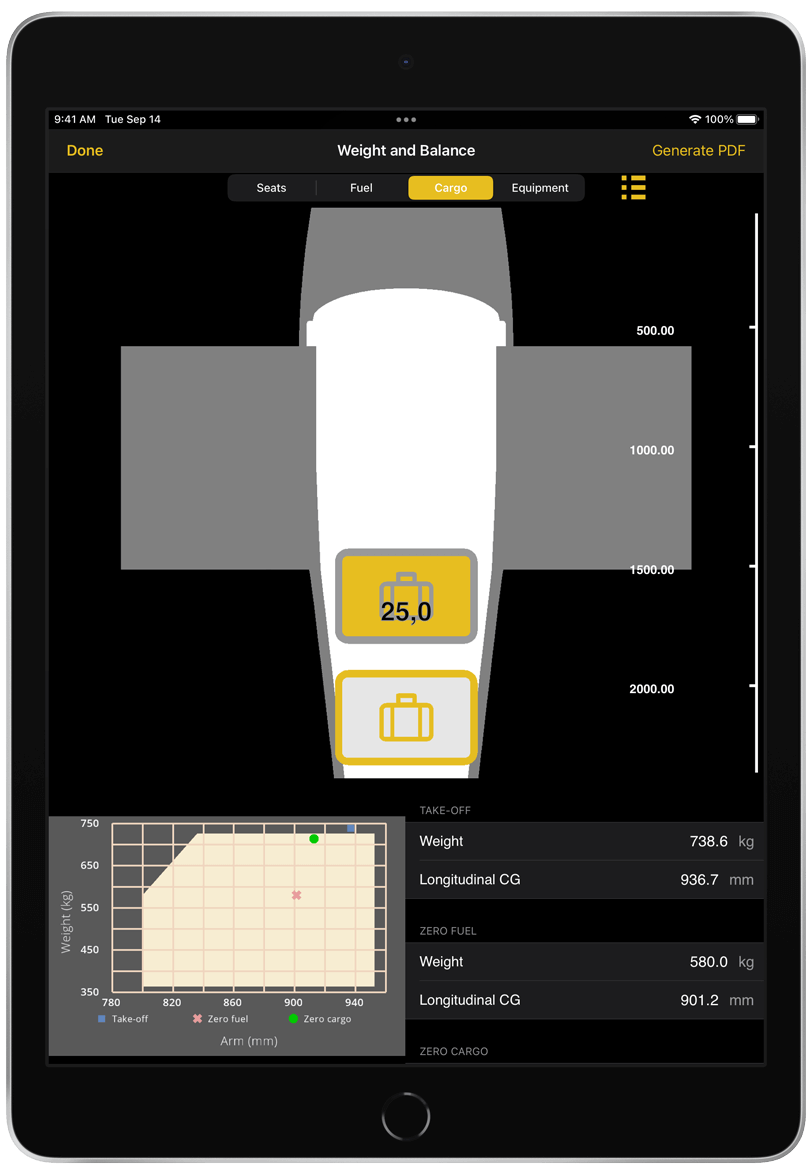
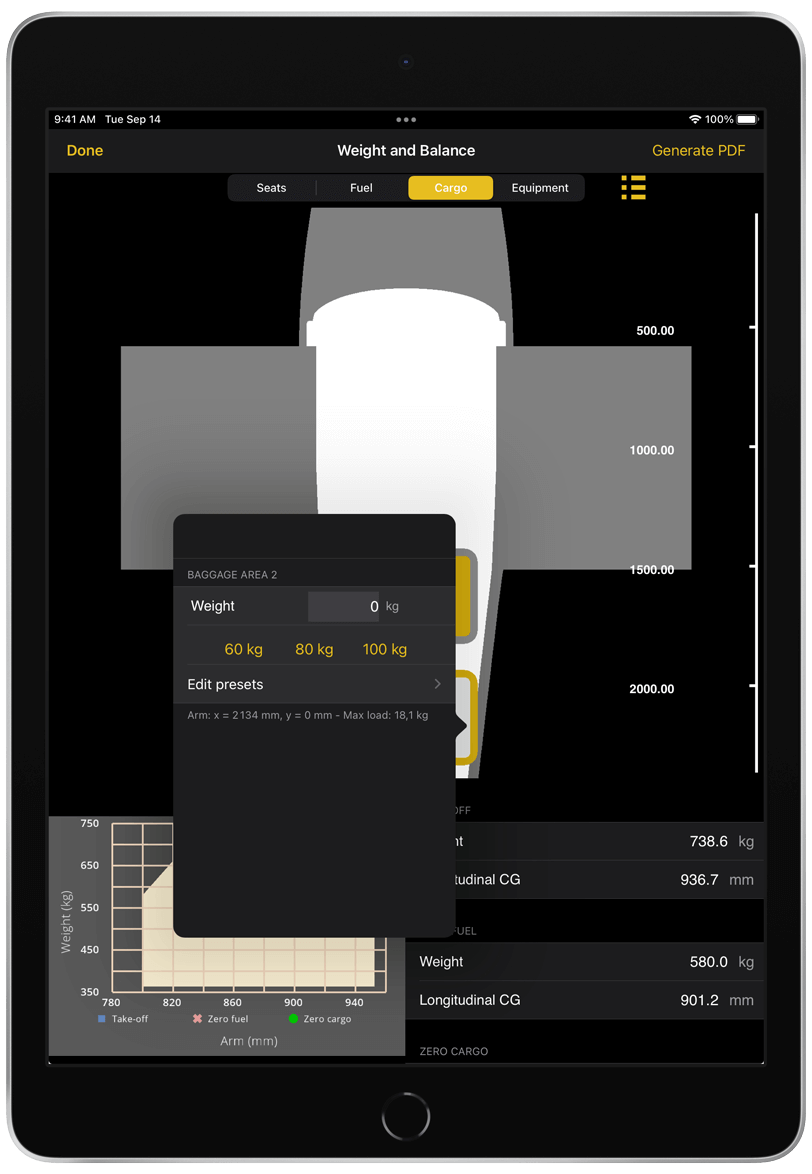
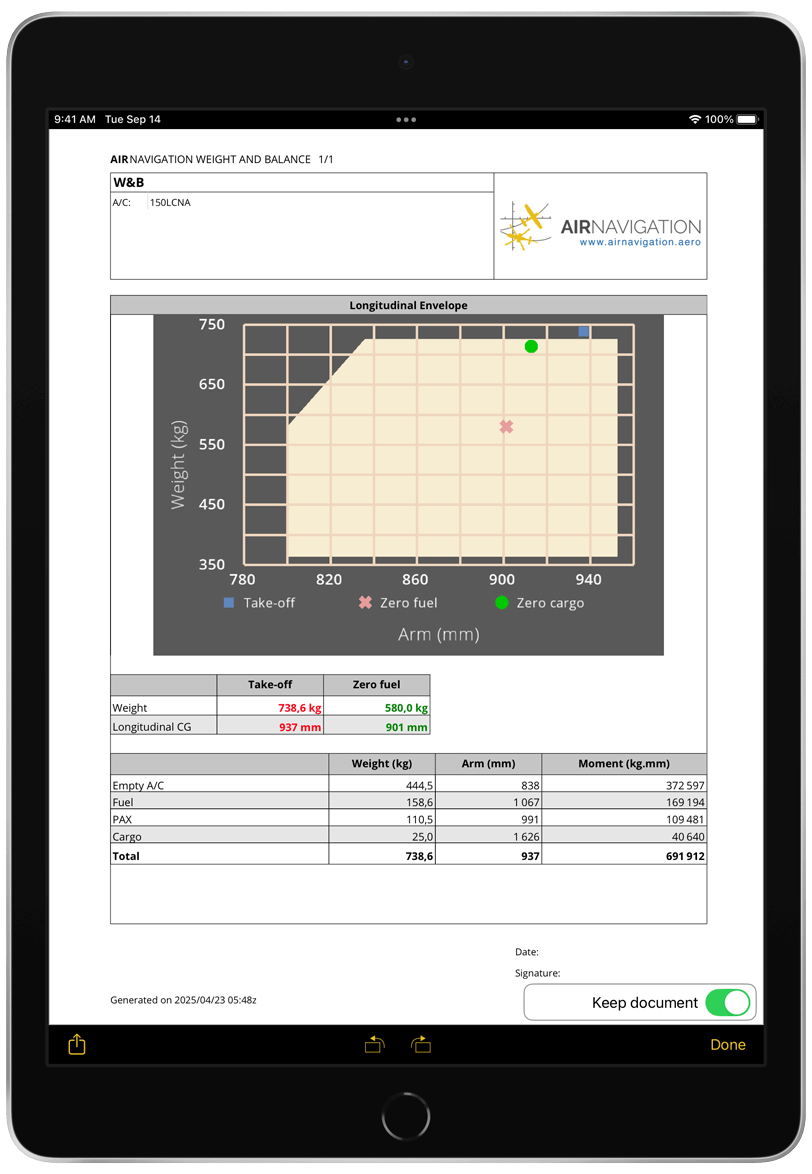
Weight and Balance#
Calculate aircraft weight, CG, and ensure compliance. To generate this, make sure that the Weight and Balance data in your Aircraft Profile is properly set.
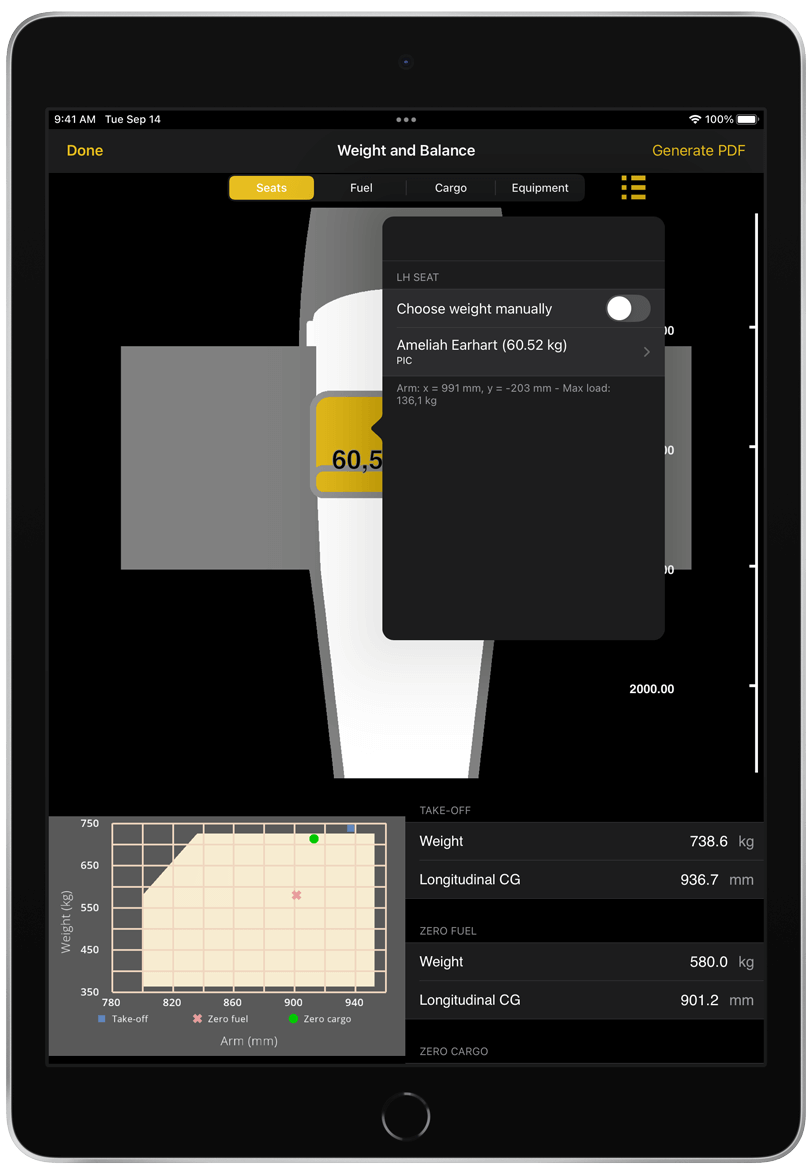
Steps:
Load/Create route on the map
Go to Tablet Menu Bar → Flight (Flight Parameters on Phones) → Current aricraft
Edit your selected Aircraft’s Weight and Balance as needed.
Go to Briefing → Weight and Balance
Set weight under Seats, Fuel, Cargo and Equipment
Tap the
icon to generate the document.In the document, enabling Keep document saves it to the PDF view.
Click the
icon to share or print the PDF. Share and print options may vary on Windows device and the PDF viewer in use.
Tip
You can assign seats to your created crew and passengers within the Weight & Balance section.

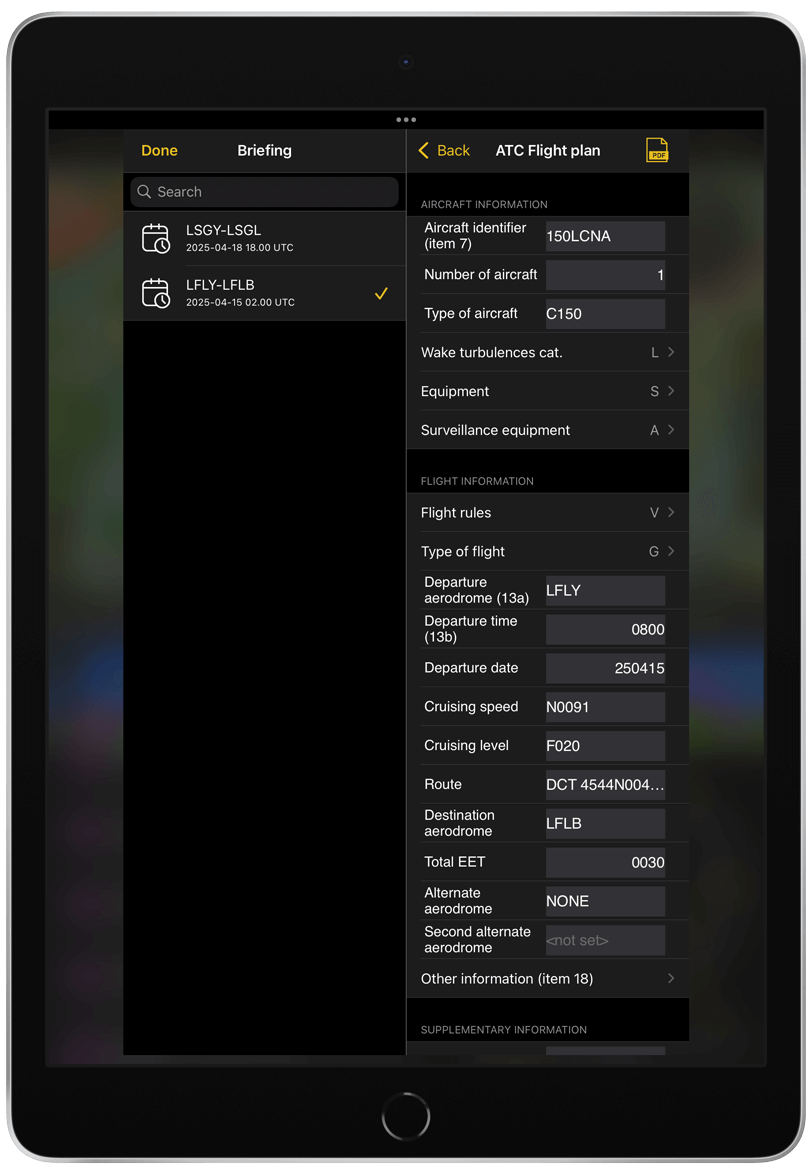
ATC Flight Plan#
Fill, generate, and optionally send ATC flight plan.
Submitting an ATC flight plan to ATC consumes one credit that you can acquire as part of our subscription plans. Without credit, it is still possible to fill and print the flight plan.
Steps:
Load/Create route on the map
Go to Tablet Menu Bar → Flight (Flight Parameters on Phones) → Briefing → ATC Flight plan
When the ATC Flight Plan opens, a pre-fill prompt is displayed. Choose whether to pre-fill the form with available route and aircraft data or continue with the existing input.
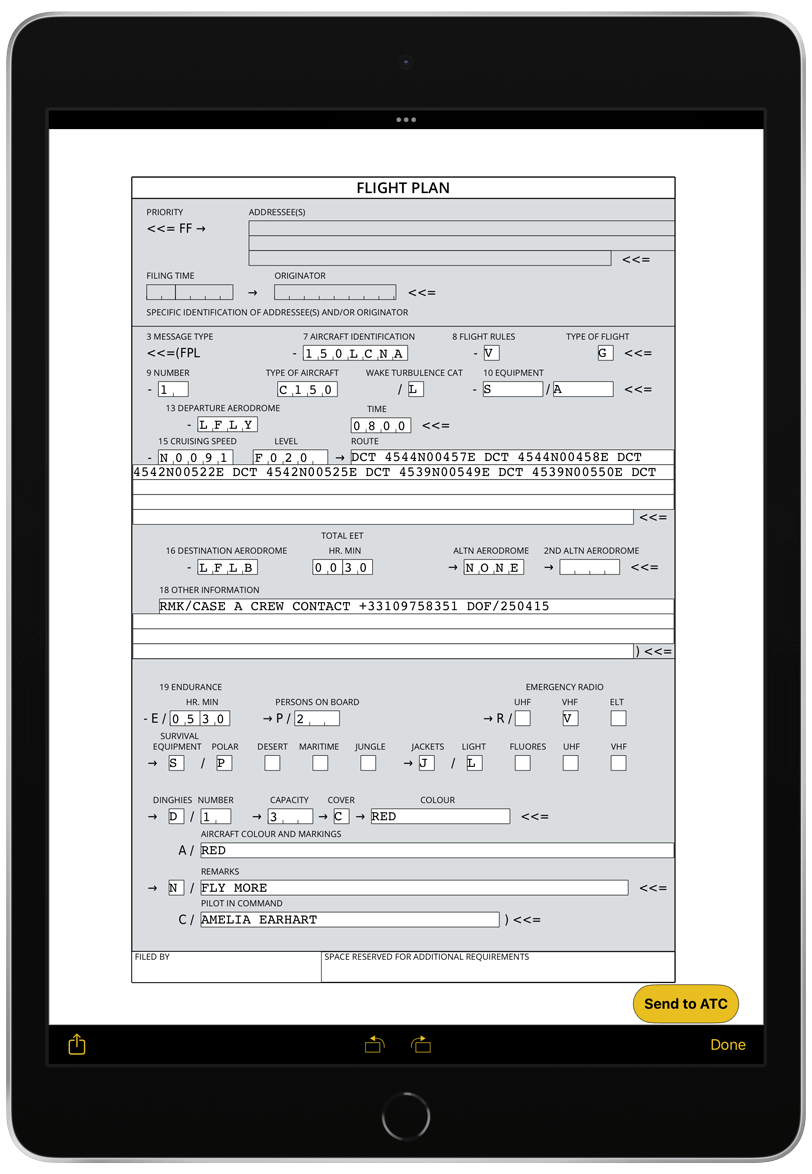
Fill in or review all required flight plan information.
Tap the
icon to generate the flight plan document. Note: An error message will appear if the entered data is invalid. Choose to continue generating the PDF or return to the editor to correct the issues.Tap the
icon to share the PDF. Note: Share and print options may vary on the device and the PDF viewer in use. Choose to continue generating the PDF or return to the editor to correct the issues.Tap Send to ATC to submit the flight plan.
Note
When the flight plan is successfully sent, the Send to ATC button will be replaced with Delivered.

Post-flight#
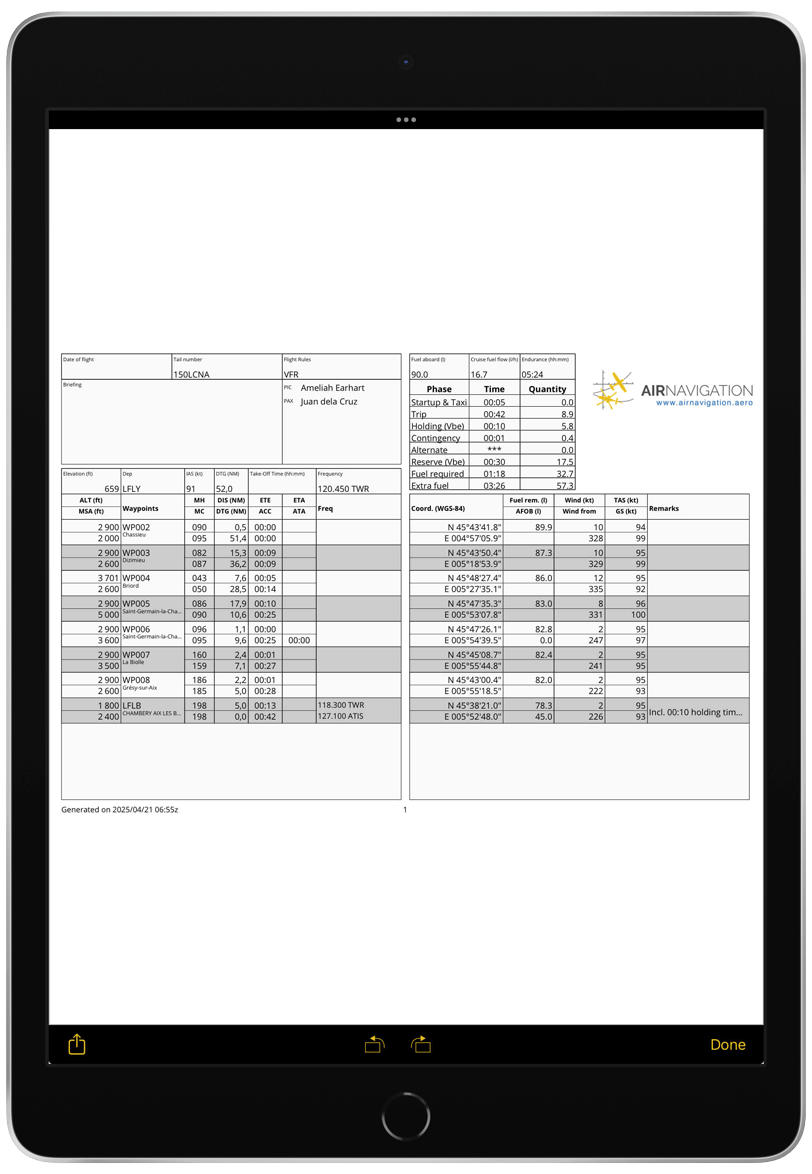
Post Navigation Log#
Post navigation log allows user to record the actual fuel on a specific location. After the flight and saved in the Logbook, the post navigation log will be automatically generated as PDF
Note
The Navigation log is required to be able to create the Post navigation log.
Set actual fuel and generate post navigation log PDF
Load/Create route on the map.
Go to Tablet Menu Bar → Flight (Flight Parameters on Phones) → Briefing
In the Navigation log provide the required fields and generate PDF.
Start your flight
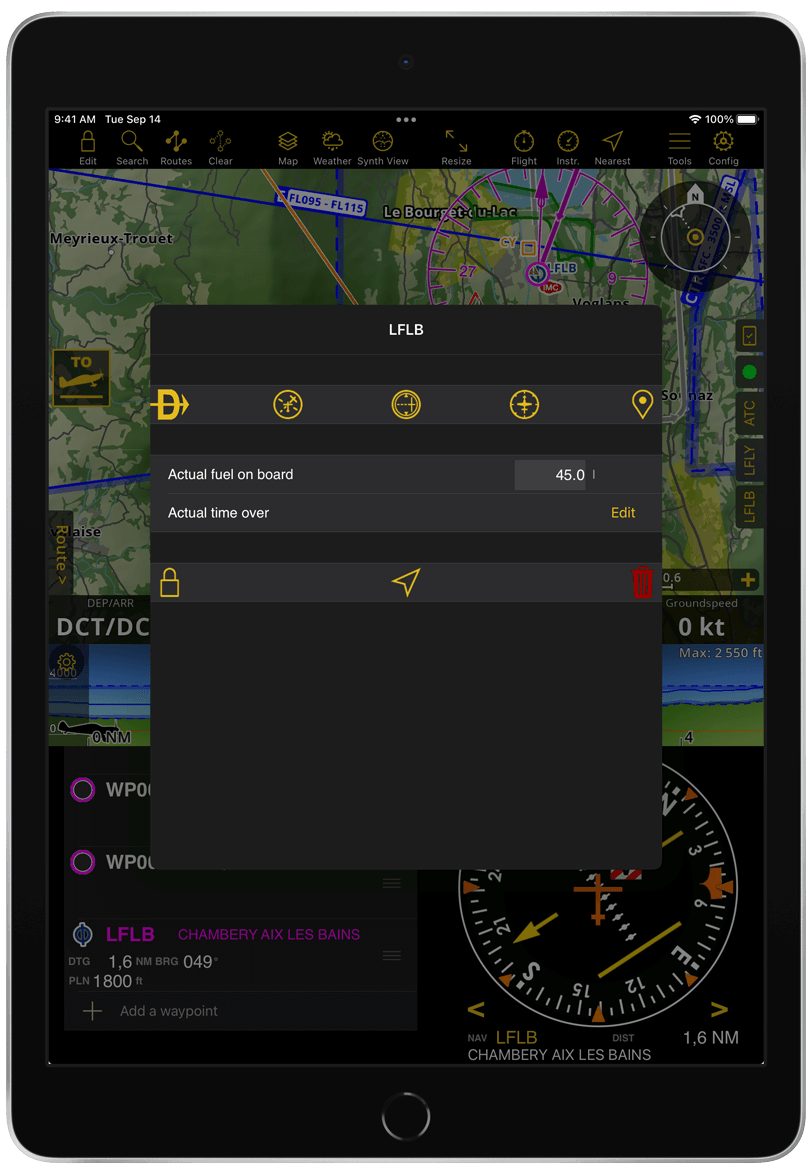
During the flight, go to the Navigation Dashboard.
Tap the waypoint at your location Waypoint Pop-up Window.
Set your actual fuel on board.
After the flight, go to Tablet Menu Bar → Flight → Briefing → Post navigation log.
Click the
icon to share or print the PDF. Share and print options may vary on Windows device and the PDF viewer in use.
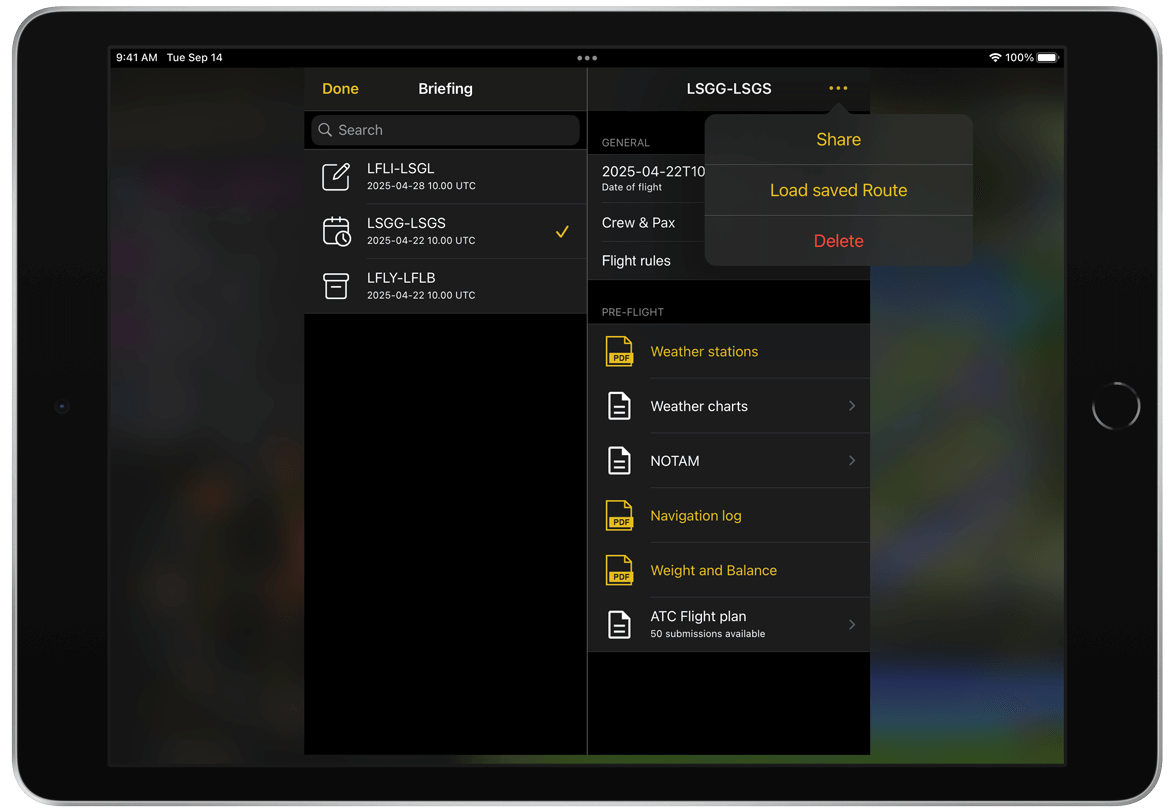
Manage Briefing#
You can manage your Briefing by tapping the ![]() icon to easily organize and control your flight briefings. From here, you can:
icon to easily organize and control your flight briefings. From here, you can:
Share: Merged or individual PDFs + GPX route file.
Load Saved Route: Load route and generate new draft briefing.
Delete: Remove outdated or unwanted briefings.